fbpx

Build it Your Way

Getting started - the parts

By Scott Smith

Having been in the shooting and training business as well shooting IPSC and IDPA for the last ten years I have been fortunate enough to shoot or own a number of firearms from many noted pistol plumbers. My stable of 1911s include work from Novak’s, Wilson Combat, Springfield Custom Shop, and Gunsite’s Gunsmithy. I have had the pleasure to shoot custom blasters from Heinie, John Yanek, Les Baer, Cylinder & Slide, and Action Works for extended sessions and many others for the dreaded chrono at IPSC matches.

Yes, the custom 1911’s I have were built for me, but its tough to get exactly what you want. Every shop has preferences for parts so instead of waiting or paying more I took what was available. If I was willing to wait or fork over more cash, I could have had everything my way, but lets face it–certain things from the factory are good so why replace it.

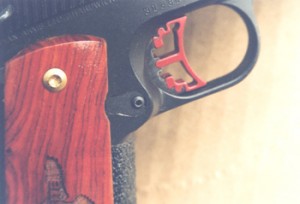
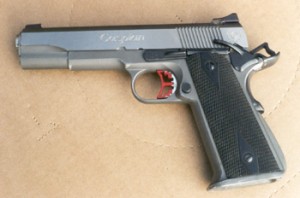
SVI Trigger Installed

The more I thought about it, the more I realized I really wanted a 1911 built my way for me. Instead of waiting upwards of a year and paying in excess of two grand, why not build it myself? Since the Army spent vast sums of money sending me to the Special Forces Q Course for light weapons and having been raised on the 1911, I felt I had the knowledge; besides I have a Dremel tool.

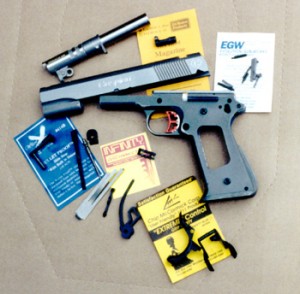
So the task at hand was to determine what I actually wanted in a 1911. Lets see, a good ambi safety, a posi-grip; grip safety, tough parts that take abuse; the slide stop, the firing pin stop, the firing pin, tactical mag release and hex head locking screw, excellent tritium sights, an excellent barrel for those sub-MOA shots at two feet, and for those blazing sub-2 second splits; a good trigger, quality internal parts, and lastly a solid steel frame and slide with a matte black finish. So who makes all these parts, in order: Chip McCormick, Wilson Combat, AFTEC, Ed Brown, Heinie, Nowlin Mfg, SVI, EGW, Caspian, and Brownells. Coincedently all the parts are available from Brownell’s.

Assembled and waiting for a finish

After a few calls and mailing ffls to round up the parts, it was time to wait for everything to arrive. Over a few weeks all the parts showed up, save for the major one, the frame and slide; really helps to hold the other parts. A quick call to Caspian had them on the way, filing error. In two days time everything was here all at once, now what?

After a quick study, fitting frame to slide seemed like a good place to start. This was accomplished fairly quickly with a few good metal files found at a local hardware store, and some fine and medium grit emery cloth for final sanding. The slide to frame fitting took about two hours and I did not want to over cut the rails and have paper weights; if not for the excellent work from Caspian it could have taken longer.

After that off to the races. Before putting all the other parts together, all sharp edges had to be removed from the slide, frame and small parts. Trust me a sharp edge on a thumb safety, or slide stop can make for a long week at Gunsite. Short work was made of this with the handy Dremel and an assortment of grinding and polishing wheels.

Pistol finished with Brownell's GunKote

From there on out it was like putting a model together. All parts fit as advertised, especially the easy fit barrel from Nowlins. All it required was a little polishing of the rear of the hood and polishing the feed ramp of the frame. The SVI Tri-Glide trigger parts(trigger, leaf spring and disconnector) dropped in. All of EGWs pins mated up like they should and the ejector had plenty of material to allow for fitting/tuning to personal choice. As in many cases the Ed Brown magazine release needed minor fitting, as did the Heinie Straight 8 Slant Pro sights. Wilsons “Bullet Proof” slide stop needed a little polishing to allow for smooth interface with link, but the firing pin stop and extractor dropped right in.

The Wilson BP extractor would have been great but this is a racy 1911, so I wanted one of those nifty AFTEC extractors. All the top shooters say they are the only way to fly. So why discuss just the extractor, because care needs to be taken when putting it together and in. The AFTEC is 4 parts; 2 springs (for constant tension), a cap, and the extractor. After reading the enclosed instructions, if you are uncertain how to get this beast in, call AFTEC, it can make life easier.

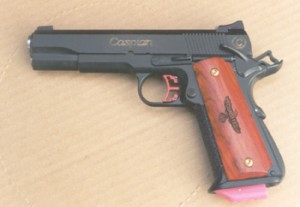
At last it was time to finish the 1911. Since I didn’t want to wait to ship it to and from for finishing, Brownells latest finish in a can–GunKote was the answer. This is an oven cured, teflon/moly baking laquer-(molybdenum disulfide). It goes on easily and evenly and provides a durable self-lubricating finish done at home. WARNING, before doing this check with significant other as it has an odor; and neither Brownells or I will be responsible for your losing your happy home for failure to follow this warning. About two hours after application and baking, what emerged from my oven was a black 1911 and it looked cool.

So how does this 1911 of many parts and manufacturers shoot, excellent. It was tough the first time out to the range; some more polishing of the feed ramp and light polishing of the rails was required. After that this 1911 has been a tack driver and runs smoothly.

In the accuracy department thanks to the Heinie sights and Nowlin barrel, it can’t be beat. As seen in the photo, that is an eight round group at twenty yards offhand, less than 1 3/4″. If better accuracy is required to play IPSC or IDPA I haven’t seen it.

To build your own 1911 start with Brownells they can be your one stop source for all the parts you need. Check out the web pages for the folks at www.brownells.com, www.nowlin.com, www.sviguns.com, www.heinie.com, www.chipmccormickcorp.com, www.wilsoncombat.com, www.edbrown.com, and AFTEC at770-506-0849, and Caspian at 802- 472-6454. You can have it your way with time and patience.

If you have additional questions, Scott Smith can be reached at [email protected]

Use of the .45 Auto Sear Jig

For the Colt Model 1911 type pistols by Les Bengston


Related tooling (available from Brownell’s, Inc.):

  • Norton Fine India Stone (SN 657-246-246)
  • Norton Hard Arkansas Stone (SN 657-300-650)
  • Brownell’s Trigger Adjustment Pins .45 Auto (SN 080-622-001)
  • Trigger Pull Scale (SN 747-094-500 or 747-873-070)
  • The Colt .45 Automatic-A Shop Manual (SN 924-200-045)
  • Hallock’s .45 Auto Handbook (SN 600-001-045)

Using the sear jig:

  1. Detail strip the frame and clean all parts thoroughly. Inspect all parts to ensure they are in good, unaltered condition. Parts that have been previously altered should be replaced with new factory or aftermarket parts.
  2. Use a fine India stone to lightly polish the hammer hooks. This can be done by placing the stone on a flat surface and holding the hammer hooks against it. Only a few strokes are necessary. Then mount the hammer in your bench vise with the area under the hammer hooks parallel to the top of the vise. Use a feeler gage to measure the height of the hooks. Opinions on the proper height of the hooks on a tuned hammer range from .018″ for bullseye competition guns to .026″ on duty guns. I use .024″ for duty/self defense/hunting/IPSC Limited guns. FOR COMPETITION USE ONLY you can reduce the hooks to .020″. To reduce the hook height, use the appropriate feeler gage leaf placed flat on the flat area below the hammer hooks. Then use you fine India stone to reduce he hammer hooks until the stone is just contacting the feeler gage.
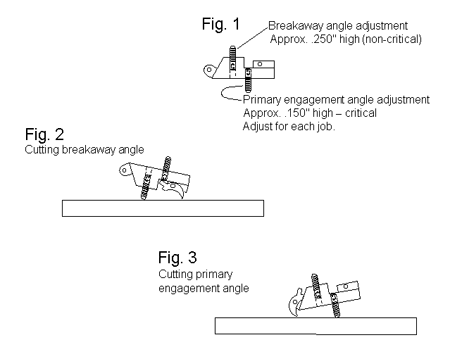
  3. Install the sear on the sear jig using the position to cut the “de-creep” or “break away” angle, using the pistol’s sear pin to hold the sear on the jig. Opinion varies as to whether the depth of this cut should be 1/3 to 1/2 of the sear engagement area. I use the 1/3 figure on duty pistols and the 1/2 figure for competition only pistols. (The exact angle of the break away cut is not particularly important. Approximately 45 degrees is generally used.) Remove the sear from the jig and put Dykem or cold blue on the primary engagement surface.
  4. Install the sear on the jig using the position to cut the primary engagement angle, using the pistol’s sear pin to hold the sear on the jig. Hold the sear against the jig with your index finger. Make several passes against the fine India stone, inspecting carefully to ensure you are cutting with equal pressure on both sides of the sear engagement. Only remove a minimum of metal. Then remove the sear from the jig and clean it.
  5. Install the Brownell’s Trigger Adjustment Pins in the frame and put the hammer and sear on them. Inspect the hammer/sear engagement. The sear should be flat against the full cock notches of the hammer. If not, adjust the sear jig to cut the correct angle. If the front of the sear needs to be lowered, extend the jig screw. If the rear of the sear needs to be lowered, retract the jig screw. NOTE: Production tolerances vary between manufacturers. Tolerances also mean that exact angles required can vary from gun to gun. All sear jigs must be adjusted to each individual pistol to do a safe, effective trigger job. I use a Tasco 30X pocket microscope to examine the engagement angles of the hammer/sear and ensure they are correct.
  6. When the sear angle is correctly mated to the hammer, lightly stone the sides of the sear and the lower rear of the sear where the disconnector bears against it. Then stone the rear of the trigger where the disconnector bears and the rear and front of the disconnector. On the disconnector, also stone the flat where the trigger spring (three-leaf spring) bears. The top of the disconnector can be lightly polished where the slide rides on it.
  7. Clean all parts thoroughly, including the frame. Install the trigger in the frame and ensure that it moves freely. If not, the frame will have to have its trigger recesses polished lightly. When the trigger moves freely, lubricate it lightly and install the trigger and magazine catch. Install the sear, disconnector, trigger spring, hammer and mainspring housing. Check the trigger pull for crispness. Do not let the hammer fall fully to strike the frame. Use your thumb to catch it as it falls, but be careful not to catch your thumb between the ejector and hammer. It hurts and bleeding on a clients pistol is the mark of the non-professional. If the trigger pull is crisp, go on to step 8. If the trigger pull is not crisp, attempt to ascertain why. Disconnector click and engagement angles are both possibilities. Correcting the problem may be time consuming. Trigger jobs on .45s run less then an hour when all goes right to more than four hours when there are problems. I have never found an experienced professional who could determine exactly how long it will take on any particular pistol.
  8. When the trigger pull is crisp, install the upper assembly on the frame and put the front of the slide into the shop vise, using tape, leather or paper to ensure the vise jaws will not mark it. Then use your trigger pull scale to weigh the pull. If it is satisfactory, go on to step 9. If not, you will have to adjust the trigger spring to lower or raise the weight of pull. Disassemble the pistol, removing the upper assembly, the mainspring housing and trigger spring. Bend the left and center leafs of the spring towards the rear to lower the weight of pull and forwards to increase it. Hallock’s .45 Handbook contains a good illustration of the properly adjusted trigger spring which can be used as a starting point. Each pistol is different and will require slightly different spring configurations. When the springs have been bent, re-install the trigger spring and mainspring housing. Then check to ensure that the disconnector is held up to its full height. By pushing down on the top of the disconnector, you can ensure that it has proper tension. Re- install the upper assembly and again weigh the trigger pull. This is a trial and error process.
  9. When the trigger pull is correct, re-install the grip safety and thumb safety and check proper operation. Ensure that the trigger is not rubbing against the arm of the grip safety and altering the trigger pull. Then put the thumb safety in the on (up) position and try to pull the trigger while the grip safety is depressed. You should feel no trigger movement after the rear of the trigger and disconnector contact the sear. Then release the trigger, put your thumb between the rear of the slide and the front of the hammer and push the thumb safety to the off (lower) position. If you felt movement or the hammer dropped, you will have to adjust the thumb safety. This is done by lightly peening the engagement surface where the sear connects it. After peening, re-assemble and test again.
  10. After the trigger job, the pistol must be test fired. Start by loading a dummy round and a live round into the magazine. Chamber the live round, keeping the pistol pointed down range. Fire. The dummy round should have been chambered and the hammer remain at full cock. If the hammer remained at full cock, load a magazine with two live rounds and fire both. If no problems are encountered, load three rounds and fire. Then load a full magazine and fire it. I recommend that a full box of ammunition be fired through the pistol after a trigger job. REMEMBER, AN IMPROPERLY DONE TRIGGER JOB CAN RESULT IN UNCONTROLLABLE, FULL-AUTO FIRE. TAKE THE TIME TO ENSURE THAT THE JOB HAS BEEN DONE PROPERLY BEFORE RETURNING THE PISTOL TO A CLIENT.
  11. Weight of trigger pull is a subject of much discussion. Clients will often request very light trigger pulls. I will not put a trigger pull of less then 4 pounds on a duty/self defense pistol. With less experienced shooters a 4 1/2 pound pull is better and as high as 5 pounds is acceptable.
  12. FOR COMPETITION ONLY. When a client requests a lighter than 4 pound trigger pull, it should be on a competition only pistol. You should start with a competition grade after market hammer, sear, sear spring and trigger. The hammer hooks may be cut to .020.” The sear may have the break away angle take up to 1/2 of the top sear surface. An Ed Brown trigger spring (with the longer disconnector leaf) should be installed. All parts, including the trigger recess in the frame, should be well polished. In this manner, a light, crisp trigger pull may be obtained. While a trigger pull as light as 2 1/2 pounds may be had, I do not recommend going below 3 1/2 pounds except on pistols for experienced competitors. Any time you do a competition trigger job, the build sheet/work invoice should be clearly labeled, “FOR COMPETITION USE ONLY”

GENERAL NOTES:

On tuned triggers, the hammer can be jarred off full cock by dropping the slide with the slide stop due to trigger surge. (The inertia of the trigger allows it to travel backwards and bump the disconnector and sear slightly.) This is more apparent on very light trigger pulls. Various methods are used to control this problem, including holding the hammer back with the thumb while dropping the slide, holding the trigger to the rear while dropping the slide and cycling the slide with the non shooting hand rather than releasing the slide stop. The weight of the recoil spring being used will influence how hard the slide goes forward, with a heavier spring increasing the likelihood of trigger surge. You should make your client aware of this and discuss proper gun handling with him or her.

WARNING:

This sear jig is designed to be used by trained, qualified gunsmiths. Neither L. Bengtson Arms Company nor retailers of its products assume any liability for its incorrect use or damages resulting from such use.


.45 Auto Sear Jig
.45 Auto Sear Jig


L. Bengtson Arms Company
Mesa, Arizona
(480) 981-6375
[email protected]

AAS in GUNSMITHING
CERTIFIED POLICE ARMORER
CERTIFIED GUNSMITHING INSTRUCTOR

Copyright © 1999 by L. Bengtson Arms Co.

Autoloader Actions

There are four types of actions around which semi-auto pistols are built. It’s important to understand the differences:

Single Action – 1911 Colt .45 ACP, Browning Hi-Power 9mm, CZ-75B SA
This is the oldest autoloader design still in service, designed by John Browning (with the help of the Army Ordnance Board) during the period between 1905 and 1911. The hammer must be cocked, generally by racking the slide, for the gun to fire. This design in 1911 .45 ACP is favored by competitive shooters, FBI SWAT, LPD SWAT, FBI Hostage Rescue Team, and many special forces units because it has the best trigger and outstanding accuracy. For the gun to be carried in a state of readiness, the hammer must be cocked and the manual safety applied, “cocked and locked” (see “The Conditions of Readiness“). This looks scary and is not recommended for novices or those suffering from attention deficit disorder.

Double Action/Single Action – Beretta 92F (Armed Forces M9), most Smith & Wesson autos, Walthers, Walther P99, and some Rugers.
This has been the standard design for most autos for the last 50 years. These pistols are cocked by the first trigger pull, but subsequent shots are cocked by the action of the slide cycling back. Consequently, the first trigger pull is long and harder (Double Action) since it is also cocking the hammer. Subsequent trigger pulls are easy (Single Action) since the hammer is already cocked. These guns have an external safety lever which puts the gun on safe and de-cocks the hammer. This is generally thought to be the safest design since the long, heavy first trigger pull and the external safety which blocks the firing pin tend to prevent the gun from going off by accident. The criticism of this design is that it forces the shooter to learn two different trigger pulls and accuracy often suffers on the first double action shot. Most accidental discharges with these sorts of pistols are the result of the shooter forgetting to decock the hammer.

Double Action/Single Action with De-Cocker Only – Ruger and SIG
This is a variant of the DA/SA which is used by Ruger, SIG and some others. It functions just like a DA/SA except the “safety” lever is not a safety. It only de-cocks the hammer, but the gun will still fire when the de-cocker is applied. I personally do not like this design since the de-cocker looks just like a safety lever but does not put the gun on safe.

Double Action Only – Glock, some Smith & Wessons, some Berettas, some Rugers, Kahr, Kel-Tec,.
This is the newest action design made popular by Glock. With these pistols every trigger pull is the same and they have no external safety or decocking levers. The hammers are not cocked by the cycling of the slide, except for the Glocks which are pre-cocked by the slide, and are not true double action. DAO pistols depend on the long double action trigger pull to prevent accidental discharges. In a sense these are autoloaders which fire like revolvers. Triggers vary from model to model. Some, like the Glocks, have very light triggers. Other DAO triggers can get quite heavy and long, and can be very upleasant to shoot. The advantage of this action is its simplicity and the fact that every trigger pull is the same.

Why Carry a Revolver?

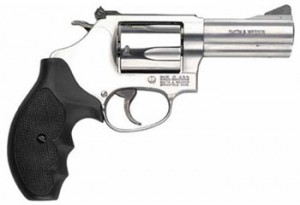
Smith & Wesson Model 60

I used to carry semi-auto’s extensively, and revolvers only for use as BUG’s, but this has changed in recent years.

Firstly, in training disabled or handicapped shooters, I’ve noticed that many of them simply can’t handle a pistol properly. Their limited upper body and/or arm strength makes “limp-wristing” a fact of life. Now, in a combat situation, one is very likely indeed to be shooting from the ground, having been knocked down; or with one hand, using the other to fend off an attacker at close range; or after being shot or stabbed oneself, and having to shoot with that impairment. Given these circumstances, the chances of “limp-wristing” a pistol are very real. It’s a problem that simply doesn’t arise with a revolver.

Secondly, pistols are notoriously ammo-sensitive. There are some (e.g. Glock, SIG, etc.) that feed almost anything with monotonous reliability: but others (including the fabled 1911) need a certain type of bullet to feed reliably. All of them need a certain amount of power to cycle reliably. All of them, to a greater or lesser extent, rely on lubrication and a lack of dirt in the action to work properly. A revolver is less susceptible to these problems: it will feed anything, anytime; it will fire irrespective of the power level of the bullet; and it will shoot at least a few rounds even if bone dry and covered with dust and dirt.

Third, simplicity of action is of major importance. One’s fine motor skills tend to degrade significantly in a high-stress environment. One needs no fine motor skills at all to fire a revolver, but several of them to use the average pistol, what with safeties, slide stops, etc. Also, in certain situations (e.g. with the muzzle pushed into the torso of one’s attacker, or the gun grasped by one’s assailant) a pistol slide can be pushed “out of battery”, meaning that the gun will not fire and/or will not cycle the action if fired. A revolver suffers rather less from this handicap (although if the cylinder is grasped, it can be prevented from turning, so a revolver isn’t altogether immune).

Fourthly, a well-tuned and well-set-up revolver will rival most autopistols in accuracy and ease of use. A good action job makes the double-action trigger pull a joy to use. A moonclip conversion means that speed of reloading is almost identical to most autopistols, and a speedloader is not too far behind. A decent set of sights are OK, but the fixed sights on something like a S&W Model 13 or 65 are just fine for most combat distances (I can get a decent group with them at up to 50 yards), and they won’t get knocked out of alignment by being dropped.

So, the revolver scores high on simplicity, reliability, etc. I’m finding myself carrying a revolver more often than a pistol these days – and I’ve been in more shooting encounters than I care to remember (18 years in a civil war situation will do that to you). I feel very confident in my ability to handle a revolver at least as accurately as a pistol, and the 5- or 6-round capacity will enable me to deal with up to 2 or 3 attackers before I need to worry about reloading. Also, on my snubbies for pocket or backup carry, I’ve fitted Crimson Trace laser grips, which give an instant sight picture even if I can’t use the sights! Very useful accessory, that…

Works for me!

— Preacherman on The High Road
http://www.thehighroad.org

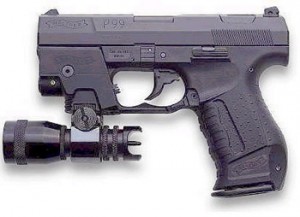
Walther P99: The Glock Alternative

Walther P99
Walther P99

By Stuart Clark, Director KC

There is no denying that Glock pistols dominate the polymer pistol market in the U.S.

The company offers its legions of loyal customers a variety of reliable compact and service size handguns in popular calibers such as the 9mm Parabellum, 40 S&W, and 45ACP. However, I am one of those few people who don’t like Glocks for one simple reason: they do not fit my hand well. They ride too low in the hand, and the back straps contact the palm of my hand in such a way that it does not make for a comfortable grip, and the muzzle tends to point skyward when bringing the gun on target. This requires me to slightly drop my wrist to align the sights. From what I have read and heard, this is not an uncommon problem for people like me who are accustomed to the grip angle of the Model 1911 series of pistols.

However, I found a high quality German-made alternative to the Glock that is every bit as well made and reliable, plus incorporates a number of features not found on the Austrian handguns. The Walther P99 is a striker-fired pistol with a Tennifer finish and comes with three interchangeable back straps that allow the shooter to custom fit the weapon to his or her hand for maximum comfort. The first time I held the P99, I immediately was impressed with its comfortable grip and balance. It felt natural in my hand and it pointed well. It has safety features such as a loaded chamber and cocking indicator and a flush mounted de-cocker button in the top of the slide (of course the most important safety feature rests between one’s ears), ambidextrous magazine release, light rail, four interchangeable front sights, 2-10 round magazines and a unique double/single action trigger capability. The DA mode is a little long and creeping but not displeasing to me. A feature I like is the ability to change from the DA trigger mode to SA by simply pulling the slide rearward about 3/8 of an inch and it sets the trigger for a light SA trigger pull. The weapon can be safely carried in this single action mode as well.

I have found my particular pistol, which is chambered for 9mm, to be very reliable and accurate. I have fired over 500 rounds consisting of 125 gr. lead RN reloads, 115gr and 124gr FMJ, and a variety of standard pressure hollow-point ammo in 115, 124, and 135 weights without a single stoppage. I have yet to try any of the +P loads but have no doubt the P99 would handle them without difficulty. Though I have never been a great fan of the 9mm, it is easy to shoot and ammunition is inexpensive and plentiful. This permits more practice, which translates into increased proficiency. Should Walther ever decide to produce the P99 in 45ACP, I would definitely procure one. For a weapon that is classified as service size, it is relatively compact and conceals quite easily.

So if Glock pistols don’t appeal to you, seriously consider the P99. If you want more power than the 9mm, the P99 is also chambered for 40 S&W. It is an excellent handgun that has not been aggressively marketed in this country. However Smith &Wesson and Walther are jointly manufacturing the SW99 that has all the same features as the P99 but with some minor cosmetic changes. I presume this version will be marketed by S&W with more zeal than Walther has done with the P99. If you wish to check out the P99, visit the Walther website at www.waltheramerica.com. It is a fine handgun worthy of the attention of those seeking a top notch defensive weapon.

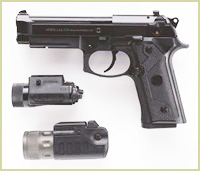
The Beretta Vertec: A double action auto that single action fans can get their hands around.

Beretta Vertec
Beretta Vertec

By J.D. Charles

Having carried the 1911 as my primary self defense auto for some years now, my hand has become accustomed to the flat mainspring housing and narrow grip. I also appreciate the concealability of this set up. For many years, I was a dedicated wheel gunner, but while working in industrial security the advantages of the semi-auto became more apparent – flatter, more compact, withstands abuse that will knock the frame and crane out of alignment even on the best of wheel guns. My first carry semi-auto was the Beretta 92. I liked the accuracy and reliability of the gun, which could rival a good long barreled wheel gun for accuracy and seemed to be every bit as reliable. However, the Beretta was a wide load and I soon replaced it with a Smith and Wesson 645. The big Smith equaled the Beretta for reliability but it was about as accurate as a hand grenade and heavy as the anchor for the Queen Elizabeth II.

I dabbled with the Glock for awhile for the sheer joy of not worrying about things like corrosion of finish or dings from use, as to me the Glock is not a handgun; it is a tool. Rugged and reliable and adequately accurate, the Teutonic Tactical Tupperware never felt good in my hand and I never much cared for the lack of thumb safety.

Finally, good quality 1911’s with rust resistant finishes became affordable about that time, and I switched to the 1911 a gun that looked good, shot good and felt good. My Springfield, Kimber and 1991 A-1 pistols all offered accuracy in the Beretta Ball Park, were as hard hitting as the big 645 (but felt about five pounds lighter) and were even more concealable thanks to the slim slides and grips. I was a happy camper indeed. Soon, I found myself content with the 1911 for street carry and the Beretta for home defense.

Still, as a born and bred wheel gunner, I often missed that double action capability. When the new Para Ordnance’s with DA first shot hit the shelves, I felt that perhaps this would be my own personal holy grail of auto pistols.

Having handled the Para Ordnance, there was just something about the trigger linkages that for me at least, did not feel quite right. The old Colt Double Eagle not only had a better “feel” but actually seemed less cobbled together in my grasp. The P-O does have a good light trigger pull, but it just did not really impart any feelings in my breast but disappointment. Why? Just my own subjective feelings, I reckon, as I haven’t heard anything bad about the P-O designs, which is a rarity in brand new gun designs. However, a new version of a time-proven gun is now out on the market that has the “right” feel and is one that I am familiar with and comfortable with. A few days ago, I stopped in at my favorite gun shop to look around for good buys on traded-in wheel guns. Usually around Christmas time the locals tend to upgrade their ordnance and I figured there had to be some nice buys on classic revolvers that were opted off in trade on the latest high-tec tactical tupperware. While scoping out a nice Ruger Security Six with a three inch barrel, I noticed an odd looking gun that looked like a cross between an H&K USP and the Beretta 92. I asked the pistol purveyor for a closer gander…

I don’t know why Beretta calls their new tactical operator’s pistol the Vertec. Probably stands for Vertical rails and Technical accessory or some such. To me, the name Vertec sounds similar in vowels and consonants to the historical name Vercingetorix. The Celtic warrior who stood up to the might of the Roman empire and Julius Caesar himself. Back then, the Gauls inhabited large portions of Europe including what is now Belgium, France and parts of the Rhineland. Maybe fanciful thinking for a history buff, I suppose. For me, the appellation is appropriate as when it comes to military side arms their was some exchange of culture back then between the Celts (known as Gauls back then) and the Romans. The gladius short sword itself may have been a Celtic design adopted by the Romans. The Spathan infantry sword most definitely seems to have been. Caesar wrote of the terrible long slashing swords of the Gauls in his campaigns. Today that cross exchange of cultures continues with the Beretta pistols. The original Beretta 92 itself featured several ideas borrowed from other cultures. The trigger linkage and tilting under-barrel lock were from the Walther P-38 from the Rhineland and the high capacity magazine was borrowed from the Belgian Browning.

The new Beretta Vertec pistol features a beefed up dust cover with grooves for tactical light and laser accessories, but it also features a grip configuration that feels and even looks very similar to a 1911 pistol with the straight back strap. The gun has a newly configured trigger that has to be pulled almost to the rear of the trigger guard area before the trigger releases, making it, in single action, very much like a 1911 trigger! Other features of the new gun included the best high viz sights I have ever encountered on the M9 breed and a flattened off slide top (well, what part of the slide is not machined away). The barrel is blackened stainless steel, and with the aluminum frame that means the only rust problems would be the slide itself and the small parts.

Needless to say, I had to have it. Returning to the old homestead I looked around for some trade goods and settled on my old Glock 17 and some custom knives that a friend had his eye on for a long time….

In some way,s this impulse buy made more sense than even my raging hormones realized. I suppose I should have waited for the .40 version in full stainless finish to come out, but then again, I already had a 92F at home with plenty of high capacity magazines and holsters. That meant that the only new gear would be required would be leather holsters as I found out, some of my nylon rigs fit the new Vertec pistol well enough.

Upon taking my purchase out to the range I noticed other features that were not quite as apparent, especially with a 1988 vintage Beretta 92F for comparison. The grip frame is deeper towards the trigger guard as well as shaped differently making the new Vertec Beretta pistol much easier to handle and shoot. The gun was very accurate, despite being hampered by an unusual (for Beretta) heavy Double Action trigger pull. My older 92F had a much lighter DP pull but the Vertec equaled it in accuracy. I can only imagine how much better it would be with a good pull….

The single action just felt right for this 1911 shooter. With the handle and new trigger design the gun felt almost identical to a 1911 on the firing range while shooting.

The shorter barrel and slide did not increase the minimal recoil any at all. Even though I am not a tactical light using kind of guy, I like the beefed up dust cover which should ease the mind of those of us who worry about things like our carry pieces taking a whack in the field and possibly damaging them. For this same reason, I really like Springfield’s new “Operator” 1911 a-1. Most 1911’s are very thin in this area of the frame. If you are a worry wort like I am, these integral frame dust covers will ease your mind. The gun fired everything without a hitch. Part of me was tempted to attempt to make it jam by pouring sand over the barrel or run over it with my truck or some other salesman’s trick, till I came to realize that I never had to defend myself from a sandstorm or jeep. Maybe I started to suffer a little from Glock withdrawal there…

The only complaints I have with the new pistol are (1.) it’s not a .45. (2.) It’s not stainless and (3.) Those damn politically correct 10 round Clinton clips are a bitch to load. Thank the gods I stocked up on high capacity clips before the Clinton administration. All in all the new Beretta Vertec pistol is a proven double action design that has a traditional single action feel in the hand. For a nine, it is built like a bank vault. In .40 caliber it would be good substitute to the traditional .45 for other 1911 pistoleros who find themselves wanting (or being required by departmental regulations) to carry a DA piece.

Up Close and Personal – Final Conclusions and Recommendations

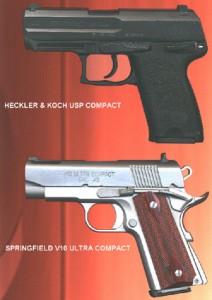
HK and Springfield Pistols

Part 9: Final Conclusions and Recommendations
© 2000 by John L. Marshall

All of these pistols are excellent designs and are made by reputable, established manufacturers. Each has its strong points and weak points for the concealed-carry permit holder. Each offers power, light weight and reliability. You would be well armed with any of the four. Here would be my take on the best use for each:

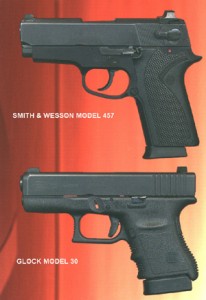
Glock 30. This is a compact, high-firepower, reliable pistol that is just a bit blocky for easy concealed carry in a holster beneath clothing. I think it would be at its best stuffed into one of those belt holsters that looks like a small camera case. Few would believe that you could pack a 10-shot .45 in there. It would be great in a fanny pack, too. Thus put up, it could be worn in plain view with no one the wiser. Pre-ban Glock 21 hi-cap magazines can be used for reserve ammo.

H&K USP Compact. An excellent and reliable design that could be quick into action in any mode you want. It is concealable, but not nearly so much as the Smith & Wesson or Springfield offerings. I think it would be a good “executive planner” gun that would be unobtrusive in such camouflage and yet quick to deploy. It’s marginally suitable for belt carry under clothing – if carried in this mode, use the flat base plate magazine.

Glock and S&W Pistols

Springfield V10 Ultra Compact. A nearly ideal concealment pistol that’s quick to get into action. Be sure you’re comfortable with the cocked-and-locked carry mode, though. If you love the 1911 design, this one is a great choice. Best for daylight carry, its compensator could mess up your night vision with its muzzle flash. Fast and accurate repeat shots are ridiculously easy with this baby. Use +P ammo with lighter bullets, because you’re losing some velocity with the short barrel and the 10 ports.

Smith & Wesson 457. Excellent in the under-clothing concealment role. The thin grip makes it the best of the lot for holstered, under-clothing concealment. Not an especially accurate piece or easy to shoot well for quick precision initial and repeat shots, its best mission is for up close and personal. Good, reliable bang for the buck.

And there you have it. Good shooting!

John L. Marshall

Up Close and Personal – Disassembly and Mantenance

Disassembly and Mantenance

Part 8: Disassembly and Mantenance
© 2000 by John L. Marshall

While I will not go into detail on the field stripping of each pistol, I will rank them for ease of disassembly and maintenance, with a few comments.

Number one is easily the Glock. It takes but four seconds to strip the pistol down. Little residue is left inside the pistol when it fires. Lubrication needs are minimal. It can take a lot of abuse and neglect and still keep firing. Its finish is weather-resistant. It’s the standard by which all the others are judged.

Number two is the H&K. Slightly more complex than the Glock to disassemble, it still can be done quickly and easily. The lube points needing attention are few. Like the Glock, it’s “clean shooting,” leaving very little crud inside the pistol to brush out, and its finish is durable and largely rust-free.

Number three is the Springfield. Anyone familiar with the 1911 design can field strip it blindfolded, although it’s more involved than with the Glock or H&K. Lubrication and cleaning needs are more demanding and time-consuming. The pistol can be completely disassembled without tools if need be, a feature the other pistols cannot offer. The stainless and aluminum finishes are easy to maintain.

Number four is the Smith & Wesson. The disassembly and reassembly of this pistol are the most complex and it requires care to do it right. Small levers have to be depressed in order with some sort of tool before the slide can go back on the frame. Lube points are numerous. Some minor parts are almost inaccessible for cleaning. Disassembly and assembly are not really difficult, but there is a learning curve to be achieved first. The drill is the worst of the four.

Previous: Handling and Shooting Impressions | Next: Conclusions and Recommendations

Up Close and Personal – Handling and Shooting Impressions

Part 7: Handling and Shooting Impressions
© 2000 by John L. Marshall

First, let me say that since we are talking about compact .45s whose primary purpose is up-close self-defense, I will not address accuracy or ballistics. Each of these pistols is sufficiently accurate to place all shots into a 5-inch circle at 25 yards from a machine rest. Each will provide sufficient power with the right loads to effectively stop an assailant from doing you harm. In my hands, fired rapidly with the “Mozambique drill” technique of two shots to center mass, plus one to the head area of a silhouette target at seven yards, there was some difference among the pistols, but not a lot. I got the best accuracy in rapid fire with the Springfield, followed, in order, by the Glock, the H&K and the S&W. Since the Springfield is the only compensated pistol of the four and I have years of experience with 1911-style pistols, it is no surprise that I did better with it.

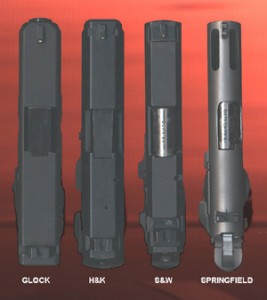
The Springfield V10, particularly since it was partially customized with a carry-bevel job, slimmer grips and a shorter trigger, handled and shot like a dream. It’s no secret that I like 1911 pistols. I have years of experience in handling and shooting them, so it was like shaking hands with an old friend when I fired this one. The pistol comes from the factory with a lot of sharp edges – the nose of the frame and the slide being particularly bad in this regard. Likewise, the slide stop needed some rounding and beveling. This was done on this particular pistol, and the custom work made it smoother handling and easier on drawing and reholstering. Rapid repeat shots with the V10 were a snap, and the compensator vents made it feel even better than a full-size pistol in recoil. The 1911 design and the high-ride beavertail grip safety keep the axis of the bore at about an inch from the top of your hand. This further eases the muzzle up-flip. The high-mounted conventional sights were excellent and provided a quick and sharp sight picture. I will tell you that the muzzle flash from the ports was spectacular in low light, particularly with +P loads and lighter bullets. For this reason, and because night sights will quickly become carboned up from the ports, this is more of a “daylight” gun than an “evening” gun. The pistol ran through its paces with no problems at all. There were zero malfunctions in extended firing. For a fast first shot from “cocked and locked” mode out of the holster, and for fast and accurate repeat shots, this little pistol really shines. The trigger pull was match grade, crisp with no creep, letting off at just under 4 pounds. The aluminum frame makes for light weight, and it’s among the best of the compact 1911 designs for lightness. Of all four pistols, I’d rate the Springfield second in concealability to the Smith & Wesson. Although the maximum width of its grip is the same as the Glock (the worst for concealability), its shape is more ovoid in cross section, and the edges are thinner. Thus, it doesn’t “print” as noticeably as the Glock when carried in a strong-side belt holster under clothing.

The Glock 30 is one helluva little pistol. Its big advantage is in firepower, and it’s the only one of the four to pack the legal maximum 10-round magazine into a compact configuration. Having the big full-size Glock 21 without pre-ban magazines of 13-round capacity seems almost pointless if this pistol is available. By the way, pre-ban high-capacity magazines will fit and function fine in the Glock 30, so back up magazines can be of up to 15-round capacity (with a +2 extension). Of the four pistols tested, the Glock was the most accurate in deliberate fire, and the second most accurate in rapid fire. The design of the pistol, since it doesn’t need room for a pivoting hammer, allows for a very low bore axis. The center of the bore is only .70” from the top of your hand when firing. This means that it recoils in more of a straight line, and the muzzle flip is minimized. The Glock “safe action” trigger takes some getting used to, but if you think of the trigger pull on a Garand or M14, you can visualize it. It’s two-stage, with a light take-up and about a 5.5 lb. let-off. Once you get used to it, it’s workable. Also taking some getting used to is the fact that the pistol has no manually-operated safety. It can be carried safely fully loaded with no danger of discharge in a holster that completely covers the trigger. The only way the gun can fire is with a deliberate pull on the trigger, depressing the built-in safety mounted directly on the trigger. This is characterized by some as “leaving the key to the henhouse with the fox,” but there is no denying the popularity of the concept. The flexibility of the polymer frame, the low bore axis, the two-stage recoil spring arrangement and the width of the grip all combine to minimize apparent recoil. The factory plastic sights should be dispensed with in favor of metal sights with tritium inserts at the first opportunity. This pistol, with the tritium sights, did well in low light. The grip angle of the Glock is more slanted than that of the 1911, so if you are used to a 1911, the gun will come up to your line of sight pointing high. This takes some momentary adjustment until you get used to it, and point shooting is not recommended until you do. The Glock functioned flawlessly through extensive firing with many types of ammo. Reliability is one of the hallmarks of this design. It can be very difficult to load the last couple of rounds into the magazine with your issued magazine-loading tool (your thumb). Glock provides a mag loader as part of its factory package, but it’s not something you’ll carry around a lot. The mags get easier to load with use, thank goodness. The standard slide release is tiny and hard to actuate with the thumb. This particular pistol was equipped with the factory-optional “extended” slide release, which has a little nubbin on it for easier manipulation. It’s better, but not by much. Glock recommends releasing the slide by pulling back on it, and that is the school combat solution, anyway. Technically, the Glock is a “double action only” pistol. However, there is no “repeat strike” capability with the Glock design, as a second pull on the trigger will not load and trip the striker again. You will have to execute the “tap-rack” drill to get it back into action after a bum round. The magazine drops free of its own accord when the mag release button is pressed. For concealed carry, the Glock’s clunky shape, unfortunately, is its undoing. It’s thick, squarish, and not the most ideal for holster carry under a shirt or other outer garment. The best concealment holster I’ve found for this pistol, incidentally, is Glock’s own economical “sporter” model, made of very thin plastic.

If you are used to the controls of a 1911 pistol, the H&K USP Compact should suit you just fine. The safety, slide release, and mag release controls are all where you would expect them to be, and your developed motor skills will apply well to this gun. Just remember to press down on the mag release instead of in. This is easy and natural. Even easier is pressing down on the right-side mag release with your right index finger. Suit yourself. On this pistol, you can apply the safety before you rack the slide to load a round, giving you an extra safety margin not available with 1911-type pistols. In the 1911 design, the hammer must be cocked before the safety can be applied. I mentioned earlier that the bobbed hammer can be cocked, and the safety design allows you to do this with less trepidation than with the S&W, for example. The procedure is to apply the safety, point the pistol in a safe direction, and pull the trigger gently. The hammer will lift and stop at about “1/2 cock” position, and you can then press it the rest of the way back with your thumb. You are now cocked and locked. I’d prefer a hammer with a thumb spur, but this one was designed for concealed carry and snagless draw. Needless to say, this procedure should not be performed under extreme stress lest the sequence above be reversed and a negligent discharge become the result. The pistol can be carried safely with the safety off and the hammer down, ready for a double-action first shot. This is the preferred means of concealed carry. For open holster carry, the hammer should be down and the safety applied to help in case an opponent snatches the gun from the holster. The moment of confusion that could result from the safety being on might work to your advantage should the gun be turned against you. This pistol fits my (average) hand very well, particularly with the finger-rest magazine. It still fits pretty well with the smaller-baseplate magazine, and that’s the one to insert for concealed carry. The H&K USP Compact runs a close third to the Springfield for concealability. The grip area, which is the hardest part of a pistol to conceal under clothing, is nicely shaped and second only to the S&W for thinness. The checkering and stippling molded into the polymer grip give a secure hold. The double-action trigger pull is nothing to write home about, coming in at a somewhat gritty 12 pounds. The single action pull is pretty nice, with about ¼ inch of slack, and then a creep-free let-off of about 4 1/2 pounds. If action were imminent, I’d prepare for it by going to the cocked-and-locked mode. A creepy double-action first shot will not make for accuracy. Recoil is quite manageable. The bore axis is about 1 inch higher than the hand and the muzzle flip is not severe. There were no malfunctions in extended firing. I found that a uniformly strong grip serves to give you better accuracy with this pistol, as it’s more sensitive to varying grip strength than the others. The tritium sights give a good, clear sight picture and work well in reduced light. The decocker available to you by pushing the safety lever all the way down should be used to go from cocked-and-locked to down-and-double action. A flip up on the lever then gives you an extra margin of safety in the double-action mode. The grip fits the hand nicely. This is a nicely-designed, very functional pistol that was obviously intended for the U.S. shooter used to operating a 1911. It gives you features not available on the 1911, but allows you to operate it quite similarly if you wish.

The Smith & Wesson 457 is a study in contrasts. It is easily the most concealable of the four pistols evaluated. The grip is slim and nicely shaped, and it almost disappears under clothing. At the same time, the gun suffers somewhat in the shooting department. The bore axis is about 1.1 inches above the top of the hand. Also, the curve of the grip places the pivot point of the hand somewhat lower than would be ideal. This results in more muzzle flip than with the other pistols. Accuracy, while acceptable, is not its strong suit. I personally dislike the slide-mounted safety-decocker, which does not allow a “cocked and locked” carry. I also am not a fan of pistols having a magazine safety. In my opinion, this is an attempt to make gadgetry substitute for training. To clear any pistol properly, the magazine should be removed first, followed by racking the slide to eject the round in the chamber. This should be written in stone and drilled into every semiauto user’s head. If you only remove the magazine on this gun, you have totally deactivated the pistol. It does make it safe, but it completely prevents you from firing the one remaining round you might have in the chamber. Without a magazine, this pistol is not even as effective as a rock. The magazine safety can be deactivated, but removal of any “safety feature” could get you in trouble if you use the pistol for self-defense and have to justify your actions in court. The double action pull is smooth at 11 pounds. The single-action pull is crisp at about 5 pounds, with about 1/3 of an inch of slack. If your index finger is fleshy, the trigger has the annoying habit of pinching it at let-off unless you use just the tip of your finger to press it. Thumb-cocking the pistol would require squeezing the trigger slightly to lift the hammer to the point where your thumb can get in front of it to pull it all the way back. This is definitely not recommended due the danger of a negligent discharge if you pull the trigger too far. The H&K will allow this procedure, but it has a safety that stops the trigger from pulling all the way through when applied. The S&W is completely reliable, with no malfunctions occurring in extended firing. The matte blue finish on the slide and the black anodizing on the frame are not especially durable as finishes go, and holster wear will take its toll rather quickly. The rock-hard durable finishes on the H&K and Glock pistols, or the stainless-bare aluminum finish of the Springfield are superior. The tritium sights on this pistol, provided by Trijicon™, give a good sight picture, day or night, and the pistol shot close to the point of aim. The dovetailed factory plastic sights are cheesy in my view, and almost demand replacement.

Previous: Frames | Next: Disassembly and Maintenance
Up Close and Personal – Frames

Part 6: Frames
© 2000 by John L. Marshall

The Glock did much to popularize the polymer frame, and this pistol’s frame is one of the breed. Because of the width of the magazine, the Model 30 has a rather “clunky” feel in the hand, which will not suit everyone. In fact, the newer Model 36, with its single-stack magazine, was in part an answer to this problem. The frame features molded-in checkering on the front and rear of the grips and on the front of the squared-off trigger guard. There are finger grooves in front and a vestigial thumb rest on both sides of the grip. The plastic magazine ejection button to the left rear of the trigger protrudes about a tenth of an inch and is rectangular in section. There is a cavity at the heel of the butt, which allows the magazine to be grasped with the thumb more easily should it need to be plucked out. The slide release on this example is the factory-optional extended type, but it’s still pretty small. The locking tabs for disassembly are located above the trigger on each side of the frame. The now-classic “safe action” trigger with its integral finger safety is made of plastic material. The serial number of the pistol is stamped on an in-letted steel plate on the bottom of the frame forward of the trigger guard.

The H&K USP Compact frame is quite similar to that of the Glock, also being made of a composite polymer material. Since the magazine is slimmer, so is the grip area. H&K has succeeded in packing a double action mechanism into a frame that has less depth than the Smith & Wesson offering, so as a result, the bore line is closer to the hand. This aids in controlling recoil. Controls on this pistol are placed in the traditional 1911 pistol locations, with the safety lying under the thumb when held in the right hand. The safety is reversible with an optional factory part for left-handers. In the “up” position, the safety is on safe. When pressed down, the pistol is taken off safe. When forced all the way down, the safety acts as a decocker. This is a neat and handy system. Incidentally, the safety may be applied in any condition of readiness, or even while the slide is being retracted. This is a good feature, and we’ll talk more about the benefits later. The hammer is bobbed, and protrudes only slightly from the back of the slide. The bottom of the frame forward of the trigger guard is grooved for the attachment of a laser, a light, or combination unit. H&K markets a light which will fit either the full-size USP or the Compact. The magazine release is truly ambidextrous, with levers on both sides of the pistol, just in back of the trigger. It’s activated by pressing downward, and is just as handy, if you’re a right-hander, to depress with the index finger of the right hand. If you are used to the 1911 push-in mag release, this takes little re-training. The release is in the same position, and just a slight alteration in thumb angle drops the mag. The trigger is made of a polymer material, but appears to have a metal core. It is of the traditional double action-single action design. The serial number, as with the Glock, is on a metal plate in the frame forward of the trigger guard. H&K offers a variety of firing modes and safety-decocker options for its USP-series pistols, but this one is the most popular configuration.

The Smith & Wesson 457 has an aluminum frame, anodized black. It is of fairly conventional design, deriving from the original 9mm Model 39 introduced nearly a half century ago. I think its nicest characteristic is the slimness of the grip area, only 1” in width, which makes it about as good as you can get for a concealed-carry .45 pistol. My only problem with this frame is its unusual depth, which measures .85” from the bottom of the slide to the top of the trigger cutout area. By contrast, the H&K measures only .52” in this area, and it’s also a DA/SA design. This longer depth does two things. First, it shortens the grip area below the trigger guard, necessitating a magazine with a flared finger rest to get full a purchase on the grip. Secondly, it places the bore axis higher in the hand, resulting in accentuated muzzle flip as the gun is fired. Smith has attempted to partially help this problem with a frame cutout area to the rear of the trigger guard, but it only results in a minor improvement. This pistol has more height than any of the four being examined here. The hammer is completely bobbed, fitting flush with the rear of the slide. While it can be thumb-cocked, it’s a dicey maneuver that is not recommended under stress. The magazine and slide releases are conventionally located, as per the 1911 pistol layout. The black polymer grips are very slim, and wrap around the backstrap of the pistol. The front of the frame terminates with some fairly sharp edges. It would have been simple for S&W to design the frame molds to incorporate a more rounded configuration. Likewise, the leading edge of the slide release is sharply cornered, and needs to be rounded or beveled more for carry purposes.

The Springfield V10 Ultra Compact frame is made of aluminum, left in natural matte finish to roughly match the stainless steel slide. It is of conventional 1911 compact design, and will take all accessories designed for the Colt Officer’s ACP. The grips as it comes from the factory are Hogue finger-groove wraparounds, which have been replaced on this pistol with custom checkered wood substitutions. The grip safety is of the beavertail design, and unusually comfortable in the hand. The thumb safety is extended. The mouth of the magazine well comes already beveled from the factory. The trigger on this pistol was originally of the long, lightweight “3 hole” design, but has been replaced with a Videki short aluminum trigger. The mainspring housing is stainless steel, not plastic, and has a unique wedge shape rather than a more rounded profile. It’s grooved rather than checkered. The forward edge of the frame was sharply cornered as it came from the factory, as was the slide release. A bit of custom work has rounded these areas on our sample pistol. The frame has been cut, of course, for the ramped barrel. This means that the rounds being fed from the magazine do not contact the frame at all, but strike the integral feed ramp of the barrel. Although aluminum frames which utilize a frame feed ramp area are being used by Colt, Kimber and others, the approach taken by Springfield guarantees that there will be no wear and tear in this vital location. The major components of this pistol, by the way, are made in Brazil at F.I. (Fabrica Itajuba), and the pistols are assembled and fitted in the U.S. at the Springfield facility.

Previous: Sights and Slides | Next: Handling and Shooting Impressions