fbpx

Custom M1911A1 Modifications

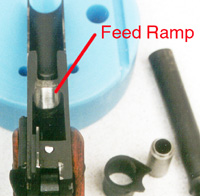
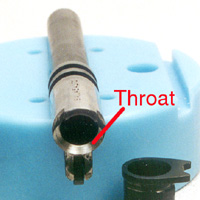
A Pictorial Guide Polished Throat and Feed Ramp – To improve the feeding of hollow point and other flat point ammunition; the original design had a very sharp feed ramp which fed round nosed (full metal jacket or round nosed) ammunition well, but doesn’t feed hollow point bullets so well.  This is a necessity for proper functioning with hollow point defensive ammunition.  See “My Fluff and Buff

Shown is the feed ramp and barrel of the Springfield Mil-Spec


Beveled Magazine Well/Magazine Well Extension – To improve the speed and ease with which magazines are inserted into the well during a reload.

The extended magazine well is nice for competition use, but it makes the gun harder to conceal for carry guns. A beveled magazine well is a good compromise for improved loading without the extra length, but it is not a necessity.
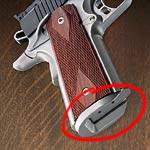
Kimber Super Match with an extended magazine well.


Custom Sights – The original sights of the M1911 and M1911A1 were quite small and did not lend themselves to rapid target acquisition. Custom sights enable to shooter to more quickly get a sight picture.

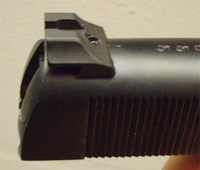
Millet Night Sights
Millet Night Sights
Wilson Snag Free sights installed on an Argentine Sistema slide by Roderus Custom


Lowered/Flared Ejection Port

To improve ejection of the spent casing out of the chamber.

This is a necessity for reliable functioning.
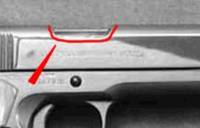
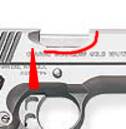
The red outlines the bottom of the standard ejection port on an original 1911A1.
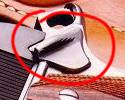
This is a port which has been lowered and flared - note the indentation in the slide behind the ejection port.


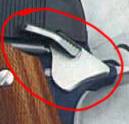
Extended, Ambidextrous, and Tactical Safety – Safeties come in many different sizes and shapes as you can see from the pictures to the right. It’s generally a matter of personal preference. For instance, the width and size of extended safeties varies from maker to maker, and gunsmiths can round, trim, and shape safeties into almost any shape. Some people like the safety to be accessible from both sides of the gun, while others like the ‘thinner’ feel of only having one.

You may replace your safety several times before you find one you like. Or you might be lucky and get one that fits right from the factory.
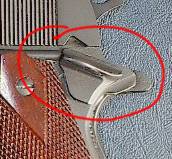
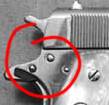
This is the original safety on a 1911A1.
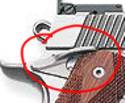
This is a typical extended safety; note the longer flange which increases the area with which you can operate it.
This is a tactical safety. It's deeper than the standard safety, but it's not any longer. This often provides a good compromise between the full extended safety and the standard safety.
This is the backside of a 1911A1 without an ambidextrous safety.
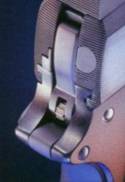
This is the back side of a 1911A1 with an ambidextrous safety.


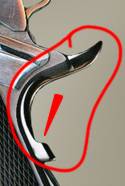
Beavertail Grip Safety – Increases the area over which recoil is spread which reduces the pounding of the web of your hand; eliminates hammer bite, and allows you to get a higher grip on the gun without being bit by the slide. Also provides for a more consistent grip, resulting in greater accuracy.

If you add an extended beavertail to the gun, you must either bob the hammer or install a Commander style hammer.
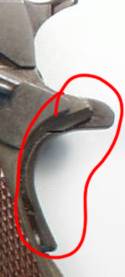
This is a standard grip safety. Note that it doesn't protrude all that far from the back of the frame. It's very easy to get the meat of your hand over this thing and get pinched by the hammer coming back when the slide cycles ("hammer bite") or be nipped by the slide as it cycles.
This is a beavertail grip safety. Note the sharp turn up at the back, and the small pressure point added where the arrow points.
This is another view of a beavertail grip safety. Note that the hammer actually nestles into the top of the safety.


“Loop” or “Skeletonized” Commander Style Hammer
or Bobbed Hammer – A Commander style hammer, a.k.a. “loop” or “skeletonized” hammer, generally fits with a beavertail grip safety.

The Commander style hammer is lighter which provides a faster firing cycle for the gun and it is less likely to snag on clothing when drawn from concealment.

If you add an extended beavertail to the gun, you must either bob the hammer or install a Commander style hammer.
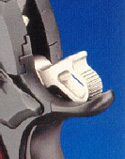
A bobbed hammer allows the grip safety to be trimmed back considerably at the risk of putting your hand up into the slide when grabbing the gun. The worst configuration is the spur hammer with no beavertail safety.
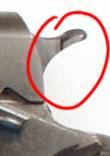
This is a standard "spur" hammer.
This is a Commander style hammer. There are many variations on this design, smaller and larger, different hole patterns, jeweled, etc.
This is a radically bobbed hammer. Some hammer bobs leave a portion of the spur so that you could thumb cock the gun if needed. This hammer would mandate Condition 1 carry. The bobbed hammer does allow the cutting back of the beavertail grip safety, shortening the gun up some.


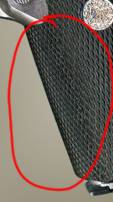
Checkered Front Strap – Checkering is done to improve the grip, feel and style of the gun. This is generally a matter of preference. Some treatments feel better than others, and some look really cool.
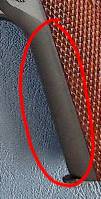
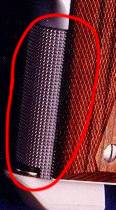
A standard front strap - no checkering.
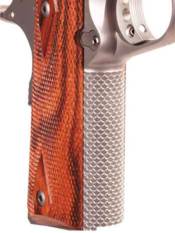
This is a checkered front strap.
This is a scalloped front strap.
The rubber grips cover the front strap here.

Mainspring Housing – There are a lot of variants available here; it’s generally a matter of personal preference.

This is a flat mainspring housing which was characteristic of the original M1911
This is an arched mainspring housing which is characteristic of the M1911A1
This is a bobtailed mainspring housing.

Cocking Serrations – These are grooves in the slide which make gripping the slide to cock the gun easier. There could be serrations on the back or both (there are few without serrations at least on the back). The depth and style of serrations vary considerably. Some users have found that they do not like the front cocking serrations because they tend to tear up leather holsters.

This gun has both front and back cocking serrations which are very wide.

Slide Release – There are various types of slide releases, including standard, tactical, and extended. This is a matter of taste and whether or not you feel you can operate the release without the extensions, which are similar to the extensions on safeties.

Extended slide stops can be dangerous because they extend back nearer to the thumb which makes them more likely to be inadvertently engaged by the thumb in recoil.
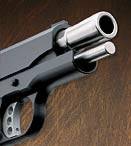
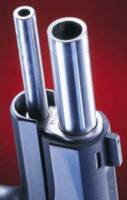
This is a bushingless bull barrel. Note that the barrel is much thicker at the end than in the middle; it flares out.
This is a match bushing barrel from Ed Brown.

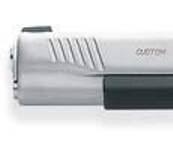
Melting – “Melting” is the process of smoothing off all the hard edges on the gun. Simple de-burring and softening is called “dehorning,” while melting actually alters the look of the gun.

A service weapon should at least be de-horned. Higginbotham says that it should feel smooth “like a bar of soap.”
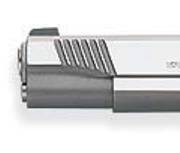
This the front of a Kimber in standard configuration.
This is a melted front end on a Kimber. Note the radical smoothing of all the edges.

Porting and Compensators – The purpose of porting and compensation is to keep the muzzle down during the recoil pulse of the gun. Ports are holes which are drilled through the top of the barrel and slide which release gasses in a jet as the bullet passes them in the barrel. It acts like a retro rocket on a space capsule, pushing the barrel down. The compensator adds weight to the front of the gun reducing the upward flip of the gun when it fires and pulling the muzzle down for more rapid re-acquisition of the target.

Note: Ported barrels are not allowed in IDPA competition. Porting is a modification which is primarily done on IPSC competition guns. It is not advised for a personal defense weapon since in the even that the gun might need to be fired close to the body (from retention) the hot gasses could spray up into the eyes.
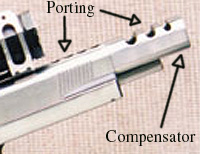
This is the front end of an SVI Unlimited Class race gun

See also:

Custom Auto Pistol Modifications for Serious Duty by Jim Higginbotham

Fluff & Buff – Tips for enhanced break-in and reliability preparation for autoloading pistols

Reliability Secrets by John Marshall

Recommended Modifications to the Colt .45 Auto for Self-Defense Use by Les Bengtson


Comments, suggestions, contributions? Let me know