fbpx

Custom M1911A1 Modifications

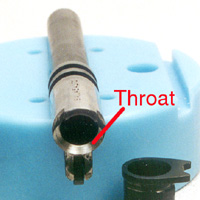
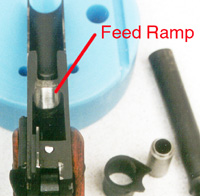
A Pictorial Guide Polished Throat and Feed Ramp – To improve the feeding of hollow point and other flat point ammunition; the original design had a very sharp feed ramp which fed round nosed (full metal jacket or round nosed) ammunition well, but doesn’t feed hollow point bullets so well.  This is a necessity for proper functioning with hollow point defensive ammunition.  See “My Fluff and Buff

Shown is the feed ramp and barrel of the Springfield Mil-Spec


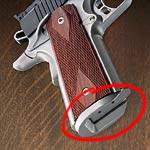
Beveled Magazine Well/Magazine Well Extension – To improve the speed and ease with which magazines are inserted into the well during a reload.

The extended magazine well is nice for competition use, but it makes the gun harder to conceal for carry guns. A beveled magazine well is a good compromise for improved loading without the extra length, but it is not a necessity.

Kimber Super Match with an extended magazine well.


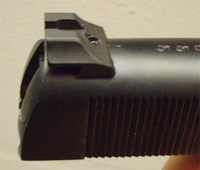
Custom Sights – The original sights of the M1911 and M1911A1 were quite small and did not lend themselves to rapid target acquisition. Custom sights enable to shooter to more quickly get a sight picture.

Millet Night Sights
Millet Night Sights
Wilson Snag Free sights installed on an Argentine Sistema slide by Roderus Custom


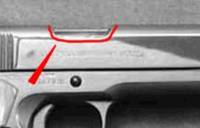
Lowered/Flared Ejection Port

To improve ejection of the spent casing out of the chamber.

This is a necessity for reliable functioning.

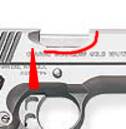
The red outlines the bottom of the standard ejection port on an original 1911A1.
This is a port which has been lowered and flared - note the indentation in the slide behind the ejection port.


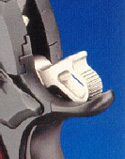
Extended, Ambidextrous, and Tactical Safety – Safeties come in many different sizes and shapes as you can see from the pictures to the right. It’s generally a matter of personal preference. For instance, the width and size of extended safeties varies from maker to maker, and gunsmiths can round, trim, and shape safeties into almost any shape. Some people like the safety to be accessible from both sides of the gun, while others like the ‘thinner’ feel of only having one.

You may replace your safety several times before you find one you like. Or you might be lucky and get one that fits right from the factory.

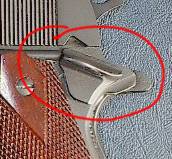
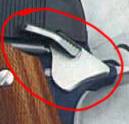
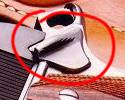
This is the original safety on a 1911A1.
This is a typical extended safety; note the longer flange which increases the area with which you can operate it.
This is a tactical safety. It's deeper than the standard safety, but it's not any longer. This often provides a good compromise between the full extended safety and the standard safety.
This is the backside of a 1911A1 without an ambidextrous safety.
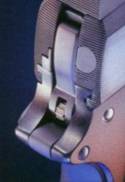
This is the back side of a 1911A1 with an ambidextrous safety.


Beavertail Grip Safety – Increases the area over which recoil is spread which reduces the pounding of the web of your hand; eliminates hammer bite, and allows you to get a higher grip on the gun without being bit by the slide. Also provides for a more consistent grip, resulting in greater accuracy.

If you add an extended beavertail to the gun, you must either bob the hammer or install a Commander style hammer.

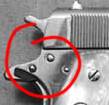
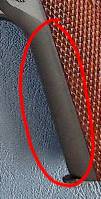
This is a standard grip safety. Note that it doesn't protrude all that far from the back of the frame. It's very easy to get the meat of your hand over this thing and get pinched by the hammer coming back when the slide cycles ("hammer bite") or be nipped by the slide as it cycles.
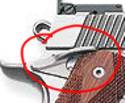
This is a beavertail grip safety. Note the sharp turn up at the back, and the small pressure point added where the arrow points.
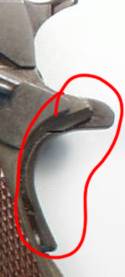
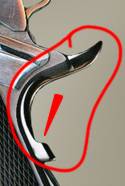
This is another view of a beavertail grip safety. Note that the hammer actually nestles into the top of the safety.


“Loop” or “Skeletonized” Commander Style Hammer
or Bobbed Hammer – A Commander style hammer, a.k.a. “loop” or “skeletonized” hammer, generally fits with a beavertail grip safety.

The Commander style hammer is lighter which provides a faster firing cycle for the gun and it is less likely to snag on clothing when drawn from concealment.

If you add an extended beavertail to the gun, you must either bob the hammer or install a Commander style hammer.

A bobbed hammer allows the grip safety to be trimmed back considerably at the risk of putting your hand up into the slide when grabbing the gun. The worst configuration is the spur hammer with no beavertail safety.

This is a standard "spur" hammer.
This is a Commander style hammer. There are many variations on this design, smaller and larger, different hole patterns, jeweled, etc.
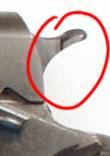
This is a radically bobbed hammer. Some hammer bobs leave a portion of the spur so that you could thumb cock the gun if needed. This hammer would mandate Condition 1 carry. The bobbed hammer does allow the cutting back of the beavertail grip safety, shortening the gun up some.


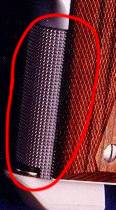
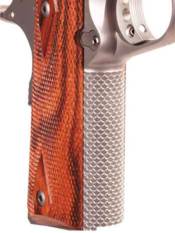
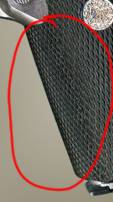
Checkered Front Strap – Checkering is done to improve the grip, feel and style of the gun. This is generally a matter of preference. Some treatments feel better than others, and some look really cool.

A standard front strap - no checkering.
This is a checkered front strap.
This is a scalloped front strap.
The rubber grips cover the front strap here.

Mainspring Housing – There are a lot of variants available here; it’s generally a matter of personal preference.

This is a flat mainspring housing which was characteristic of the original M1911
This is an arched mainspring housing which is characteristic of the M1911A1
This is a bobtailed mainspring housing.

Cocking Serrations – These are grooves in the slide which make gripping the slide to cock the gun easier. There could be serrations on the back or both (there are few without serrations at least on the back). The depth and style of serrations vary considerably. Some users have found that they do not like the front cocking serrations because they tend to tear up leather holsters.

This gun has both front and back cocking serrations which are very wide.

Slide Release – There are various types of slide releases, including standard, tactical, and extended. This is a matter of taste and whether or not you feel you can operate the release without the extensions, which are similar to the extensions on safeties.

Extended slide stops can be dangerous because they extend back nearer to the thumb which makes them more likely to be inadvertently engaged by the thumb in recoil.

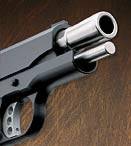
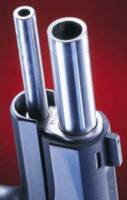
This is a bushingless bull barrel. Note that the barrel is much thicker at the end than in the middle; it flares out.
This is a match bushing barrel from Ed Brown.

Melting – “Melting” is the process of smoothing off all the hard edges on the gun. Simple de-burring and softening is called “dehorning,” while melting actually alters the look of the gun.

A service weapon should at least be de-horned. Higginbotham says that it should feel smooth “like a bar of soap.”

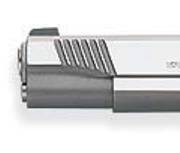
This the front of a Kimber in standard configuration.
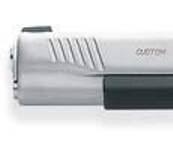
This is a melted front end on a Kimber. Note the radical smoothing of all the edges.

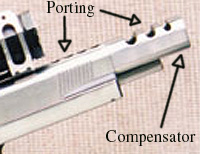
Porting and Compensators – The purpose of porting and compensation is to keep the muzzle down during the recoil pulse of the gun. Ports are holes which are drilled through the top of the barrel and slide which release gasses in a jet as the bullet passes them in the barrel. It acts like a retro rocket on a space capsule, pushing the barrel down. The compensator adds weight to the front of the gun reducing the upward flip of the gun when it fires and pulling the muzzle down for more rapid re-acquisition of the target.

Note: Ported barrels are not allowed in IDPA competition. Porting is a modification which is primarily done on IPSC competition guns. It is not advised for a personal defense weapon since in the even that the gun might need to be fired close to the body (from retention) the hot gasses could spray up into the eyes.

This is the front end of an SVI Unlimited Class race gun

See also:

Custom Auto Pistol Modifications for Serious Duty by Jim Higginbotham

Fluff & Buff – Tips for enhanced break-in and reliability preparation for autoloading pistols

Reliability Secrets by John Marshall

Recommended Modifications to the Colt .45 Auto for Self-Defense Use by Les Bengtson


Modifying the 1911

By Jim Higginbotham

The Browning designed 1911 pistol is arguably the finest close quarters combat pistol ever made. It is also the most modified or customized pistol ever made. Some of the myriad of changes made to John Moses Browning’s masterpiece are indeed enhancement but not all that glitters is gold. So, let’s take a look at what is out there and just what utility it might serve.

First off, let me say that this is not a piece advising you to modify your personal pistol. You should be aware that there is some debate on whether it is advisable, from a legal liability standpoint to do so. The idea is that should you be forced to use your pistol in self defense the prosecutor, should there be one, might make a case that you were irresponsible and were so interested in guns that you were just itching to use it. I don’t personally put much stock in this argument but never the less it is out there. At any rate I am merely discussing the various modifications and their effects and will leave the decisions on your own weapon to you alone.

Secondly, I should point out that I am not discussing the various mods that are mere affectations or strictly meant to be used in competition for I am about the serious use of the handgun. Nothing at all against competition and gadgets here it is just that I am not discussing this except for some overlap in features which can be used both competitively and in the real world of shooting to live.

With that out of the way let’s start with the basics. There are many 1911 clones out there so let me specify that we are discussing the real military pistol or the equivalent Colt commercial Government Model for the most part. Actually the 1911 or 1911A1 is a fine pistol just the way it came way back when. The most obvious drawback to it was that the sights are so small (slightly larger on the A1 but you would hardly notice). One who really knows his Colts knows that there was a 1/10 inch optional front sight (fixed rear) available on request and that there were several pistols actually shipped with this option. So far as I am concerned, with this option, you have just made an original 1911 a 9.5 on a scale of 1 – 10. The rest of the discussion is how to make it a 10. Now one may legitimately ask about the trigger pull but nearly all of the real 1911s I have seen ( those not reworked by some arsenal or have been “repaired”) had triggers in the 4-5 pound range. One really doesn’t need much better though a lighter trigger might be desirable as we inch toward that “10”. There are also some commercial equivalents to the early guns available today. One such pistol is the Colt 1991A1. Right now its future is in doubt but as an example it is quite a pistol. I have examined several dozen of these ( usually in the process of customizing them) and I must say almost all ran right out of the box, the sights are decent and the trigger pulls were just about 4.5 pounds on average. I might want a more robust rear sight – since I walk into walls a lot – but that is sort of picking nits. I might also want to enhance it’s accuracy just a little – though it is certainly more than adequate for defense and to take off some of the sharp corners. Another pistol that comes about ready to go out of the box is the Kimber Custom Classic. Yet another is the Springfield Armory 1911s, though these might use a little work on the feed system in order to function reliably. No doubt there are others so don’t take my not mentioning them as a slam on these other brands.

If you happen to have a pistol which has the minimal requirements of highly visible sights and manageable trigger then there are many options open to you. A good sturdy set of sights which are snag free will cost you somewhere between $50 and $100 installed. Tritium night sights ( which will last about 10 or 12 years) are a bit more and, while nice, are not essential. Adjustable sights can be up to $250 or even $300 but in actuality they are a disadvantage, prone to breakage and they tend to get “unadjusted” as well as adjusted. Most serious gunsmiths that I know have fixed sights on their personal 1911s. A good crisp 4 pound trigger job will run anywhere between $40 and $100 from a reputable ‘smith. Don’t take chances here, an unreliable trigger is dangerous.

OK, so we have a basic pistol which feeds ball ammo with monotonous reliability ( to insure this always use quality magazines), has sights which are at least 1/10″ wide (.100″), .125 is better, and at least .140 – .200″ tall, and has a reasonably crisp 4 – 5 pound trigger. Noting that there are 1911s from custom smiths out there that cost up to $3,000 you might inquire – what am I getting for my money? I will attempt to tell you, without stepping on the toes of too many gunsmiths – most of whom are dear acquaintances to me. In some case the news is not good though.

To my mind the priority goes to function. The original military weapons ( and Colts up to about 1969) were not noted for feeding unusual ammunition such as semi-wadcutters and the newly designed hollowpoints ( oddly enough the ammunition manufacturers have only recently discovered that they can make JHPs with a roundnose profile which feeds just fine in older guns). So the first major consideration after sights and trigger are modifications which actually enhance the reliability of the weapon. A gun that won’t work under the worst possible conditions should be repaired or thrown away as it is a danger to the shooter. Most smiths offer a “reliability” package which usually consists of modifying the feedway ( both in the frame and barrel), polishing the breechface and adjusting the extractor tension as well as removing sharp edges from the extractor “hook”. Not everyone can do this work so be careful. Don’t let anyone tell you that the separated feedway in a 1911 ( part in the frame and part in the barrel) is a big disadvantage – it is not. Nor is it necessary to have a “ramped” barrel to have a chamber which supports the case head for some of the hotter loadings ( however many commercial barrels – either ramped or unramped – do not support the case head so be careful with +P loads).

Leaving accuracy enhancing modifications for later ( I will explain why) lets look to the Controls on the pistol. Likely the most common modification in this area is the thumb safety. Most people want a larger safety to enable them to disengage it more surely when speed is of the essence and in a fight for your life speed is usually of the essence! Many want to augment this with an ambidextrous safety which can be manipulated by either hand. Such modifications are fine and even desirable, however there are some pitfalls. Most common is that just drop-in in a safety can leave you with basic controls that have sharp edges and can cause problems with your handling of the weapon. Some are even sharp enough to lacerate the skin. Another is that if the safety is too large – especially on the right side of the frame for right-handed people – then it can get inadvertently disengaged. This is one reason I do not opt for “bilingual” safeties on most of my 1911s. Not that it worries me too greatly to find I have bumped the safety off. Good gun handling and a good holster are the essence of firearms safety not the mechanical device too many have grown dependent on. Of all the safeties on the market I am most impressed with the Chip McCormick speed safety. It is extended but it has no sharp edges and literally “melts” into the gun. Yet there are other good safeties if you want to put in a little work de-burring them. One must make sure that they actually function, I have seen many a “custom” 1911 which would drop the hammer when the trigger was pulled with the safety off ( usually they drop the hammer when you release the safety and usually they do not fire but it is scary).

These days a popular control modification is to replace the grip safety with a wider version that not only helps to spread the recoil over wider area of your hand but also allows a higher grip on the weapon which is an aid in controlling recoil. Done correctly this enhances the handling of the pistol though I have never noticed that it has a great effect on my shooting a particular drill it helps to make those long practice sessions more pleasant and a higher grip is a good thing. Again, you want to make sure the safety functions. The most common problem I see is that the shooter will fail to disengage the safety with his higher grip. Many such safeties now come with a “speed bump” on the lower part to help insure disengagement. Years ago many folks pinned their grip safeties – Jeff Cooper, the Father of the Modern Technique was prominent amongst them. Personally I don’t see any need to do this since the grip safety surfaces can be “adjusted” to disengage at the slightest movement but then again, I don’t depend on mechanical devices for my safety so it does not bother me much to see an inoperable grip safety. Mine work since someone else might be shooting my pistol and expect it to work.

Then there is the slide stop. Now we start to tread in dangerous waters. A thing as simple as a slide stop can end your life. The purpose of the slide stop is – of course – to stop the slide from closing when the last shot is fired. The trouble arises when the part stops the slide BEFORE the last shot is fired – sometime the first or second! One sure way to invite such a problem is to install and extended slide stop – or even worse – ambidextrous extended slide stops! Not only are these not usually well made but the fact that they extend back nearer the firing thumb makes them more likely to be inadvertently engaged by that thumb in recoil. This is very bad as you might imagine. To install one of these dinguses on your pistol is to mark you as a tactical amateur anyway. First, and more importantly, the thinking gunman reloads anytime he CAN – meaning the first chance he has when bullets or people are not coming his way – no matter if he has fired 2 rounds or 6, get the gun back up to capacity just in case the Bad Guys have help! The second thing, recognizing that we all can’t count rounds in a gunfight ( not something I try to do anyway) and that comes the day we actually do run dry – no problem, just speed reload ( from behind cover please) in the normal fashion and trip the slide release with the thumb of your weak hand – which just seated the magazine and is in perfect position to do so. Or, as is the current rage in tactical schools ( in order to have a uniform movement between all autopistols) simply retract the slide with that hand and release it. In plain words, avoid this modification like the plague.

One other possible modification to the slide stop is to “dimple” or slant the bearing surface where it meets the plunger. This helps to ensure that normal recoil will not inadvertently engage the slide stop and yet allows proper function with most magazines ( some 8 rounders may be a little week). I don’t regard this as a must unless you have noticed the problem in your particular gun.

Yet another control on the 1911 is the magazine release. Here too we can get in real trouble. In order to enhance their ability to reload faster, many folks have given up sure function. Reloading is something emphasized in competition – and indeed it should be a skill one has – but it is highly overstated. I have only recorded two cases in which a person was able to finish a fight in better shape because he reloaded quickly ( and both should have been over long before the reload) in my decades of research. Gunfights tend to be over in 2 to 3 seconds, reloading is not one of those things that figures highly in them though, to be sure, there are a couple of cases where failing to reload might have been a problem – Newhall comes to mind. The great danger in an extended or enlarged mag release is that it will get bumped in the holster and the mag will be released without your knowledge leaving you with a single shot pistol ( it is even worse with a S&W since the gun won’t work with the mag down 1/4″ ). Best leave the mag release alone. The Kimbers have a slightly extended button which I can live with but otherwise leave it alone. Left- handers can actually operate the standard button better than right-handers so ambidextrous releases should be avoided also.

While I know many are champing at the bit to hear about some of those “extreme” gunsmith mods and little secrets to tuning race guns, bear with me while I talk about really important stuff. Externally your gun should feel like a well used bar of soap ( though not necessarily slick). Meaning, it should not have any razor sharp edges that cut hands, clothing and leather – or plastic these days. You should be able to comfortably run your hands all around it. The only thing that should stick to your hands is the actual gripping surfaces of the frame. Old Colts and military 1911s are usually OK in this regard but even they could use a little “dehorning”. Modern commercial Colts – especially the Enhanced models which I refer to as “disenchanted” models – and Springfield Armory’s as well as several others are pretty poor in this regard. One exception is the Kimber. Almost all the edges ( if you don’t count the recoil spring plug around the goofy guide rod) are nicely blunted without exaggeration. Make sure your weapon does not hurt you to handle and shoot. It is a hand tool, it should be comfortable.

One thing I like that sounds out of place when talking about bars of soap, is either stippling or checkering on the front and back straps of the frame. Checkering on the stocks is something I can take or leave. The gripping is done fore and aft on a 1911 and these surfaces should be non-slip. Some folks get by on the cheap by applying some skate board tape or other rough temporary surface. Some even just glue sandpaper to the surface – “True Grit”. Good checkering is not only practical it is very attractive. It is also expensive running about $150 to the inch. Stippling works just about as well and I personally like it but it is a bit too rough for some folks taste. I am not fond of wrap around rubber grips with either checkering or finger groves. This does not release the gun easily enough when the grip is relaxed to perform a reload nor does it allow enough leeway when establishing the grip on the draw. If you do like them I can think of no really serious drawbacks except to warn against any stock that covers the toe of the magazine when it is inserted. You might need to use this protrusion to strip a stuck magazine out of the gun in case of dirt or a double feed. Obviously stocks with thumb rests should be avoided since they block access to the magazine release.

Though not really controls, let’s examine some of the various accessories one is tempted with when perusing all those gun magazines. How about starting with hammers. There are literally dozens of shapes and sizes of hammers. For the most part I think this is strictly a matter of taste with the exception that if you install a high and wide grip safety then you will likely need some sort of “commander” hammer to fit with it. Functionally I can find nothing wrong with the standard G.I. hammer. If it bites you then “bob” it by about ¼” . However if you want one of those high / wide grip safeties then you will have to install a hammer that will accommodate it. A “Commander” hammer is in order and there are many out there. Most of the top names, Wilson, MGW, McCormick, etc. are well made and you can simply pick one whose looks suit your taste. Many of these relocate the hole that the strut pin anchors through in the manner of the Gold Cup since that takes a lot of load off of the hammer as it rests on the sear, resulting in a lighter trigger pull. Since the 1911 is carried in condition one ( cocked and locked) when in service it does not matter much if the hammer is easy to cock or not.

While we are on the rear of the pistol let’s look at the mainspring housing. You can have them in flat or arched or in between. Since the serious gunman uses the sights for the most part, this is a matter of personal taste and he can usually pick up a gun with a type of MS housing different from his and do quite well with it. However, even the sighted fire used in the Modern Technique is quite reflexive and a strange feeling pistol will slow you down a little – I simply could not live with my Glock 23 or 22 ( early models) because I constantly had to pause to push them down on target after a smooth draw. So, naturally I made them point more like a 1911. While I like the feel of the flat housing, I learned to shoot a 1911 with an arched so the vast majority of my guns have the arched. I prefer mine checkered 20 LPI. I also prefer mine to have the military lanyard loop. This is not so important but it is a nice touch to be able to attach a lanyard when you are canoeing or backpacking ( particularly if you sleep in a hammock on the trail). For self defense under normal conditions it probably does not serve a purpose. It does however, make a handy bottle opener – if there were bottles to open anymore. Another related MS issue is the Extended Magazine Wells that are so common today. Often these are part of the custom MS housing itself. Personally I think they are unnecessary for the serious pistolero. Sure they make hitting the mag well easier for competition but in real life you likely wont have to reload and you have made your pistol taller and less concealable. The main thing I have against them is that it makes using a standard magazine without a pad very difficult and almost impossible to reload with quickly. Hardly worth the effort for what little gain you get. One exception I have seen is on the Officer’s Model. By attaching one of the S&A mag wells which taper off before it gets to the “toe” of the magazine, on the OM you have extended the rear of the pistol which helps most normal hands get a better grip while extending the front none at all. This means the pistol is really just as concealable as before the way most of us carry our guns with the barrel canted to the rear. Gun designers should realize that when you sit a gun down with the floor plate of the magazine flat on the table, then the barrel should be parallel to the table not pointing up ( or down). This is the way the hand is shaped and it promotes concealability. At any rate the OM with magwell will take a standard 1911 magazine without a pad and you won’t fail to seat it. A word of caution, longer mags in an OM can malfunction if you put upward pressure on the floor plate while firing so don’t use the “cup and saucer” grip.

Let’s move up to triggers. We have talked a bit about trigger pull but let’s discuss the part. There are many triggers available and most of them are fine so I would say, if you want to change your trigger at all, then pick the one that suits your hand and your tastes. Stay away from the cheap ones with aluminum trigger stirrups but the material of the trigger itself is almost irrelevant. At first I thought plastic was a bad thing but I see that it moves easily and is almost indestructible. I still prefer some sort of metal for taste or perhaps to prevent melting in an extremely hot environment ( I mean where you might store the gun not for me as anything that would melt the trigger on my Kimber would melt me). The most important characteristic of the trigger, after assuring that it fits your grip style, is the actual weight of the part. Not so important for shooting but when you reload from slidelock or drop the slide on an empty pistol ( this is NOT a good idea but likely someone will do it to your gun sooner or later) the inertia of the trigger – it’s tendency to stay still – will trip the sear when the gun lurches forward as the slide slams shut. This causes the hammer to “follow” from the jar and usually it will catch on the “half cock” notch ( safety shelf on series 80’s). This is not a good thing. Choose a good gunsmith for your trigger job and choose a light part for your trigger.

Speaking of slides slamming forward, let’s talk about recoil springs. This is another area where you can get into trouble with the neat gadgets available in parts ads. Let me state right up front. A recoil spring guide rod is not one of the stellar ideas to dawn on gun designers in the 20th century. You will not that none of John Browning’s designs have them. That is because they are not needed. To be sure, some guns work OK with them, Glock, S&W, Kimber, Wilson ( who makes guns both ways) etc. The problem is twofold. One is reliability. If they are designed well, as those in the aforementioned pistols seem to be, then fine. However some after-market designs are not well thought out. It takes more than just sticking a rod through your recoil spring. In the 1960 there were several after-market rods that sold through mail order which were less than stellar – we called them malfunction kits. You could put one in you Colt that was monotonously reliable and then get a chance to do remedial action drills. The more pertinent point is that the rod under the barrel prevents you form applying pressure under the barrel to draw the slide back, preventing convenient one hand operation. If you find one hand disabled or occupied during a gunfight and you do need to clear a malfunction, reload an empty gun from slide forward ( slide stops don’t always work) or simply need to check the condition of your weapon you can place the recoil spring plug on the edge of a table or desk or the sole of your shoe and press the slide back by using only one hand. Another handy trick is to “press check” your piece in the dark by pinching your thumb to the inside of the trigger guard ( just the tip and not too far inside please!) and the index finger under the barrel ( you approach this from the underside and NEVER let actual muzzle point at your finger). With seemingly little pressure you can bring the slide back about ¾” which will allow you to take your trigger finger ( you have the gun in a firing grip) and feel the cartridge in the ejection port. There are other ways to do this that can be applied to guns with the rod but they are a little more difficult. Let me say. If you have a guide rod on your 1911 and the gun works then don’t feel like you have to rush out and get rid of it. These are sort of minor points. Besides, some of the compact models out there were designed with them and it would be difficult to change them.

OK, now what about recoil springs and buffers. The standard Govt. Model spring is 16 pounds. I am sure that the gun will work just fine with this if you replace the spring when it is worn out. The military uses the gauge of spring length. When the spring has worn until its uncompressed length is 5″ then it is time for it to go. Military parts these days are “low bid” so they were getting about 1,000 round on a spring before replacing them in the mid 80’s as the 1911 was being phased out of service. Personally I prefer an 18.5 or 20 pound spring for the 5″ guns ( 20-22 pounds for the 4.25″ guns) but one must be careful not to go too high lest he run into the problem of short cycling the slide due to a lose grip. The 1911 is one of the most forgiving designs I have ever seen – it will even function when held with 2 fingers or even held upside down – but all autos eventually have the point where less resistance to recoil will result in a malfunction. 18.5 pound springs work for almost everyone with normal ammo and they will overcome any slight resistance to feeding that perhaps a 16 would not. At the same time one does not want to go too high on the spring weight as there can be battering when the slide closes as well as when it is shoved to the rear. Stick with this range. While on the subject of springs, do not change the weight of the Main Spring ( the one that drives the hammer). Many amateur or even professional bullseye gunsmiths will cut or reduce this spring in order to make a light trigger pull easier to obtain. Don’t do it. The pressure of the hammer in its forward position is part of the lockup timing cycle of the slide, less resistance here means more battering and has much more effect on it that 4 or 5 pounds of pressure in the recoil spring.

What about recoil shock buffers. Well, I have experimented with these for years and was on hand when the Wilson version was invented – or at lest conceived. I can see the logic in this but over the years I have gradually gotten away from using them in my serious self defense guns. I do use them in my practice guns just to be on the safe side. The problem is, and it is different with each individual gun, that these things can get chewed up and spread out and cause the gun to become unreliable. This is a bad thing in a defense gun. I was having trouble with a Wilson Combat Master ( this was a $1500 pistol in 1985) running with ball ammo and McCormick magazines. Now the gun was good, the mags were good, the ammo was Winchester ball and the gun was clean when I started shooting it. Oiling the barrel hood made it run better but it still choked. I did not discover the problem until I got home. The shock-buff was smashed and a bit of it was pushing upwards on the underside of the barrel. Needles to say, that gun no longer carries a shock-buff. Yet they seem to work in some other guns. What is really needed is a sort of “sandwich” which has steel in front buffer in-between and steel in the back so that it won’t get chewed. However this can all interfere with the reward travel of the slide and the odds of the slide locking back on the last shot – especially on a Commander. Shock buffs may save your gun from battering if you shoot 1,000 rounds a week but it may also cause problems – buyer beware.

So far I have not mentioned barrels. I am not going to talk about them much. I strongly feel that most folks do not shoot quite well enough to appreciate the difference between a run of the mill barrel and a match barrel. My dad’s Remington Rand 1911a1 which is unmodified and was made in 1943 shoots about 5″ groups at 50 yards with ball ammo. My most accurate 1911 will do 1″ at this range but I doubt that I can tell the difference when shooting a man at 10 feet or even at 25 yards from a field position. However, some folks want a super accurate piece so that they at least know it is them doing the missing rather than the gun. My advice on barrels is this. If the fit of the bushing is not extremely loose and you cannot move the barrel by pressing down on the barrel hood while it is locked in battery then you likely don’t need a new barrel or bushing. If the former is true you might need a new bushing. If the latter you might get by with a new link ( it will not be locking up in the preferred manner though). My friend Dane Burns, who builds extraordinary 1911s, believes that there never was a G.I. or Colt Govt. Model to ever come out of the factory with a “properly” fitted barrel. One where the “legs” or bottom lugs of the barrel as well as the link rub evenly on the slide stop as it goes into lockup. I tend to agree with him though the law of averages says that there must be some which are properly fitted if only by accident. My point is that unless you want a pistol that shoots 1″ at 50 yards then you don’t have to have perfect lockup. The G.I. guns – until they are simply shot out – will have all the accuracy a person needs for self defense and a little fitting – even less than perfect fitting – can get you to 3″ at 50 yards which is much smaller than the front sight. I can’t see 3″ at 50 yards!

Barrels, especially the feedway and the chamber dimensions, affect the reliability of the gun. Here, the things that enhance accuracy – tight tolerances – work against us so we have to have a compromise of sorts. Dane’s guns are EXTREMELY accurate yet he emphasizes that they must work. He is one of the few smiths who can accomplish this. His guns also cost $2500 – and are some of the few that are worth it. However, most out of the box Kimbers will shoot 3″ at 50 yards and they usually work pretty good ( I have not had any gun related malfunctions out of either of mine since I bought them). One after-market barrel that I have experience with, the Wilson, seems to be very accurate and is cut with sufficient tolerance to work well, I don’t even have to modify the feedway in the barrel, though I do polish it just a little which is likely unnecessary. The critical lockup on a 1911 barrel is in the rear. The bottom lugs, I mentioned as well as the barrel hood should reposition the barrel the same every time. The bushing fit can be a little more loose than most people think. Whatever you do don’t buy a two-piece barrel and I would recommend replacing the two-piece barrel that comes in the Springfield Armory guns immediately. Bottom line here is that if you spend your $200 on practice ammo then you will likely find you have a much more accurate gun that you thought you started with.

Well this has gone overlong and though I have only scratched the surface I must stop. I hope it has given food for thought. Good shooting.

Praise the Lord and pass the ammunition.

See also Custom M1911A1 Modifications – A Pictorial Guide
Breaking in a 1911

By Syd

Break-in of a pistol is not quite the elaborate ritual that it is with a rifle. Here’s what I do. Field strip it and check it out. If it’s bone dry, give the contact surfaces a light coat of gun oil or grease, depending on what you have. I use Mil-Comm MC2500 gun oil and Mil-Com TW25B grease on the slide rails and just a bit on the lugs where the barrel locks into the slide just forward of the chamber. If the gun happens to have excess lubrication in it, clean that out. Springfield is bad about shipping guns that are just dripping with oil; Kimber tends to ship them dry. I run my fingers over the rails just to make sure that there are no burrs or rough spots. There probably won’t be any with a Kimber or Springfield, but you never know. Even good gun makers occasionally miss things.

I will take a swab and give the bore a very, very light coat of oil, not wet and drippy, but just run a lightly oiled swab through the barrel a couple of times. It may only be my imagination, but this seems to make the barrels easier to clean after they’ve been fired. Then go to the range and run 50-100 rounds through the gun. Bring it home and give it a thorough cleaning and lube, including the very light coat of oil in the bore. Repeat this through the first 500 rounds fired through the gun. The key to a good break-in is frequent cleanings during the first 500 rounds.

I don’t really consider a pistol broken in until I have 1000 rounds down range. If the gun is to serve as a personal defense weapon, a minimum of 200 rounds of the carry load should go through the gun without a malfunction.

When I clean a pistol, the first thing that I do is to run a swab soaked in Mil-Comm MC25 Cleaner/Degreaser through the bore and set the barrel aside to let the solvent work while I clean the rest of the gun. After the rest of the gun is clean, I brush the barrel out with a bronze brush (don’t use steel brushes) and then clean out the gunk with with cotton patches.

Dry firing helps to smooth the engagement surfaces on the sear and hammer. Despite what some people will tell you, dry firing is a good thing, and it helps to smooth the action. Unless you’re unhappy with the trigger break, nothing more is needed.

A method I picked up from “Gun Tests” is to push forward firmly on the hammer with your thumb while pulling the trigger 10 or 20 times. This does seem to remove roughness at the sear and gives a slight but noticeable improvement.

I know some people who will do a complete detail strip (completely disassembling the gun) with a new 1911. They will clean, oil all the parts, and sometimes lightly polish the engagement surfaces on the hammer and sear. I don’t recommend this for people who are new to the gun. 1911’s are easy to take apart, but more difficult to reassemble until the user acquires greater familiarity with the mechanism. I would certainly do the detail strip on a used gun that I didn’t know, but on a new gun, it shouldn’t really be necessary unless it just makes you feel better about the gun.

Tips for enhanced break-in and reliability preparation for autoloading pistols
https://sightm1911.com/lib/tech/fluffandbuff.htm

Accidental Discharge of a 1911 in a Thumb Break Holster

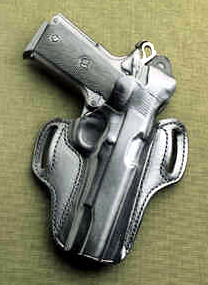
DeSantis Holster and a 1911 COCKED AND LOCKED

My brother recently acquired a Colt Commander. He had put a Federal hollowpoint in the chamber and lowered the hammer (condition #2). He was holstering the pistol with the hammer down. This was a holster with a thumb break. As he attempted to adjust the pistol in order to snap the thumb break closed, the pistol discharged. The round traveled into his upper right butt cheek and out the bottom, about 6 inches below his butt cheek. The round didn’t expand and fell to the floor under the weight of gravity alone. He is fine now but the AD [accidental discharge] perplexed us a lot until we figured that the hammer was resting on the firing pin, and the soft primer Federal hollowpoint round and the hard “snap” of the new holster hit the hammer hard enough to touch off a round. Fixing the issue is to simply not chamber a round, period.

Thank you for sending in this incident report and I’m glad that your brother is OK. After conferring with a couple of my gurus, we agree that your analysis is entirely possible. With the hammer down on a live round, the force involved with forcing down the thumb break could set off a sensitive primer, especially if the force was applied quickly. Thumb break holsters for the 1911 are designed to fit “condition one” guns – hammer cocked and safety locked. The thumb break then fits securely around the rear of the slide. In addition to the internal safeties of the gun, the thumb break provides an additional barrier to an accidental discharge because it fits between the hammer and the firing pin. This incident provides yet another illustration of why I don’t like condition two carry – hammer down on a live round. On a genuine 1911 there is no firing pin block and it is possible for a condition two gun to go off if it receives an impact on the hammer.

Safety On!
Safety On!

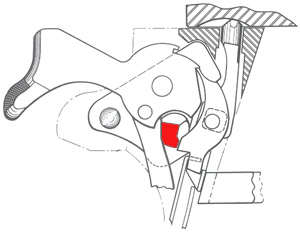
There is another possibility here, and that is that the gun was actually in a “false half-cock” condition. It is possible on some guns to lower the hammer so that it stops with the end of the sear against the point of the half-cock hook rather than being trapped within the half-cock notch. It has been shown in testing that a hammer falling from half-cock will set off a live round about 40% of the time. It is possible that your brother actually lowered the hammer to this “false half-cock” condition and the force of trying to snap the thumb break over hammer caused it to slip and thus allow the hammer to fall from half-cock. [In the diagram, the half-cock hook is the uppermost hook which is nearest to the hammer stem. The sear is the crescent-shaped piece which sits in front of the hammer.]

The only place I disagree with you is in your conclusion that the only safe way to carry a 1911 is with an empty chamber. I think that the safest way to carry a 1911 is condition one – hammer cocked and safety locked. In an absolute sense, condition three or condition four is “safer” from the point of view of accidental discharges, but these are not safer in terms of the gun performing the function for which it is intended. Racking the slide to load the gun during the draw is considerably slower than sweeping off the thumb safety, and in an emergency it could make the difference between life and death. For more of my thoughts on this, please see “Is ‘Cocked and Locked’ Dangerous?” An alternate way of dealing with this problem is to use gun with a firing pin block such as Series 80 and later Colts or Series II Kimbers.

The 1911 Pistol Is Its Own Toolbox!

By John L. Marshall

It’s pretty well agreed that one of the top firearms inventors of the 20th Century was John Moses Browning. One of his finest creations was the U.S. Pistol, Model of 1911. Browning designed this pistol to be suitable for use by the U.S. military services, and in this he succeeded admirably. Although 90 years have elapsed since the pistol was adopted for service, it is still in use by U.S. military units, and very much in demand in the civilian sector. Less generally known is that Browning designed many parts of the 1911 pistol to be used as tools in its own disassembly and assembly. Even the .45 ACP cartridge itself could be used for work on the gun!

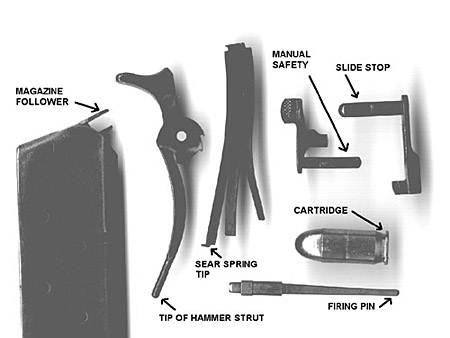
Some of the parts of the 1911 pistol used as disassembly/assembly tools

Have you ever wondered why the slots in the grip screws on the big .45 are concave rather than simply flat? Wonder no more. Browning designed those screws so that the rim of the .45 ACP cartridge could be used to unscrew them! You don’t need a screwdriver for this task if you have a single cartridge available!

Once the manual safety is removed, the safety and slide stop plungers can be withdrawn and used to drift out the hammer pin.

The hammer strut is far and away the most useful tool provided with the 1911 pistol. It can be used to drift out the mainspring housing pin and the sear pin both. It also serves to press in on the firing pin so that the firing pin stop can be removed, and then it works to pry out the extractor. It can be used to drift out the link pin from the barrel on those pistols where the link pin is not staked in place. It can also be used to retain the depressed magazine spring when inserted in an inspection hole, so that the magazine follower can be removed! Some modern-manufacture 1911-style pistols have a flat end to the hammer strut. While this design functions acceptably and is easier to manufacture, it subverts one of this part’s intended uses: it can’t be used very well as a drift punch. The flat variety can be filed down to the round shape. It’s worthwhile to do it.

The hammer strut is used to drift out or pry out several parts

The shaft of either the slide stop or the manual safety can be used to depress the mainspring cap while the firing pin is used to start the mainspring cap pin out of its hole to free the mainspring, its cap, and the mainspring housing pin retainer.

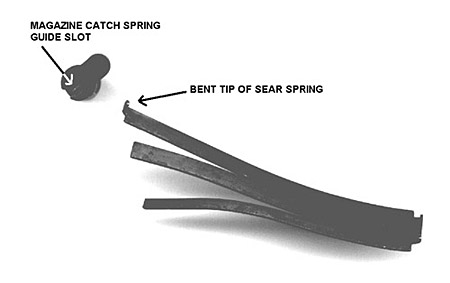
That little bent piece at the end of the leaf-style sear spring can be used to twist the magazine catch spring guide to remove the magazine catch and its spring.
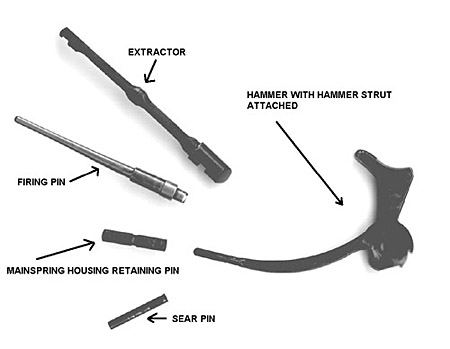
The magazine follower can be used to depress the safety plunger while the manual safety is being reinserted in place.

Here’s the lowdown on complete disassembly of the pistol, using only the pistol and its cartridge for tools:

First, clear the pistol of any cartridges by removing the magazine and then retracting the slide to remove any round in the chamber. Inspect the chamber carefully to be absolutely sure the pistol is unloaded before proceeding.
Next, apply the manual safety and press in on the recoil spring plug, which will allow the barrel bushing to be rotated clockwise. Carefully remove the recoil spring plug, which is under spring pressure.

Release the manual safety and pull the slide back until the disassembly notch in the slide lines up with the end of the slide stop. Remove the slide stop from the frame. Slide the slide and barrel assembly forward off the frame.
Remove the barrel bushing by rotating it counterclockwise. Remove the recoil spring and the recoil spring plug from the slide. Tip the barrel link forward, and remove the barrel and its link forward through the muzzle of the slide.

Cock the hammer and with the manual safety midway between the off and on positions, wiggle it out of the frame. Lower the hammer. With the fingertips, remove the safety and slide stop plungers with their attached spring from the plunger tube.

Use one of the removed plungers inserted from the right of the frame to start the hammer pin from its seat. Remove the hammer pin, and remove the hammer and its strut.

Use the hammer strut, with the hammer attached, to drift out the mainspring housing pin. Remove the mainspring housing. Remove the grip safety and the leaf-style sear spring.

Use the hammer strut to remove the sear pin, drifting it out from right to left. Shake out the sear and disconnector

Use the tip of the sear spring to remove the magazine catch assembly

Partially depress the magazine catch, and use the little right-angled bent portion of the leaf-style sear spring to rotate the magazine catch spring guide counterclockwise. The magazine catch can now be removed. Use the same part to rotate the magazine catch spring guide clockwise to allow the guide and its spring to be removed from the magazine catch body.

The trigger can now be pressed to the rear and withdrawn from the frame.

Use the hammer and its strut to press in on the firing pin, allowing the firing pin stop to be slid down and out of the slide. Remove the firing pin and its spring. Use the hammer strut to pry the extractor out of its hole in the slide.

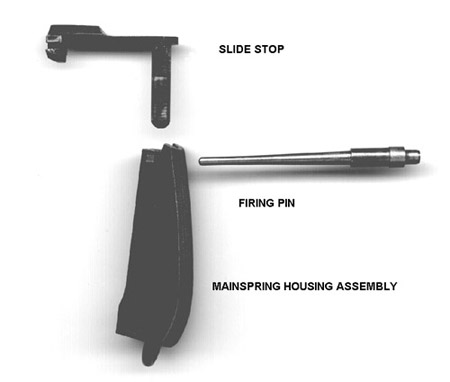
While it’s not recommended for normal disassembly because the mainspring is under heavy compression, the mainspring housing can be taken apart using the shaft of the slide stop or the manual safety to depress the cap while the firing pin starts the retaining pin out of its hole. Keeping pressure on the cap with the slide stop or safety, the retaining pin can now be withdrawn, releasing the cap, the mainspring, and the mainspring pin retainer.

The mainspring housing assembly can be disassembled with these parts

The magazine can be disassembled by using the slide stop shaft to partially depress the follower while the hammer strut is inserted over a magazine spring coil through an inspection hole to retain it. Then the magazine follower can be removed from the top of the magazine.

As mentioned, the flat end of the magazine follower can be used to depress the safety plunger when reinserting the manual safety – you don’t have to disassemble the magazine to accomplish this trick!

So there you have it – complete disassembly and assembly of the 1911 pistol is possible without using one external tool. The pistol itself contains all the implements necessary to do the job!

© 2001 by John L. Marshall

You want reviews? Here’s mine on the S-A “loaded” 1911A1.

Springfield Armory 1911A1

By Vaughn Terpack

All features that I can find are cosmetic and not functional on the pistol that I have. They say that the gun is throated and polished, but I can’t verify that as I have little knowledge on the subject.
The trumpeted Novak rear sight is as near to worthless for a combat gun. It is very durable and very snag-free so I don’t expect that it will ever break….but, every smith that I’ve spoken with doesn’t understand their popularity; basically, it is heavier, more costly, and trickier to install than other combat sights. The single greatest reason for my dislike of the sight is that there is no illuminating paint or tritium to help you distinguish the sight picture in low-light combat situations. Black-on-black sights might have been the norm in the old days, but you would think that with today’s technology would allow them to put a drop of bright paint on the sight before sending it out the door. This shouldn’t be left up to the consumer!

The gun is very, very accurate right out of the box and it feels great in the hand. But, if I was to do things over again, I would buy their mil-spec pistol because it is far cheaper and have custom work done to it. This would have allowed me to get all of the needed combat enhancements I want/need without paying so much for the stock gun. Figure that my gun cost $520 new and I will have to replace several components and add several others to make this a serviceable duty weapon fit for real fighting. At $450 for the mil-spec, I could have put on a contoured beavertail safety, extended thumb safety, and durable work grips w/o going too far over the price of the “loaded” versions. It would definitely have been more expensive, but you get exactly what you want and don’t end up with doubles (like I’ll have when I replace my fancy rosewood grips with plastic or rubber ones). The key here is research. Lots of it and plenty of serious thinking about what you need.

The parkerized finish is nice and durable, but maybe something else is better. Maybe you do need a guard under the thumb safety or an inlet mag well funnel. Who knows what your needs are better than you? Do the research and then buy the Mil-spec for the base gun. That’s my opinion.

I am having fun, though;-) Gotta love that 1911A1 and all the history that comes with it.

Vaughn Terpack,
master shootist.

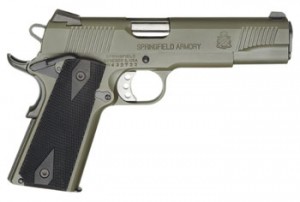
Springfield Armory OD Green Armory Kote™ “Loaded” 1911 Pistol

Springfield Armory 1911 OD Green

Review by Dennis Pollock

I would like to make another confirmation on the PX9609L OD Green. I have been looking for one for about 6-months. No body had one and I called Springfield and found out that they had quit making them. Even though on most web-sites they (all) still advertise PX9609L – The standard answer is, “Don’t have one and cant’ get it anymore.” My standard answer, “Take it off your site.”

Anyway, A friend and I were at a gun show in Ft. Worth Texas (I am a Texan), and it was a very busy and great show. My buddy looked over a guy’s shoulder and, low and behold, there was a used one on the table. You can imagine my reaction after looking for 6-months. I squirmed my way in and put my hands on it. The woman helping the owner asked if she could help. I said, “I would like to see this Springfield.” She unhooked the warning system and I put it in my hands. I have owned several Colts and Springfields including a Trophy Match, which is an awesome gun, but this one felt good. I looked it over and it had slight holster wear and then checked functioning parts. All OK. I pulled slide back about 1/16 inch and barrel was still tight – so on and so forth. I ask the history of the gun and she said she had no idea and had just got it in the day before. The gun had been shot (looking at the inside of the barrel) but it was in great shape. The price was $550.00. Of course I asked for bottom $$$ and yep – that was bottom dollar. Looking on the net and talking to Springfield, that was not a bad price and you will understand more as you read.

I purchased and was on my way. I took my new baby home and took the Green Monster apart and cleaned and inspected. By the way, I have cleaned everything I own with Kerosene and it always works great, but this time in the barrel, I used Outers non toxic foam twice, and barrel shined like new. I understand Gunslick makes same. Oiled, greased, buffed and out to the range. A little back ground: I shot IPSC and IDPA since 1987 but have had to quit for a health reasons, but I still always shoot as if I were doing that, with minor modifications. I put some standard IPSC targets up and some steel – and loaded it up – always one round at first with head turned, to insure it functions, especially with a used pistol. Most of my 45’s in the past have had adjustable sights but this one has standard Novak sights which are adjustable for windage only, and they are night sights. I put 3 rounds in and off to one side as fast as I could. Perfect. I put three more in and lined up on the black line I put across the target – leveled and centered my sights and round one – ½ inch below and off center, ½ inch at 10 yds. Second shot little above and third little left but I figured it was me. This was all with normal IPSC stance free hand. This was out of a Chip McCormick mag so I loaded three more in a Colt mag and stepped back five yards. Leveled and centered: first shot, almost dead on. I turned and fired at two steel and plink-plink down they went. WELL, you know that satisfied feeling and that high you get off of smelling a fired piece of brass? WOW. I loaded a CM 11-rd up and went to town – six steel and five shot group on paper – 4-A’s and B, then an aftermarket mag and at 20 yds. I lined up on the steel and first shot was off center 1-1/2 inch and low 1 inch. Took rest out and one on paper head shot – about right corner mouth (you have to imagine that on a IPSC target). So I loaded CM up and to do a test. Now I will remind you, none of this is bench rest stuff. Long time ago I shot Bullseye, so I got into stance with five rounds at 12 yds., and shot five rounds in about 15 seconds. HOLY COW – I covered all five shots with a fifty cent piece. I continued my shooting time with about 200 rounds standing, sitting, one knee, BLA, BLA – what a weapon. Not one single malfunction at all, in about hour and fifteen minutes. This is by far one of the best I’ve ever owned. It’s fully loaded, with ambi safeties and the works. It’s a heck of a pistol, and there is no other feeling like a single stack 1911 in your hands. To be honest – like I said, I have owned many 1911/A1’s – Springfield is by far the best.

Specifications:

Springfield Armory 1911 OD Green

OD Green Armory Kote™ PX9609L
Caliber: .45 ACP
Capacity: 7+1
Barrel: 5″, 1:16 LH
Sights: Novak® Patented Low Mount
Sight Radius: 6.5″
Size: 38 ozs., 8.5″ overall length
Trigger Pull: 5 to 6 lbs.
Magazines: 2 Mags.
MSRP: $829.00

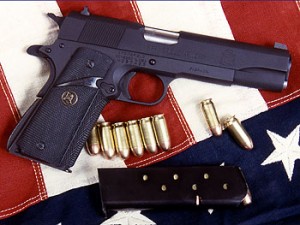
My Springfield Mil-Spec M1911A1

Springfield Armory Mil-Spec

by Syd (1997)

I took the SA Mil-Spec to the range today for the first time. I stepped into a lane next to two guys who were trying to train on a .40 S&W Glock. They were all over the paper. I put on my shooting gloves slowly, and with a certain degree of ceremony, loaded a magazine, ran the target out to about 10 yards, and proceeded to shoot a ragged hole in the x-ring, and then, to ice the cake, loaded a second magazine and shot a second ragged hole into the ocular cavity zone. The boys with the .40 packed their gear and went home.

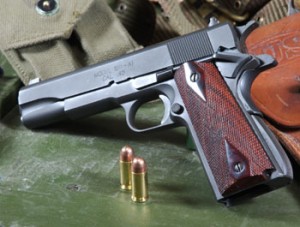
This particular gun is Springfield Armory’s rendering of the Mil-Spec M1911A1. It’s as close as they want to get to the original configuration that was issued to the troops. It varies from the true mil-spec M1911A1 on some small details: the ejection port is larger and lowered; the magazine well is slightly beveled; the manual safety is a bit larger; the front sight leaf is larger and thicker; the barrel is throated for modern hollow-point ammo, and it has a black parkerized finish rather than the greenish gray of the WWII guns. It is milled from better steel with the benefit of contemporary tool technology, so, in a way, you could say it is “better” than the original Colt Government Model, while maintaining the look and feel of the original. It lacks, of course, the cache of those wonderful old pieces that fought their way across Europe and the Pacific, but those guns are museum pieces now, and I wouldn’t take one out to play with it.

I have read so much about people “tricking out” these guns, essentially rebuilding them into custom pieces, that I expected to immediately launch into a series of mods. But now I find myself debating if I should do anything with this one. I don’t get slide and hammer bite, so I really don’t need to change the beaver tail and hammer. I don’t like super-light triggers, and the trigger on the Springfield is fine – it “breaks like a glass rod.” Being a true M1911A1, it doesn’t have the magazine safety like the Hi-Power, the firing pin block of the Series 80 Colts, or the firing pin block and mag safety of the S&W DA/SA’s, so the trigger is already light and smooth to my touch. I really like the Parkerized finished. I’m the kind who grieves a lifetime over rust spots in blued steel. I added a full length guide rod from Wilson Combat and a set of Pachmyar grips. I will probably change out the hammer and sear because I want to put an extended beavertail on it, and I’ll probably have Novak combat sights installed on it. I’ll do stuff to it because that’s part of the reason I wanted it – the 1911 is the hot rod frame of pistols like the Model A Ford and the `57 Chevy are with cars. But it’s nice to feel like I don’t need to do a damned thing to it for it to be a very enjoyable shoot.

My first real shakedown cruise with the big .45 was an IDPA match, and I was delighted with it. There were no stoppages or malfunctions and the accuracy was impressive. The shots went where I wanted them to go. I can definitely see why a lot of people view the M1911A1 as the greatest fighting hand gun ever built.

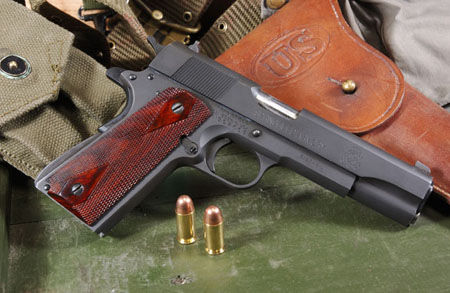
Springfield Armory Mil-Spec 1911

It’s not easy to find things to criticize about the gun. With 2500 rounds downrange, it has proven itself to be highly reliable. Although not “match grade,” the accuracy is excellent and more than adequate for tactical action shooting like IDPA. It is capable of 3″ groups at 25 yards. It did experience a half dozen failures to feed within the first 300 rounds. However, after adding the Wilson full-length guide rod and completing the 500-round break-in period, it has experienced no further malfunctions. It has never experienced other types of failures such as double feeds or extraction failures. The front sight blade is square on the back and can snag on a holster if the holster isn’t perfectly fitted for a Government Model 1911. The gun is also large and heavy, a little too big for comfortable extended concealed carry. I know people who do it, but at 39 ounces empty, the Government Model is a load.

There are some things about the 1911 that you have to experience to appreciate, particularly the way it feels in your hand, the accuracy, and the surprisingly mild recoil it creates in launching that big old bullet. Some of it is emotional and aesthetic. It is, after all, the handgun carried and fought with by American forces through four terrible wars. It was affirmed and proven in those trials by fire by those who had to use it. That counts for something.

To me, the thing that sets the 1911 apart is the way that it shoots. In my hand, a Government Model 1911 is just more accurate and faster than any other autoloader I have used. Some of this is the trigger; some of it is the inherent accuracy of the .45 ACP cartridge, and some of it is in the design of the gun. In terms of accuracy and power, I find myself comparing the 1911 not to other autoloaders but to long-barreled wheel guns. There are other good combat guns, but if I knew I had to take one pistol to a fight it would be a 1911.

As to what empirical data might be drawn upon to substantiate the superiority of the 1911, perhaps it is that so many old gunfighters seem to like them. This follows the logic of Hagar the Horrible when asked if you had to be smart to be a Viking. He answered, “No, you just have to be smart to be an old Viking.” For more on this issue, see “Why the 1911?”

The main thing is that they’re just so much fun. They shoot great, look great, and feel great.

Five Years Later

This gun has served well. I shot it in a lot of matches, and then, when in my fickle way, I moved on to other models, my son adopted it for his match gun and he has come to love it more than I do. In five years of heavy service the only problem I have had with the gun was that the front sight post worked loose and I had to have it re-staked. I replaced the factory 17 lb. recoil spring with an 18.5 lb. spring from Wolff. I did a bit of polishing on the feed ramp, throat and chamber, but nothing extensive. I never did add a beavertail, Commander hammer, or custom sights. I decided that I just liked the gun the way that it was, and if I wanted to do extensive modifications on a gun, I would do it to another and let this pistol maintain the classic form it has.

While these guns have gone up in price a little, they remain an excellent value. I paid $400 for mine NIB in late 1997. I’m still seeing them in the $475-$550 range. Whether you want a pistol that is a close, if slightly enhanced, reproduction of the G.I. gun, or if you want a solid platform upon which do build up a custom gun, it’s hard to do better than the Springfield Armory Mil-Spec.

Nine Years Later

This is the pistol I bought in 1997 to start shooting IDPA. It’s the pistol that inspired The Sight M1911. It’s the one that, when I fired the first magazine, I said, “Wow!” It’s the one that my son, Alex, prefers over his $1K Kimber for matches, and he never ceases to try to get me to give it to him, and calls it “my pistol,” but I won’t give it to him, at least not yet, not until I’m too old and feeble to shoot it. I haven’t shot it in several years, in part because Alex is always shooting it, and in part because I have come to prefer the Combat Commander for matches. The Government Models are a little slow for me in terms of getting onto the target. Yet, I love this gun like few others. It’s in that rarified rank with the Winchester Model 94 with which I took my first deer. I have other pistols, but none of them have the psychic power that this one does.

My dad was a tremendous repository of bullshit about the Government Model .45. Most of those tales like, “If you hit a man in the thumb with one it will spin him around,” and, “A normal person couldn’t hit a door at 20 feet with one,” I heard first from him. The irony was that he had carried one during his brief stint in law enforcement before I was born. He was Navy and I don’t know if he actually got any training on the gun during the war. But, nevertheless, one of the first tasks I had with the gun was to work through the lore and stories, and separate fact from fiction.

The SA Mil-Spec was a game gun for me from the start. I wanted to check out the sport of IDPA which was new at that time. That’s why I bought a big, heavy gun. I think I only actually carried it for personal defense once. It’s just a bit too heavy to be comfortable for me for carry. Big guns like this are more pleasant to shoot for matches and such. The follow-up is excellent; accuracy is inspiring, and abuse to hands is kept at a minimum. It never was about the calibers. It was about “shoot-ability.” I just noticed immediately that I got better hits faster with the SA/45 ACP combo than with the other handguns I had tried. The inherent accuracy of the pistol, its excellent trigger, and the .45 ACP cartridge make it a rewarding handgun to fire. However, I didn’t get rid of my lightweight snubs and compact 9mm’s that served for personal defense. The rest, as they say, is getting to be history at an alarming rate. The Sight M1911 will celebrate its first decade in January of 07.

The main frame home page of The Sight M1911 has had 1,112,731 hits. That’s over a million hits on one page of that web site, and the site has well over 300 pages at this point. That’s an honest number. I started the counter at 0 in ‘97 and I have never messed with it. I won’t say that The Sight is the “best” thing I have ever done, but it has definitely had the most impact of any piece of writing I have done, and this pistol was the impetus for it.

Unconsciously, this particular pistol has influenced a million people. I find that statistic staggering – the miracle of the internet, I guess. It has never “fired a shot in anger.” It didn’t have to. It’s an icon. I started my e-mail newsletter in 1999 just to alert people on what was going on in gun rights, and on my mind at the time was defending my right to keep and bear this pistol. This pistol is “mythical” in the sense that it is a symbol that points to a reality that is beyond it, and for the most part, inexpressible. How do you describe freedom and heroism? This gun points to that level of meaning. It demands that you search out the stories of heroes and villains who have fought with the M1911, like York, Basilone, Dillinger and Barrow. That’s where this gun takes you – to some of the darkest moments of the 20th Century. There is perhaps one other handgun that has this kind of effect, and that would be the Colt Single Action Army revolver. The old six-gun is an antique, obsolete for anything except cowboy action shooting. The 1911, old as it is, is not at all obsolete, and is probably more popular and more in use today than at any time in its illustrious history.

I do consider the M1911A1 to be the greatest fighting handgun, but that’s just my opinion and you know what they say about opinions. There are other fine pistols that will do the job, but none to my knowledge have seen the moments of greatness that Old Slabsides has. There are none that feel quite as “right” in my hand, or burn up the stages quite as well for me. Most of all, no other firearm has fired my imagination and sustained a decade-long effort to understand and describe it that this one has.

The Mil-Spec is really nothing special when viewed objectively, just a 95% true reproduction of the G.I. M1911A1 of World War II. But to me, it’s something more like a magic carpet.

Springfield Armory Mil-Spec 1911

Springfield 1911A1 Mil-Spec

Springfield Armory Mil-Spec

Steve White

After weeks of rain and moss growing on my arms, it finally cleared enough in this state (Washington) to try out my new 1911A1 Springfield Mil-spec Basic. I picked the moss off and hiked into the Cascades. The reason for the hike is my range was closed and I’ve been waiting weeks to shoot this pistol. Tired of looking at it on my bench.

So I packed up and went into the hills.

After hiking a few miles in, I found a good safe place to shoot. Set up my target 35 feet in an area all the distance I could measure. And pulled that 2 1/2 pounds of steel to begin what I’ve been waiting for. I packed up 100 rounds of FMJ plus various hollow points such as Lawman, Federal, and Star. Also brought along some old government magazines to test. Out of the box test, only additions were a good cleaning, lube and shok-buff.

At 35 feet, I shot 2 inch groups in a Weaver stance. I thought, “not bad for me!” Next, I loaded up with hollow points and not a misfeed. I continued to shoot FMJ and again, no problems. Old magazines, no problems.

I was happy. Shot 3 kinds of hollow points and 100 or so standard FMJ loads.

Some of you remember my previous post regarding the Springfield 1911A1 Mil-Spec Basic. The pistol came with high profile 3 dots sights, throated, tight slide to frame fit, beveled magazine well, ramp looked very good, lowered and “flaired” ejection port, the forged barrel, slide and receiver are nice.

All for $399.

Custom work? Whatever you want. November issue if GUNS magazine has a good article on Wilson custom guns using the 1911A1 Springfield as a base gun.

Out of the Colt’s, Glock’s, Makarov’s, S&W’s, and a Beretta I’ve owned, the Springfield no question is one of the best out of the box. Long term? Only time can tell.

All I’m going to do is have a AMBI safety installed (left handed) and some trigger work done.

Thats it.

Steve

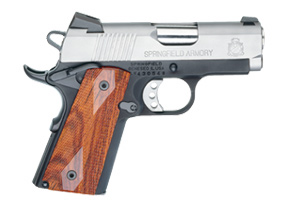
Springfield Armory Loaded Micro-Compact 1911-A1

Springfield Armory Micro Compact

By Bill Vojak

I finally had a chance to take my Springfield Micro Compact 1911 out to the range this weekend. Fit and finish are very good. The gun takes officer magazines, and is equipped with Novak low profile night sights. The whole gun is “melted” so there are no sharp edges. The gun has a bushingless barrel, an ambidextrous safety, a beavertail, with memory groove, It also has the Integrated Locking System, that you can simply ignore. The lock seems to have no effect on the trigger feel.

Earlier in the week I sorted through my ammo supply and dug up 3 different types of rounds (all were purchased in 1994).

  1. 185 grain, cone shaped with a flat nose. All lead
  2. 185 grain, cone shaped with a flat nose. Fully jacketed
  3. 185 grain +P, jacketed HP with a average sized opening

So over the weekend I grabbed an assortment of ammo and headed to the range. I took 200 rounds with me, providing an mixture of the three above mentioned types of ammo. I had 3 magazines. The two Springfield magazines that came with the gun, and one Chip McCormick 7 round Shooting Star magazine.

I started with an SA magazine and the all lead ammo. I had 2 jams with that magazine. One in the middle, and then on the very last round. The next SA magazine provided the same results. The McCormick magazine only had one jam in the middle.

After a bit of shooting I realized that the SA magazines have a dimple on the follower that seemed to cause the last round to in each magazine to fail to feed. The McCormick magazine had random failures, but never any last round problems. I switched to the fully jacked ammo and had similar results. When I switched to the HP ammo the failures to feed dropped considerably. But after just a little bit of shooting the failure to feed rate amongst all the ammo types started to drop off.

I would estimate that in the first 50 rounds, I had at least 1-2 failures with each SA magazine, and 1 failure each time I used the McCormick magazine . But as I got close to 50-60 rounds the failure rate was closer to 1 failure for each SA magazine , a 1 failure every second use of the McCormick magazine .

During the next 50 rounds I only had about 4-5 total failures to chamber, and only with the SA magazines, and these were only on the last round of the magazine. The final 100 or so round only had one minor failure. That was with an all lead, flat nose round, and the slide was just a 1/4 or so out of breech. I tapped the back of the slide, the round finished chambering, and I fired it. This happened at somewhere about round 140-150, so the last 50-60 rounds chambered and fired without any problem, using all 3 magazines.

I do have a couple more of the Chip McCormick magazines on order and will use them instead of the SA magazines for CCW, as they seem to be more inherently reliable, and they hold one extra round (7). I had no failures with the gun firing when the trigger was pulled. If there was a round in the chamber and you pull the trigger, it fired.

So it looks like it took about 200 rounds to break in the gun. I still want to put another 200-300 through it with no jams before I’ll declare it fully broken in. It seems that generally speaking, all of the 3″ micro guns made by the different manufactures tend to be a bit finicky at first. The physics of making a sub-compact .45 just seem to require much more thought than when designing a 5″ standard gun.

As for shooting, I was having some problems at first with it shooting low. Then I realized this gun really likes you to line up the 3 dots on the sights instead of the tops of all the sights. Once I did this it still shot low, but only a inch or two instead of four or five. Next time out I’ll be trying some 230 grain rounds and see if that raises the impact point.

I was using some homemade 8 1/2 x 11 inch paper targets and had no problems keeping all of the rounds on half of the paper.

By time I got through the break in period and got a feel for the sights, I had put about a 150 rounds through the gun. At that point I tried to see what types of groups I could get. At 30 feet a typical 5 shot group was 3-4 inches depending on ammo. I’m pretty darn sure I can cut that down by at least one inch with a bit of practice, using ammo that the gun likes. The short sight radius does present some practical limits when shooting.

There is a fair amount of muzzle flip, but the recoil in my opinion, is mild. I’ve never really been recoil sensitive, except a Ruger SP101 in .38 special I own. Shooting my Taurus 85CH with 158 grain +P rounds never proved to be uncomfortable, even though it’s smaller and lighter than the SP101. I guess the geometry of the grips on the SP101 just don’t match my hands. A problem that is easily solvable by buying a new set of grips.

It’s been a while since I’ve fired a .45, and I have to say that it was fun. I never really understood all of the stories about the “tremendous recoil”, and how “it will knock you flat on your a**” and so on that some people claim regarding .45s. Even with a 3 inch barrel, a alloy frame, and shooting 185 grain +P ammo, I felt that the recoil was no big deal.

A couple other people tried shooting the Micro and liked it. Like me, they all shot a bit low. The guy in the lane next to me let me try his Kimber Ultra (5″). After shooting the Micro, the full size gun felt like a .22!

So I’m really happy with this gun. I still need some more practice with it. It’s looking like long term reliability will be high now that it’s past the initial break-in period. I have no problem with having to put a few hundred rounds though a gun to break it in. Too many people buy a gun, loaded it up, and never fire it till then need it in an emergency. As this is my new concealed carry gun, I’d still be running a few hundred rounds through it on a regular basis, even if it had been 100% reliable from round #1.

My only other problem is that Springfield provides a manual that describes three different takedown procedures, none of which are for the Micro. I had no problem removing the slide, but I still can’t figure out how to remove the barrel. None of the three described methods in the manual, worked. Further research on the WEB led to the discovery that Springfield forgot to include a spring tool in the box. It’s just a small plastic clamp that keeps the spring compressed so you can remove the barrel. I called Springfield and they are sending me one.

I bought a Don Hume J.I.T. holster for it, and It’s really nice. It’s just a thin strip of leather that covers from the trigger guard, to the end of the barrel. Even though the Micro’s barrel and grip are longer than my Taurus .38 snubby, It really is easier to carry since it is so much flatter. Also it’s easer to carry spare ammo in a magazine, rather than a speed-loader. Once I get the two extra McCormick magazines I’ll have a standard carry of 21+1 rounds of ammo.

As for the carrying cocked & locked, something I was a bit wary of, I’ve already transitioned to carrying with a round in the chamber. The J.I.T. holster completely covers the trigger area, and the slide safety clicks on with a good solid click, and stays on. Carrying cocked and locked has ended up being no big deal. Of course I am also making sure that I keep my finger out of the trigger guard and off of the trigger at all time as no manually safety can be a substitute for good weapon handling.

I’m very happy with the Springfield Micro and would recommend it as a concealed carry gun. The quality is excellent and the reliability looks like it will very good.