fbpx

The Elements of a Trigger Job on an M1911 Pistol

By Syd

There are four areas of concern with a trigger job: the sear and hammer hook interface, the sear spring, the mainspring, and the trigger bow. There are risks associated with the first three.

The sear and hammer hook interface can be polished and lubed. Some people will attempt to take a lot of metal off the hooks and sear face. This can make the gun dangerous by allowing the sear to slip off of the hammer hooks or not catch during the cycle. This can cause the gun to fire unexpectedly or fire multiple rounds on a single trigger pull. A polish is good but removing metal and changing the angle of the hook-sear interface is dangerous. Modifications to the sear face and hammer hooks should only be attempted by a trained and certified gunsmith who has the proper tools and know-how to do the job.

The sear spring puts resistance on the transfer bar of the trigger and on the foot of the sear (and also the base of the disconnector). Proper tension is critically important. The sear spring can be bent to give less resistance to the trigger, but this also reduces the tension against the base of the sear. If the tension is reduced too much, the sear may not re-engage the hammer hooks during cycling. This can result again in multiple shots and even full auto fire. Adjustments to the sear spring should be attempted only by a trained professional. I have done it, but when I do, I use a stock Colt sear spring as a template and I do not vary significantly from the factory curves in the spring.

The Mainspring (the spring hidden in the mainspring housing at the lower rear of the grip) controls the force of the hammer. In doing so, it also contributes to the pressure applied to the sear face-hammer hook interface. You can replace the mainspring with a lighter mainspring and get a significant lightening in the trigger pull. It will also make it feel less gritty. Factory spec for Colt mainsprings is 23 lbs. I put a 21 lb. mainspring in my Combat Commander and it did a lot toward lightening and smoothing the trigger pull. You can actually go down to a 19 lb. spring and still have a reliable gun. Factory spec for Kimber pistols is 21 lbs. If you go down to a 19 lb. spring, do extensive reliability testing before deploying the gun for serious work. This risk here is obvious. If the mainspring is too light, it could fail to detonate the primer and result in a misfire.

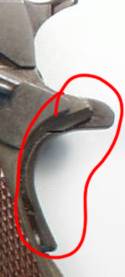
The last area of concern is the trigger bow. This piece is the bow that begins behind the trigger and extends back around the magazine well to engage the grip safety. The bow should be checked to see if it is moving freely and not snagging on either the frame or the magazine. I like to stone the edges of the trigger bow to make sure there are no small burrs that may be snagging on things. There are no real risks associated with the trigger, but there are also the least benefits to be obtained. Changing or polishing the trigger bow does very little toward lightening the trigger pull, but it may remove some slop in the trigger.

Regardless of whether you do the work yourself or have a gunsmith do the work, always go to the range and test the pistol carefully after a trigger job. Even if the work is done by a trusted gunsmith, test the work yourself. Be mentally and physically prepared for the gun to go off unexpectedly or fire multiple rounds. Have a firm grip on the gun when you load it.

There are some safety tests that you can do prior to range testing. With an UNLOADED GUN, lock the slide back pull the trigger and hold it back, and then release the slide release. The hammer should remain cocked. With the slide in battery, cock the hammer and slap the side of the gun briskly. The hammer should not fall. Cock the hammer and push the slide back about a quarter of an inch and pull the trigger. The hammer should not fall.

For a complete list of safety tests for the M1911, see https://sightm1911.com/lib/tech/safety_test.htm

Custom M1911A1 Modifications

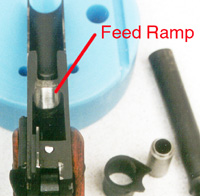
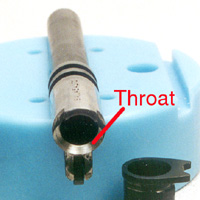
A Pictorial Guide Polished Throat and Feed Ramp – To improve the feeding of hollow point and other flat point ammunition; the original design had a very sharp feed ramp which fed round nosed (full metal jacket or round nosed) ammunition well, but doesn’t feed hollow point bullets so well.  This is a necessity for proper functioning with hollow point defensive ammunition.  See “My Fluff and Buff

Shown is the feed ramp and barrel of the Springfield Mil-Spec


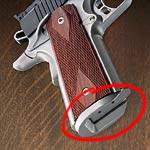
Beveled Magazine Well/Magazine Well Extension – To improve the speed and ease with which magazines are inserted into the well during a reload.

The extended magazine well is nice for competition use, but it makes the gun harder to conceal for carry guns. A beveled magazine well is a good compromise for improved loading without the extra length, but it is not a necessity.

Kimber Super Match with an extended magazine well.


Custom Sights – The original sights of the M1911 and M1911A1 were quite small and did not lend themselves to rapid target acquisition. Custom sights enable to shooter to more quickly get a sight picture.

Millet Night Sights
Millet Night Sights
Wilson Snag Free sights installed on an Argentine Sistema slide by Roderus Custom


Lowered/Flared Ejection Port

To improve ejection of the spent casing out of the chamber.

This is a necessity for reliable functioning.

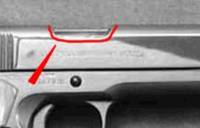
The red outlines the bottom of the standard ejection port on an original 1911A1.
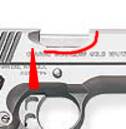
This is a port which has been lowered and flared - note the indentation in the slide behind the ejection port.


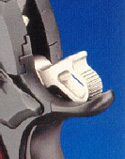
Extended, Ambidextrous, and Tactical Safety – Safeties come in many different sizes and shapes as you can see from the pictures to the right. It’s generally a matter of personal preference. For instance, the width and size of extended safeties varies from maker to maker, and gunsmiths can round, trim, and shape safeties into almost any shape. Some people like the safety to be accessible from both sides of the gun, while others like the ‘thinner’ feel of only having one.

You may replace your safety several times before you find one you like. Or you might be lucky and get one that fits right from the factory.

This is the original safety on a 1911A1.
This is a typical extended safety; note the longer flange which increases the area with which you can operate it.
This is a tactical safety. It's deeper than the standard safety, but it's not any longer. This often provides a good compromise between the full extended safety and the standard safety.
This is the backside of a 1911A1 without an ambidextrous safety.
This is the back side of a 1911A1 with an ambidextrous safety.


Beavertail Grip Safety – Increases the area over which recoil is spread which reduces the pounding of the web of your hand; eliminates hammer bite, and allows you to get a higher grip on the gun without being bit by the slide. Also provides for a more consistent grip, resulting in greater accuracy.

If you add an extended beavertail to the gun, you must either bob the hammer or install a Commander style hammer.

This is a standard grip safety. Note that it doesn't protrude all that far from the back of the frame. It's very easy to get the meat of your hand over this thing and get pinched by the hammer coming back when the slide cycles ("hammer bite") or be nipped by the slide as it cycles.
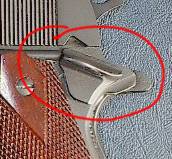
This is a beavertail grip safety. Note the sharp turn up at the back, and the small pressure point added where the arrow points.
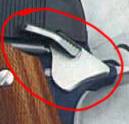
This is another view of a beavertail grip safety. Note that the hammer actually nestles into the top of the safety.


“Loop” or “Skeletonized” Commander Style Hammer
or Bobbed Hammer – A Commander style hammer, a.k.a. “loop” or “skeletonized” hammer, generally fits with a beavertail grip safety.

The Commander style hammer is lighter which provides a faster firing cycle for the gun and it is less likely to snag on clothing when drawn from concealment.

If you add an extended beavertail to the gun, you must either bob the hammer or install a Commander style hammer.

A bobbed hammer allows the grip safety to be trimmed back considerably at the risk of putting your hand up into the slide when grabbing the gun. The worst configuration is the spur hammer with no beavertail safety.

This is a standard "spur" hammer.
This is a Commander style hammer. There are many variations on this design, smaller and larger, different hole patterns, jeweled, etc.
This is a radically bobbed hammer. Some hammer bobs leave a portion of the spur so that you could thumb cock the gun if needed. This hammer would mandate Condition 1 carry. The bobbed hammer does allow the cutting back of the beavertail grip safety, shortening the gun up some.


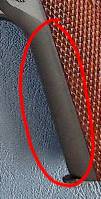
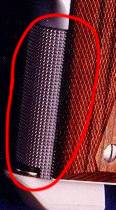
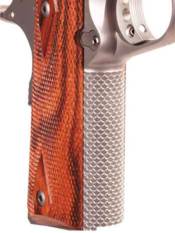
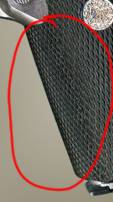
Checkered Front Strap – Checkering is done to improve the grip, feel and style of the gun. This is generally a matter of preference. Some treatments feel better than others, and some look really cool.

A standard front strap - no checkering.
This is a checkered front strap.
This is a scalloped front strap.
The rubber grips cover the front strap here.

Mainspring Housing – There are a lot of variants available here; it’s generally a matter of personal preference.

This is a flat mainspring housing which was characteristic of the original M1911
This is an arched mainspring housing which is characteristic of the M1911A1
This is a bobtailed mainspring housing.

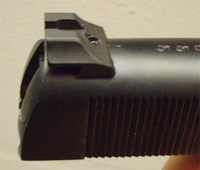
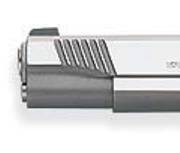
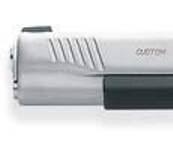
Cocking Serrations – These are grooves in the slide which make gripping the slide to cock the gun easier. There could be serrations on the back or both (there are few without serrations at least on the back). The depth and style of serrations vary considerably. Some users have found that they do not like the front cocking serrations because they tend to tear up leather holsters.

This gun has both front and back cocking serrations which are very wide.

Slide Release – There are various types of slide releases, including standard, tactical, and extended. This is a matter of taste and whether or not you feel you can operate the release without the extensions, which are similar to the extensions on safeties.

Extended slide stops can be dangerous because they extend back nearer to the thumb which makes them more likely to be inadvertently engaged by the thumb in recoil.

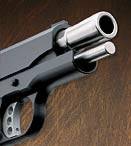
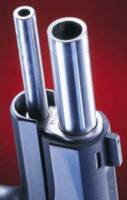
This is a bushingless bull barrel. Note that the barrel is much thicker at the end than in the middle; it flares out.
This is a match bushing barrel from Ed Brown.

Melting – “Melting” is the process of smoothing off all the hard edges on the gun. Simple de-burring and softening is called “dehorning,” while melting actually alters the look of the gun.

A service weapon should at least be de-horned. Higginbotham says that it should feel smooth “like a bar of soap.”

This the front of a Kimber in standard configuration.
This is a melted front end on a Kimber. Note the radical smoothing of all the edges.

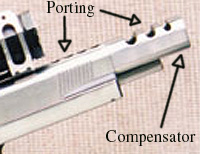
Porting and Compensators – The purpose of porting and compensation is to keep the muzzle down during the recoil pulse of the gun. Ports are holes which are drilled through the top of the barrel and slide which release gasses in a jet as the bullet passes them in the barrel. It acts like a retro rocket on a space capsule, pushing the barrel down. The compensator adds weight to the front of the gun reducing the upward flip of the gun when it fires and pulling the muzzle down for more rapid re-acquisition of the target.

Note: Ported barrels are not allowed in IDPA competition. Porting is a modification which is primarily done on IPSC competition guns. It is not advised for a personal defense weapon since in the even that the gun might need to be fired close to the body (from retention) the hot gasses could spray up into the eyes.

This is the front end of an SVI Unlimited Class race gun

See also:

Custom Auto Pistol Modifications for Serious Duty by Jim Higginbotham

Fluff & Buff – Tips for enhanced break-in and reliability preparation for autoloading pistols

Reliability Secrets by John Marshall

Recommended Modifications to the Colt .45 Auto for Self-Defense Use by Les Bengtson


Modifying the 1911

By Jim Higginbotham

The Browning designed 1911 pistol is arguably the finest close quarters combat pistol ever made. It is also the most modified or customized pistol ever made. Some of the myriad of changes made to John Moses Browning’s masterpiece are indeed enhancement but not all that glitters is gold. So, let’s take a look at what is out there and just what utility it might serve.

First off, let me say that this is not a piece advising you to modify your personal pistol. You should be aware that there is some debate on whether it is advisable, from a legal liability standpoint to do so. The idea is that should you be forced to use your pistol in self defense the prosecutor, should there be one, might make a case that you were irresponsible and were so interested in guns that you were just itching to use it. I don’t personally put much stock in this argument but never the less it is out there. At any rate I am merely discussing the various modifications and their effects and will leave the decisions on your own weapon to you alone.

Secondly, I should point out that I am not discussing the various mods that are mere affectations or strictly meant to be used in competition for I am about the serious use of the handgun. Nothing at all against competition and gadgets here it is just that I am not discussing this except for some overlap in features which can be used both competitively and in the real world of shooting to live.

With that out of the way let’s start with the basics. There are many 1911 clones out there so let me specify that we are discussing the real military pistol or the equivalent Colt commercial Government Model for the most part. Actually the 1911 or 1911A1 is a fine pistol just the way it came way back when. The most obvious drawback to it was that the sights are so small (slightly larger on the A1 but you would hardly notice). One who really knows his Colts knows that there was a 1/10 inch optional front sight (fixed rear) available on request and that there were several pistols actually shipped with this option. So far as I am concerned, with this option, you have just made an original 1911 a 9.5 on a scale of 1 – 10. The rest of the discussion is how to make it a 10. Now one may legitimately ask about the trigger pull but nearly all of the real 1911s I have seen ( those not reworked by some arsenal or have been “repaired”) had triggers in the 4-5 pound range. One really doesn’t need much better though a lighter trigger might be desirable as we inch toward that “10”. There are also some commercial equivalents to the early guns available today. One such pistol is the Colt 1991A1. Right now its future is in doubt but as an example it is quite a pistol. I have examined several dozen of these ( usually in the process of customizing them) and I must say almost all ran right out of the box, the sights are decent and the trigger pulls were just about 4.5 pounds on average. I might want a more robust rear sight – since I walk into walls a lot – but that is sort of picking nits. I might also want to enhance it’s accuracy just a little – though it is certainly more than adequate for defense and to take off some of the sharp corners. Another pistol that comes about ready to go out of the box is the Kimber Custom Classic. Yet another is the Springfield Armory 1911s, though these might use a little work on the feed system in order to function reliably. No doubt there are others so don’t take my not mentioning them as a slam on these other brands.

If you happen to have a pistol which has the minimal requirements of highly visible sights and manageable trigger then there are many options open to you. A good sturdy set of sights which are snag free will cost you somewhere between $50 and $100 installed. Tritium night sights ( which will last about 10 or 12 years) are a bit more and, while nice, are not essential. Adjustable sights can be up to $250 or even $300 but in actuality they are a disadvantage, prone to breakage and they tend to get “unadjusted” as well as adjusted. Most serious gunsmiths that I know have fixed sights on their personal 1911s. A good crisp 4 pound trigger job will run anywhere between $40 and $100 from a reputable ‘smith. Don’t take chances here, an unreliable trigger is dangerous.

OK, so we have a basic pistol which feeds ball ammo with monotonous reliability ( to insure this always use quality magazines), has sights which are at least 1/10″ wide (.100″), .125 is better, and at least .140 – .200″ tall, and has a reasonably crisp 4 – 5 pound trigger. Noting that there are 1911s from custom smiths out there that cost up to $3,000 you might inquire – what am I getting for my money? I will attempt to tell you, without stepping on the toes of too many gunsmiths – most of whom are dear acquaintances to me. In some case the news is not good though.

To my mind the priority goes to function. The original military weapons ( and Colts up to about 1969) were not noted for feeding unusual ammunition such as semi-wadcutters and the newly designed hollowpoints ( oddly enough the ammunition manufacturers have only recently discovered that they can make JHPs with a roundnose profile which feeds just fine in older guns). So the first major consideration after sights and trigger are modifications which actually enhance the reliability of the weapon. A gun that won’t work under the worst possible conditions should be repaired or thrown away as it is a danger to the shooter. Most smiths offer a “reliability” package which usually consists of modifying the feedway ( both in the frame and barrel), polishing the breechface and adjusting the extractor tension as well as removing sharp edges from the extractor “hook”. Not everyone can do this work so be careful. Don’t let anyone tell you that the separated feedway in a 1911 ( part in the frame and part in the barrel) is a big disadvantage – it is not. Nor is it necessary to have a “ramped” barrel to have a chamber which supports the case head for some of the hotter loadings ( however many commercial barrels – either ramped or unramped – do not support the case head so be careful with +P loads).

Leaving accuracy enhancing modifications for later ( I will explain why) lets look to the Controls on the pistol. Likely the most common modification in this area is the thumb safety. Most people want a larger safety to enable them to disengage it more surely when speed is of the essence and in a fight for your life speed is usually of the essence! Many want to augment this with an ambidextrous safety which can be manipulated by either hand. Such modifications are fine and even desirable, however there are some pitfalls. Most common is that just drop-in in a safety can leave you with basic controls that have sharp edges and can cause problems with your handling of the weapon. Some are even sharp enough to lacerate the skin. Another is that if the safety is too large – especially on the right side of the frame for right-handed people – then it can get inadvertently disengaged. This is one reason I do not opt for “bilingual” safeties on most of my 1911s. Not that it worries me too greatly to find I have bumped the safety off. Good gun handling and a good holster are the essence of firearms safety not the mechanical device too many have grown dependent on. Of all the safeties on the market I am most impressed with the Chip McCormick speed safety. It is extended but it has no sharp edges and literally “melts” into the gun. Yet there are other good safeties if you want to put in a little work de-burring them. One must make sure that they actually function, I have seen many a “custom” 1911 which would drop the hammer when the trigger was pulled with the safety off ( usually they drop the hammer when you release the safety and usually they do not fire but it is scary).

These days a popular control modification is to replace the grip safety with a wider version that not only helps to spread the recoil over wider area of your hand but also allows a higher grip on the weapon which is an aid in controlling recoil. Done correctly this enhances the handling of the pistol though I have never noticed that it has a great effect on my shooting a particular drill it helps to make those long practice sessions more pleasant and a higher grip is a good thing. Again, you want to make sure the safety functions. The most common problem I see is that the shooter will fail to disengage the safety with his higher grip. Many such safeties now come with a “speed bump” on the lower part to help insure disengagement. Years ago many folks pinned their grip safeties – Jeff Cooper, the Father of the Modern Technique was prominent amongst them. Personally I don’t see any need to do this since the grip safety surfaces can be “adjusted” to disengage at the slightest movement but then again, I don’t depend on mechanical devices for my safety so it does not bother me much to see an inoperable grip safety. Mine work since someone else might be shooting my pistol and expect it to work.

Then there is the slide stop. Now we start to tread in dangerous waters. A thing as simple as a slide stop can end your life. The purpose of the slide stop is – of course – to stop the slide from closing when the last shot is fired. The trouble arises when the part stops the slide BEFORE the last shot is fired – sometime the first or second! One sure way to invite such a problem is to install and extended slide stop – or even worse – ambidextrous extended slide stops! Not only are these not usually well made but the fact that they extend back nearer the firing thumb makes them more likely to be inadvertently engaged by that thumb in recoil. This is very bad as you might imagine. To install one of these dinguses on your pistol is to mark you as a tactical amateur anyway. First, and more importantly, the thinking gunman reloads anytime he CAN – meaning the first chance he has when bullets or people are not coming his way – no matter if he has fired 2 rounds or 6, get the gun back up to capacity just in case the Bad Guys have help! The second thing, recognizing that we all can’t count rounds in a gunfight ( not something I try to do anyway) and that comes the day we actually do run dry – no problem, just speed reload ( from behind cover please) in the normal fashion and trip the slide release with the thumb of your weak hand – which just seated the magazine and is in perfect position to do so. Or, as is the current rage in tactical schools ( in order to have a uniform movement between all autopistols) simply retract the slide with that hand and release it. In plain words, avoid this modification like the plague.

One other possible modification to the slide stop is to “dimple” or slant the bearing surface where it meets the plunger. This helps to ensure that normal recoil will not inadvertently engage the slide stop and yet allows proper function with most magazines ( some 8 rounders may be a little week). I don’t regard this as a must unless you have noticed the problem in your particular gun.

Yet another control on the 1911 is the magazine release. Here too we can get in real trouble. In order to enhance their ability to reload faster, many folks have given up sure function. Reloading is something emphasized in competition – and indeed it should be a skill one has – but it is highly overstated. I have only recorded two cases in which a person was able to finish a fight in better shape because he reloaded quickly ( and both should have been over long before the reload) in my decades of research. Gunfights tend to be over in 2 to 3 seconds, reloading is not one of those things that figures highly in them though, to be sure, there are a couple of cases where failing to reload might have been a problem – Newhall comes to mind. The great danger in an extended or enlarged mag release is that it will get bumped in the holster and the mag will be released without your knowledge leaving you with a single shot pistol ( it is even worse with a S&W since the gun won’t work with the mag down 1/4″ ). Best leave the mag release alone. The Kimbers have a slightly extended button which I can live with but otherwise leave it alone. Left- handers can actually operate the standard button better than right-handers so ambidextrous releases should be avoided also.

While I know many are champing at the bit to hear about some of those “extreme” gunsmith mods and little secrets to tuning race guns, bear with me while I talk about really important stuff. Externally your gun should feel like a well used bar of soap ( though not necessarily slick). Meaning, it should not have any razor sharp edges that cut hands, clothing and leather – or plastic these days. You should be able to comfortably run your hands all around it. The only thing that should stick to your hands is the actual gripping surfaces of the frame. Old Colts and military 1911s are usually OK in this regard but even they could use a little “dehorning”. Modern commercial Colts – especially the Enhanced models which I refer to as “disenchanted” models – and Springfield Armory’s as well as several others are pretty poor in this regard. One exception is the Kimber. Almost all the edges ( if you don’t count the recoil spring plug around the goofy guide rod) are nicely blunted without exaggeration. Make sure your weapon does not hurt you to handle and shoot. It is a hand tool, it should be comfortable.

One thing I like that sounds out of place when talking about bars of soap, is either stippling or checkering on the front and back straps of the frame. Checkering on the stocks is something I can take or leave. The gripping is done fore and aft on a 1911 and these surfaces should be non-slip. Some folks get by on the cheap by applying some skate board tape or other rough temporary surface. Some even just glue sandpaper to the surface – “True Grit”. Good checkering is not only practical it is very attractive. It is also expensive running about $150 to the inch. Stippling works just about as well and I personally like it but it is a bit too rough for some folks taste. I am not fond of wrap around rubber grips with either checkering or finger groves. This does not release the gun easily enough when the grip is relaxed to perform a reload nor does it allow enough leeway when establishing the grip on the draw. If you do like them I can think of no really serious drawbacks except to warn against any stock that covers the toe of the magazine when it is inserted. You might need to use this protrusion to strip a stuck magazine out of the gun in case of dirt or a double feed. Obviously stocks with thumb rests should be avoided since they block access to the magazine release.

Though not really controls, let’s examine some of the various accessories one is tempted with when perusing all those gun magazines. How about starting with hammers. There are literally dozens of shapes and sizes of hammers. For the most part I think this is strictly a matter of taste with the exception that if you install a high and wide grip safety then you will likely need some sort of “commander” hammer to fit with it. Functionally I can find nothing wrong with the standard G.I. hammer. If it bites you then “bob” it by about ¼” . However if you want one of those high / wide grip safeties then you will have to install a hammer that will accommodate it. A “Commander” hammer is in order and there are many out there. Most of the top names, Wilson, MGW, McCormick, etc. are well made and you can simply pick one whose looks suit your taste. Many of these relocate the hole that the strut pin anchors through in the manner of the Gold Cup since that takes a lot of load off of the hammer as it rests on the sear, resulting in a lighter trigger pull. Since the 1911 is carried in condition one ( cocked and locked) when in service it does not matter much if the hammer is easy to cock or not.

While we are on the rear of the pistol let’s look at the mainspring housing. You can have them in flat or arched or in between. Since the serious gunman uses the sights for the most part, this is a matter of personal taste and he can usually pick up a gun with a type of MS housing different from his and do quite well with it. However, even the sighted fire used in the Modern Technique is quite reflexive and a strange feeling pistol will slow you down a little – I simply could not live with my Glock 23 or 22 ( early models) because I constantly had to pause to push them down on target after a smooth draw. So, naturally I made them point more like a 1911. While I like the feel of the flat housing, I learned to shoot a 1911 with an arched so the vast majority of my guns have the arched. I prefer mine checkered 20 LPI. I also prefer mine to have the military lanyard loop. This is not so important but it is a nice touch to be able to attach a lanyard when you are canoeing or backpacking ( particularly if you sleep in a hammock on the trail). For self defense under normal conditions it probably does not serve a purpose. It does however, make a handy bottle opener – if there were bottles to open anymore. Another related MS issue is the Extended Magazine Wells that are so common today. Often these are part of the custom MS housing itself. Personally I think they are unnecessary for the serious pistolero. Sure they make hitting the mag well easier for competition but in real life you likely wont have to reload and you have made your pistol taller and less concealable. The main thing I have against them is that it makes using a standard magazine without a pad very difficult and almost impossible to reload with quickly. Hardly worth the effort for what little gain you get. One exception I have seen is on the Officer’s Model. By attaching one of the S&A mag wells which taper off before it gets to the “toe” of the magazine, on the OM you have extended the rear of the pistol which helps most normal hands get a better grip while extending the front none at all. This means the pistol is really just as concealable as before the way most of us carry our guns with the barrel canted to the rear. Gun designers should realize that when you sit a gun down with the floor plate of the magazine flat on the table, then the barrel should be parallel to the table not pointing up ( or down). This is the way the hand is shaped and it promotes concealability. At any rate the OM with magwell will take a standard 1911 magazine without a pad and you won’t fail to seat it. A word of caution, longer mags in an OM can malfunction if you put upward pressure on the floor plate while firing so don’t use the “cup and saucer” grip.

Let’s move up to triggers. We have talked a bit about trigger pull but let’s discuss the part. There are many triggers available and most of them are fine so I would say, if you want to change your trigger at all, then pick the one that suits your hand and your tastes. Stay away from the cheap ones with aluminum trigger stirrups but the material of the trigger itself is almost irrelevant. At first I thought plastic was a bad thing but I see that it moves easily and is almost indestructible. I still prefer some sort of metal for taste or perhaps to prevent melting in an extremely hot environment ( I mean where you might store the gun not for me as anything that would melt the trigger on my Kimber would melt me). The most important characteristic of the trigger, after assuring that it fits your grip style, is the actual weight of the part. Not so important for shooting but when you reload from slidelock or drop the slide on an empty pistol ( this is NOT a good idea but likely someone will do it to your gun sooner or later) the inertia of the trigger – it’s tendency to stay still – will trip the sear when the gun lurches forward as the slide slams shut. This causes the hammer to “follow” from the jar and usually it will catch on the “half cock” notch ( safety shelf on series 80’s). This is not a good thing. Choose a good gunsmith for your trigger job and choose a light part for your trigger.

Speaking of slides slamming forward, let’s talk about recoil springs. This is another area where you can get into trouble with the neat gadgets available in parts ads. Let me state right up front. A recoil spring guide rod is not one of the stellar ideas to dawn on gun designers in the 20th century. You will not that none of John Browning’s designs have them. That is because they are not needed. To be sure, some guns work OK with them, Glock, S&W, Kimber, Wilson ( who makes guns both ways) etc. The problem is twofold. One is reliability. If they are designed well, as those in the aforementioned pistols seem to be, then fine. However some after-market designs are not well thought out. It takes more than just sticking a rod through your recoil spring. In the 1960 there were several after-market rods that sold through mail order which were less than stellar – we called them malfunction kits. You could put one in you Colt that was monotonously reliable and then get a chance to do remedial action drills. The more pertinent point is that the rod under the barrel prevents you form applying pressure under the barrel to draw the slide back, preventing convenient one hand operation. If you find one hand disabled or occupied during a gunfight and you do need to clear a malfunction, reload an empty gun from slide forward ( slide stops don’t always work) or simply need to check the condition of your weapon you can place the recoil spring plug on the edge of a table or desk or the sole of your shoe and press the slide back by using only one hand. Another handy trick is to “press check” your piece in the dark by pinching your thumb to the inside of the trigger guard ( just the tip and not too far inside please!) and the index finger under the barrel ( you approach this from the underside and NEVER let actual muzzle point at your finger). With seemingly little pressure you can bring the slide back about ¾” which will allow you to take your trigger finger ( you have the gun in a firing grip) and feel the cartridge in the ejection port. There are other ways to do this that can be applied to guns with the rod but they are a little more difficult. Let me say. If you have a guide rod on your 1911 and the gun works then don’t feel like you have to rush out and get rid of it. These are sort of minor points. Besides, some of the compact models out there were designed with them and it would be difficult to change them.

OK, now what about recoil springs and buffers. The standard Govt. Model spring is 16 pounds. I am sure that the gun will work just fine with this if you replace the spring when it is worn out. The military uses the gauge of spring length. When the spring has worn until its uncompressed length is 5″ then it is time for it to go. Military parts these days are “low bid” so they were getting about 1,000 round on a spring before replacing them in the mid 80’s as the 1911 was being phased out of service. Personally I prefer an 18.5 or 20 pound spring for the 5″ guns ( 20-22 pounds for the 4.25″ guns) but one must be careful not to go too high lest he run into the problem of short cycling the slide due to a lose grip. The 1911 is one of the most forgiving designs I have ever seen – it will even function when held with 2 fingers or even held upside down – but all autos eventually have the point where less resistance to recoil will result in a malfunction. 18.5 pound springs work for almost everyone with normal ammo and they will overcome any slight resistance to feeding that perhaps a 16 would not. At the same time one does not want to go too high on the spring weight as there can be battering when the slide closes as well as when it is shoved to the rear. Stick with this range. While on the subject of springs, do not change the weight of the Main Spring ( the one that drives the hammer). Many amateur or even professional bullseye gunsmiths will cut or reduce this spring in order to make a light trigger pull easier to obtain. Don’t do it. The pressure of the hammer in its forward position is part of the lockup timing cycle of the slide, less resistance here means more battering and has much more effect on it that 4 or 5 pounds of pressure in the recoil spring.

What about recoil shock buffers. Well, I have experimented with these for years and was on hand when the Wilson version was invented – or at lest conceived. I can see the logic in this but over the years I have gradually gotten away from using them in my serious self defense guns. I do use them in my practice guns just to be on the safe side. The problem is, and it is different with each individual gun, that these things can get chewed up and spread out and cause the gun to become unreliable. This is a bad thing in a defense gun. I was having trouble with a Wilson Combat Master ( this was a $1500 pistol in 1985) running with ball ammo and McCormick magazines. Now the gun was good, the mags were good, the ammo was Winchester ball and the gun was clean when I started shooting it. Oiling the barrel hood made it run better but it still choked. I did not discover the problem until I got home. The shock-buff was smashed and a bit of it was pushing upwards on the underside of the barrel. Needles to say, that gun no longer carries a shock-buff. Yet they seem to work in some other guns. What is really needed is a sort of “sandwich” which has steel in front buffer in-between and steel in the back so that it won’t get chewed. However this can all interfere with the reward travel of the slide and the odds of the slide locking back on the last shot – especially on a Commander. Shock buffs may save your gun from battering if you shoot 1,000 rounds a week but it may also cause problems – buyer beware.

So far I have not mentioned barrels. I am not going to talk about them much. I strongly feel that most folks do not shoot quite well enough to appreciate the difference between a run of the mill barrel and a match barrel. My dad’s Remington Rand 1911a1 which is unmodified and was made in 1943 shoots about 5″ groups at 50 yards with ball ammo. My most accurate 1911 will do 1″ at this range but I doubt that I can tell the difference when shooting a man at 10 feet or even at 25 yards from a field position. However, some folks want a super accurate piece so that they at least know it is them doing the missing rather than the gun. My advice on barrels is this. If the fit of the bushing is not extremely loose and you cannot move the barrel by pressing down on the barrel hood while it is locked in battery then you likely don’t need a new barrel or bushing. If the former is true you might need a new bushing. If the latter you might get by with a new link ( it will not be locking up in the preferred manner though). My friend Dane Burns, who builds extraordinary 1911s, believes that there never was a G.I. or Colt Govt. Model to ever come out of the factory with a “properly” fitted barrel. One where the “legs” or bottom lugs of the barrel as well as the link rub evenly on the slide stop as it goes into lockup. I tend to agree with him though the law of averages says that there must be some which are properly fitted if only by accident. My point is that unless you want a pistol that shoots 1″ at 50 yards then you don’t have to have perfect lockup. The G.I. guns – until they are simply shot out – will have all the accuracy a person needs for self defense and a little fitting – even less than perfect fitting – can get you to 3″ at 50 yards which is much smaller than the front sight. I can’t see 3″ at 50 yards!

Barrels, especially the feedway and the chamber dimensions, affect the reliability of the gun. Here, the things that enhance accuracy – tight tolerances – work against us so we have to have a compromise of sorts. Dane’s guns are EXTREMELY accurate yet he emphasizes that they must work. He is one of the few smiths who can accomplish this. His guns also cost $2500 – and are some of the few that are worth it. However, most out of the box Kimbers will shoot 3″ at 50 yards and they usually work pretty good ( I have not had any gun related malfunctions out of either of mine since I bought them). One after-market barrel that I have experience with, the Wilson, seems to be very accurate and is cut with sufficient tolerance to work well, I don’t even have to modify the feedway in the barrel, though I do polish it just a little which is likely unnecessary. The critical lockup on a 1911 barrel is in the rear. The bottom lugs, I mentioned as well as the barrel hood should reposition the barrel the same every time. The bushing fit can be a little more loose than most people think. Whatever you do don’t buy a two-piece barrel and I would recommend replacing the two-piece barrel that comes in the Springfield Armory guns immediately. Bottom line here is that if you spend your $200 on practice ammo then you will likely find you have a much more accurate gun that you thought you started with.

Well this has gone overlong and though I have only scratched the surface I must stop. I hope it has given food for thought. Good shooting.

Praise the Lord and pass the ammunition.

See also Custom M1911A1 Modifications – A Pictorial Guide

Breaking in a 1911

By Syd

Break-in of a pistol is not quite the elaborate ritual that it is with a rifle. Here’s what I do. Field strip it and check it out. If it’s bone dry, give the contact surfaces a light coat of gun oil or grease, depending on what you have. I use Mil-Comm MC2500 gun oil and Mil-Com TW25B grease on the slide rails and just a bit on the lugs where the barrel locks into the slide just forward of the chamber. If the gun happens to have excess lubrication in it, clean that out. Springfield is bad about shipping guns that are just dripping with oil; Kimber tends to ship them dry. I run my fingers over the rails just to make sure that there are no burrs or rough spots. There probably won’t be any with a Kimber or Springfield, but you never know. Even good gun makers occasionally miss things.

I will take a swab and give the bore a very, very light coat of oil, not wet and drippy, but just run a lightly oiled swab through the barrel a couple of times. It may only be my imagination, but this seems to make the barrels easier to clean after they’ve been fired. Then go to the range and run 50-100 rounds through the gun. Bring it home and give it a thorough cleaning and lube, including the very light coat of oil in the bore. Repeat this through the first 500 rounds fired through the gun. The key to a good break-in is frequent cleanings during the first 500 rounds.

I don’t really consider a pistol broken in until I have 1000 rounds down range. If the gun is to serve as a personal defense weapon, a minimum of 200 rounds of the carry load should go through the gun without a malfunction.

When I clean a pistol, the first thing that I do is to run a swab soaked in Mil-Comm MC25 Cleaner/Degreaser through the bore and set the barrel aside to let the solvent work while I clean the rest of the gun. After the rest of the gun is clean, I brush the barrel out with a bronze brush (don’t use steel brushes) and then clean out the gunk with with cotton patches.

Dry firing helps to smooth the engagement surfaces on the sear and hammer. Despite what some people will tell you, dry firing is a good thing, and it helps to smooth the action. Unless you’re unhappy with the trigger break, nothing more is needed.

A method I picked up from “Gun Tests” is to push forward firmly on the hammer with your thumb while pulling the trigger 10 or 20 times. This does seem to remove roughness at the sear and gives a slight but noticeable improvement.

I know some people who will do a complete detail strip (completely disassembling the gun) with a new 1911. They will clean, oil all the parts, and sometimes lightly polish the engagement surfaces on the hammer and sear. I don’t recommend this for people who are new to the gun. 1911’s are easy to take apart, but more difficult to reassemble until the user acquires greater familiarity with the mechanism. I would certainly do the detail strip on a used gun that I didn’t know, but on a new gun, it shouldn’t really be necessary unless it just makes you feel better about the gun.

Tips for enhanced break-in and reliability preparation for autoloading pistols
https://sightm1911.com/lib/tech/fluffandbuff.htm

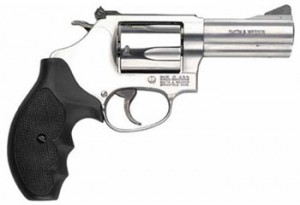
Why Carry a Revolver?

Smith & Wesson Model 60

I used to carry semi-auto’s extensively, and revolvers only for use as BUG’s, but this has changed in recent years.

Firstly, in training disabled or handicapped shooters, I’ve noticed that many of them simply can’t handle a pistol properly. Their limited upper body and/or arm strength makes “limp-wristing” a fact of life. Now, in a combat situation, one is very likely indeed to be shooting from the ground, having been knocked down; or with one hand, using the other to fend off an attacker at close range; or after being shot or stabbed oneself, and having to shoot with that impairment. Given these circumstances, the chances of “limp-wristing” a pistol are very real. It’s a problem that simply doesn’t arise with a revolver.

Secondly, pistols are notoriously ammo-sensitive. There are some (e.g. Glock, SIG, etc.) that feed almost anything with monotonous reliability: but others (including the fabled 1911) need a certain type of bullet to feed reliably. All of them need a certain amount of power to cycle reliably. All of them, to a greater or lesser extent, rely on lubrication and a lack of dirt in the action to work properly. A revolver is less susceptible to these problems: it will feed anything, anytime; it will fire irrespective of the power level of the bullet; and it will shoot at least a few rounds even if bone dry and covered with dust and dirt.

Third, simplicity of action is of major importance. One’s fine motor skills tend to degrade significantly in a high-stress environment. One needs no fine motor skills at all to fire a revolver, but several of them to use the average pistol, what with safeties, slide stops, etc. Also, in certain situations (e.g. with the muzzle pushed into the torso of one’s attacker, or the gun grasped by one’s assailant) a pistol slide can be pushed “out of battery”, meaning that the gun will not fire and/or will not cycle the action if fired. A revolver suffers rather less from this handicap (although if the cylinder is grasped, it can be prevented from turning, so a revolver isn’t altogether immune).

Fourthly, a well-tuned and well-set-up revolver will rival most autopistols in accuracy and ease of use. A good action job makes the double-action trigger pull a joy to use. A moonclip conversion means that speed of reloading is almost identical to most autopistols, and a speedloader is not too far behind. A decent set of sights are OK, but the fixed sights on something like a S&W Model 13 or 65 are just fine for most combat distances (I can get a decent group with them at up to 50 yards), and they won’t get knocked out of alignment by being dropped.

So, the revolver scores high on simplicity, reliability, etc. I’m finding myself carrying a revolver more often than a pistol these days – and I’ve been in more shooting encounters than I care to remember (18 years in a civil war situation will do that to you). I feel very confident in my ability to handle a revolver at least as accurately as a pistol, and the 5- or 6-round capacity will enable me to deal with up to 2 or 3 attackers before I need to worry about reloading. Also, on my snubbies for pocket or backup carry, I’ve fitted Crimson Trace laser grips, which give an instant sight picture even if I can’t use the sights! Very useful accessory, that…

Works for me!

— Preacherman on The High Road
http://www.thehighroad.org

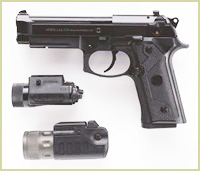
The Beretta Vertec: A double action auto that single action fans can get their hands around.

Beretta Vertec
Beretta Vertec

By J.D. Charles

Having carried the 1911 as my primary self defense auto for some years now, my hand has become accustomed to the flat mainspring housing and narrow grip. I also appreciate the concealability of this set up. For many years, I was a dedicated wheel gunner, but while working in industrial security the advantages of the semi-auto became more apparent – flatter, more compact, withstands abuse that will knock the frame and crane out of alignment even on the best of wheel guns. My first carry semi-auto was the Beretta 92. I liked the accuracy and reliability of the gun, which could rival a good long barreled wheel gun for accuracy and seemed to be every bit as reliable. However, the Beretta was a wide load and I soon replaced it with a Smith and Wesson 645. The big Smith equaled the Beretta for reliability but it was about as accurate as a hand grenade and heavy as the anchor for the Queen Elizabeth II.

I dabbled with the Glock for awhile for the sheer joy of not worrying about things like corrosion of finish or dings from use, as to me the Glock is not a handgun; it is a tool. Rugged and reliable and adequately accurate, the Teutonic Tactical Tupperware never felt good in my hand and I never much cared for the lack of thumb safety.

Finally, good quality 1911’s with rust resistant finishes became affordable about that time, and I switched to the 1911 a gun that looked good, shot good and felt good. My Springfield, Kimber and 1991 A-1 pistols all offered accuracy in the Beretta Ball Park, were as hard hitting as the big 645 (but felt about five pounds lighter) and were even more concealable thanks to the slim slides and grips. I was a happy camper indeed. Soon, I found myself content with the 1911 for street carry and the Beretta for home defense.

Still, as a born and bred wheel gunner, I often missed that double action capability. When the new Para Ordnance’s with DA first shot hit the shelves, I felt that perhaps this would be my own personal holy grail of auto pistols.

Having handled the Para Ordnance, there was just something about the trigger linkages that for me at least, did not feel quite right. The old Colt Double Eagle not only had a better “feel” but actually seemed less cobbled together in my grasp. The P-O does have a good light trigger pull, but it just did not really impart any feelings in my breast but disappointment. Why? Just my own subjective feelings, I reckon, as I haven’t heard anything bad about the P-O designs, which is a rarity in brand new gun designs. However, a new version of a time-proven gun is now out on the market that has the “right” feel and is one that I am familiar with and comfortable with. A few days ago, I stopped in at my favorite gun shop to look around for good buys on traded-in wheel guns. Usually around Christmas time the locals tend to upgrade their ordnance and I figured there had to be some nice buys on classic revolvers that were opted off in trade on the latest high-tec tactical tupperware. While scoping out a nice Ruger Security Six with a three inch barrel, I noticed an odd looking gun that looked like a cross between an H&K USP and the Beretta 92. I asked the pistol purveyor for a closer gander…

I don’t know why Beretta calls their new tactical operator’s pistol the Vertec. Probably stands for Vertical rails and Technical accessory or some such. To me, the name Vertec sounds similar in vowels and consonants to the historical name Vercingetorix. The Celtic warrior who stood up to the might of the Roman empire and Julius Caesar himself. Back then, the Gauls inhabited large portions of Europe including what is now Belgium, France and parts of the Rhineland. Maybe fanciful thinking for a history buff, I suppose. For me, the appellation is appropriate as when it comes to military side arms their was some exchange of culture back then between the Celts (known as Gauls back then) and the Romans. The gladius short sword itself may have been a Celtic design adopted by the Romans. The Spathan infantry sword most definitely seems to have been. Caesar wrote of the terrible long slashing swords of the Gauls in his campaigns. Today that cross exchange of cultures continues with the Beretta pistols. The original Beretta 92 itself featured several ideas borrowed from other cultures. The trigger linkage and tilting under-barrel lock were from the Walther P-38 from the Rhineland and the high capacity magazine was borrowed from the Belgian Browning.

The new Beretta Vertec pistol features a beefed up dust cover with grooves for tactical light and laser accessories, but it also features a grip configuration that feels and even looks very similar to a 1911 pistol with the straight back strap. The gun has a newly configured trigger that has to be pulled almost to the rear of the trigger guard area before the trigger releases, making it, in single action, very much like a 1911 trigger! Other features of the new gun included the best high viz sights I have ever encountered on the M9 breed and a flattened off slide top (well, what part of the slide is not machined away). The barrel is blackened stainless steel, and with the aluminum frame that means the only rust problems would be the slide itself and the small parts.

Needless to say, I had to have it. Returning to the old homestead I looked around for some trade goods and settled on my old Glock 17 and some custom knives that a friend had his eye on for a long time….

In some way,s this impulse buy made more sense than even my raging hormones realized. I suppose I should have waited for the .40 version in full stainless finish to come out, but then again, I already had a 92F at home with plenty of high capacity magazines and holsters. That meant that the only new gear would be required would be leather holsters as I found out, some of my nylon rigs fit the new Vertec pistol well enough.

Upon taking my purchase out to the range I noticed other features that were not quite as apparent, especially with a 1988 vintage Beretta 92F for comparison. The grip frame is deeper towards the trigger guard as well as shaped differently making the new Vertec Beretta pistol much easier to handle and shoot. The gun was very accurate, despite being hampered by an unusual (for Beretta) heavy Double Action trigger pull. My older 92F had a much lighter DP pull but the Vertec equaled it in accuracy. I can only imagine how much better it would be with a good pull….

The single action just felt right for this 1911 shooter. With the handle and new trigger design the gun felt almost identical to a 1911 on the firing range while shooting.

The shorter barrel and slide did not increase the minimal recoil any at all. Even though I am not a tactical light using kind of guy, I like the beefed up dust cover which should ease the mind of those of us who worry about things like our carry pieces taking a whack in the field and possibly damaging them. For this same reason, I really like Springfield’s new “Operator” 1911 a-1. Most 1911’s are very thin in this area of the frame. If you are a worry wort like I am, these integral frame dust covers will ease your mind. The gun fired everything without a hitch. Part of me was tempted to attempt to make it jam by pouring sand over the barrel or run over it with my truck or some other salesman’s trick, till I came to realize that I never had to defend myself from a sandstorm or jeep. Maybe I started to suffer a little from Glock withdrawal there…

The only complaints I have with the new pistol are (1.) it’s not a .45. (2.) It’s not stainless and (3.) Those damn politically correct 10 round Clinton clips are a bitch to load. Thank the gods I stocked up on high capacity clips before the Clinton administration. All in all the new Beretta Vertec pistol is a proven double action design that has a traditional single action feel in the hand. For a nine, it is built like a bank vault. In .40 caliber it would be good substitute to the traditional .45 for other 1911 pistoleros who find themselves wanting (or being required by departmental regulations) to carry a DA piece.

Up Close and Personal – Final Conclusions and Recommendations

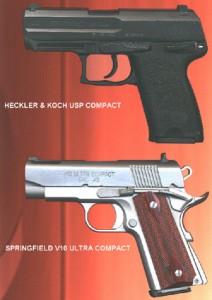
HK and Springfield Pistols

Part 9: Final Conclusions and Recommendations
© 2000 by John L. Marshall

All of these pistols are excellent designs and are made by reputable, established manufacturers. Each has its strong points and weak points for the concealed-carry permit holder. Each offers power, light weight and reliability. You would be well armed with any of the four. Here would be my take on the best use for each:

Glock 30. This is a compact, high-firepower, reliable pistol that is just a bit blocky for easy concealed carry in a holster beneath clothing. I think it would be at its best stuffed into one of those belt holsters that looks like a small camera case. Few would believe that you could pack a 10-shot .45 in there. It would be great in a fanny pack, too. Thus put up, it could be worn in plain view with no one the wiser. Pre-ban Glock 21 hi-cap magazines can be used for reserve ammo.

H&K USP Compact. An excellent and reliable design that could be quick into action in any mode you want. It is concealable, but not nearly so much as the Smith & Wesson or Springfield offerings. I think it would be a good “executive planner” gun that would be unobtrusive in such camouflage and yet quick to deploy. It’s marginally suitable for belt carry under clothing – if carried in this mode, use the flat base plate magazine.

Glock and S&W Pistols

Springfield V10 Ultra Compact. A nearly ideal concealment pistol that’s quick to get into action. Be sure you’re comfortable with the cocked-and-locked carry mode, though. If you love the 1911 design, this one is a great choice. Best for daylight carry, its compensator could mess up your night vision with its muzzle flash. Fast and accurate repeat shots are ridiculously easy with this baby. Use +P ammo with lighter bullets, because you’re losing some velocity with the short barrel and the 10 ports.

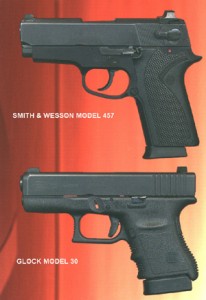
Smith & Wesson 457. Excellent in the under-clothing concealment role. The thin grip makes it the best of the lot for holstered, under-clothing concealment. Not an especially accurate piece or easy to shoot well for quick precision initial and repeat shots, its best mission is for up close and personal. Good, reliable bang for the buck.

And there you have it. Good shooting!

John L. Marshall

Up Close and Personal – Handling and Shooting Impressions

Part 7: Handling and Shooting Impressions
© 2000 by John L. Marshall

First, let me say that since we are talking about compact .45s whose primary purpose is up-close self-defense, I will not address accuracy or ballistics. Each of these pistols is sufficiently accurate to place all shots into a 5-inch circle at 25 yards from a machine rest. Each will provide sufficient power with the right loads to effectively stop an assailant from doing you harm. In my hands, fired rapidly with the “Mozambique drill” technique of two shots to center mass, plus one to the head area of a silhouette target at seven yards, there was some difference among the pistols, but not a lot. I got the best accuracy in rapid fire with the Springfield, followed, in order, by the Glock, the H&K and the S&W. Since the Springfield is the only compensated pistol of the four and I have years of experience with 1911-style pistols, it is no surprise that I did better with it.

The Springfield V10, particularly since it was partially customized with a carry-bevel job, slimmer grips and a shorter trigger, handled and shot like a dream. It’s no secret that I like 1911 pistols. I have years of experience in handling and shooting them, so it was like shaking hands with an old friend when I fired this one. The pistol comes from the factory with a lot of sharp edges – the nose of the frame and the slide being particularly bad in this regard. Likewise, the slide stop needed some rounding and beveling. This was done on this particular pistol, and the custom work made it smoother handling and easier on drawing and reholstering. Rapid repeat shots with the V10 were a snap, and the compensator vents made it feel even better than a full-size pistol in recoil. The 1911 design and the high-ride beavertail grip safety keep the axis of the bore at about an inch from the top of your hand. This further eases the muzzle up-flip. The high-mounted conventional sights were excellent and provided a quick and sharp sight picture. I will tell you that the muzzle flash from the ports was spectacular in low light, particularly with +P loads and lighter bullets. For this reason, and because night sights will quickly become carboned up from the ports, this is more of a “daylight” gun than an “evening” gun. The pistol ran through its paces with no problems at all. There were zero malfunctions in extended firing. For a fast first shot from “cocked and locked” mode out of the holster, and for fast and accurate repeat shots, this little pistol really shines. The trigger pull was match grade, crisp with no creep, letting off at just under 4 pounds. The aluminum frame makes for light weight, and it’s among the best of the compact 1911 designs for lightness. Of all four pistols, I’d rate the Springfield second in concealability to the Smith & Wesson. Although the maximum width of its grip is the same as the Glock (the worst for concealability), its shape is more ovoid in cross section, and the edges are thinner. Thus, it doesn’t “print” as noticeably as the Glock when carried in a strong-side belt holster under clothing.

The Glock 30 is one helluva little pistol. Its big advantage is in firepower, and it’s the only one of the four to pack the legal maximum 10-round magazine into a compact configuration. Having the big full-size Glock 21 without pre-ban magazines of 13-round capacity seems almost pointless if this pistol is available. By the way, pre-ban high-capacity magazines will fit and function fine in the Glock 30, so back up magazines can be of up to 15-round capacity (with a +2 extension). Of the four pistols tested, the Glock was the most accurate in deliberate fire, and the second most accurate in rapid fire. The design of the pistol, since it doesn’t need room for a pivoting hammer, allows for a very low bore axis. The center of the bore is only .70” from the top of your hand when firing. This means that it recoils in more of a straight line, and the muzzle flip is minimized. The Glock “safe action” trigger takes some getting used to, but if you think of the trigger pull on a Garand or M14, you can visualize it. It’s two-stage, with a light take-up and about a 5.5 lb. let-off. Once you get used to it, it’s workable. Also taking some getting used to is the fact that the pistol has no manually-operated safety. It can be carried safely fully loaded with no danger of discharge in a holster that completely covers the trigger. The only way the gun can fire is with a deliberate pull on the trigger, depressing the built-in safety mounted directly on the trigger. This is characterized by some as “leaving the key to the henhouse with the fox,” but there is no denying the popularity of the concept. The flexibility of the polymer frame, the low bore axis, the two-stage recoil spring arrangement and the width of the grip all combine to minimize apparent recoil. The factory plastic sights should be dispensed with in favor of metal sights with tritium inserts at the first opportunity. This pistol, with the tritium sights, did well in low light. The grip angle of the Glock is more slanted than that of the 1911, so if you are used to a 1911, the gun will come up to your line of sight pointing high. This takes some momentary adjustment until you get used to it, and point shooting is not recommended until you do. The Glock functioned flawlessly through extensive firing with many types of ammo. Reliability is one of the hallmarks of this design. It can be very difficult to load the last couple of rounds into the magazine with your issued magazine-loading tool (your thumb). Glock provides a mag loader as part of its factory package, but it’s not something you’ll carry around a lot. The mags get easier to load with use, thank goodness. The standard slide release is tiny and hard to actuate with the thumb. This particular pistol was equipped with the factory-optional “extended” slide release, which has a little nubbin on it for easier manipulation. It’s better, but not by much. Glock recommends releasing the slide by pulling back on it, and that is the school combat solution, anyway. Technically, the Glock is a “double action only” pistol. However, there is no “repeat strike” capability with the Glock design, as a second pull on the trigger will not load and trip the striker again. You will have to execute the “tap-rack” drill to get it back into action after a bum round. The magazine drops free of its own accord when the mag release button is pressed. For concealed carry, the Glock’s clunky shape, unfortunately, is its undoing. It’s thick, squarish, and not the most ideal for holster carry under a shirt or other outer garment. The best concealment holster I’ve found for this pistol, incidentally, is Glock’s own economical “sporter” model, made of very thin plastic.

If you are used to the controls of a 1911 pistol, the H&K USP Compact should suit you just fine. The safety, slide release, and mag release controls are all where you would expect them to be, and your developed motor skills will apply well to this gun. Just remember to press down on the mag release instead of in. This is easy and natural. Even easier is pressing down on the right-side mag release with your right index finger. Suit yourself. On this pistol, you can apply the safety before you rack the slide to load a round, giving you an extra safety margin not available with 1911-type pistols. In the 1911 design, the hammer must be cocked before the safety can be applied. I mentioned earlier that the bobbed hammer can be cocked, and the safety design allows you to do this with less trepidation than with the S&W, for example. The procedure is to apply the safety, point the pistol in a safe direction, and pull the trigger gently. The hammer will lift and stop at about “1/2 cock” position, and you can then press it the rest of the way back with your thumb. You are now cocked and locked. I’d prefer a hammer with a thumb spur, but this one was designed for concealed carry and snagless draw. Needless to say, this procedure should not be performed under extreme stress lest the sequence above be reversed and a negligent discharge become the result. The pistol can be carried safely with the safety off and the hammer down, ready for a double-action first shot. This is the preferred means of concealed carry. For open holster carry, the hammer should be down and the safety applied to help in case an opponent snatches the gun from the holster. The moment of confusion that could result from the safety being on might work to your advantage should the gun be turned against you. This pistol fits my (average) hand very well, particularly with the finger-rest magazine. It still fits pretty well with the smaller-baseplate magazine, and that’s the one to insert for concealed carry. The H&K USP Compact runs a close third to the Springfield for concealability. The grip area, which is the hardest part of a pistol to conceal under clothing, is nicely shaped and second only to the S&W for thinness. The checkering and stippling molded into the polymer grip give a secure hold. The double-action trigger pull is nothing to write home about, coming in at a somewhat gritty 12 pounds. The single action pull is pretty nice, with about ¼ inch of slack, and then a creep-free let-off of about 4 1/2 pounds. If action were imminent, I’d prepare for it by going to the cocked-and-locked mode. A creepy double-action first shot will not make for accuracy. Recoil is quite manageable. The bore axis is about 1 inch higher than the hand and the muzzle flip is not severe. There were no malfunctions in extended firing. I found that a uniformly strong grip serves to give you better accuracy with this pistol, as it’s more sensitive to varying grip strength than the others. The tritium sights give a good, clear sight picture and work well in reduced light. The decocker available to you by pushing the safety lever all the way down should be used to go from cocked-and-locked to down-and-double action. A flip up on the lever then gives you an extra margin of safety in the double-action mode. The grip fits the hand nicely. This is a nicely-designed, very functional pistol that was obviously intended for the U.S. shooter used to operating a 1911. It gives you features not available on the 1911, but allows you to operate it quite similarly if you wish.

The Smith & Wesson 457 is a study in contrasts. It is easily the most concealable of the four pistols evaluated. The grip is slim and nicely shaped, and it almost disappears under clothing. At the same time, the gun suffers somewhat in the shooting department. The bore axis is about 1.1 inches above the top of the hand. Also, the curve of the grip places the pivot point of the hand somewhat lower than would be ideal. This results in more muzzle flip than with the other pistols. Accuracy, while acceptable, is not its strong suit. I personally dislike the slide-mounted safety-decocker, which does not allow a “cocked and locked” carry. I also am not a fan of pistols having a magazine safety. In my opinion, this is an attempt to make gadgetry substitute for training. To clear any pistol properly, the magazine should be removed first, followed by racking the slide to eject the round in the chamber. This should be written in stone and drilled into every semiauto user’s head. If you only remove the magazine on this gun, you have totally deactivated the pistol. It does make it safe, but it completely prevents you from firing the one remaining round you might have in the chamber. Without a magazine, this pistol is not even as effective as a rock. The magazine safety can be deactivated, but removal of any “safety feature” could get you in trouble if you use the pistol for self-defense and have to justify your actions in court. The double action pull is smooth at 11 pounds. The single-action pull is crisp at about 5 pounds, with about 1/3 of an inch of slack. If your index finger is fleshy, the trigger has the annoying habit of pinching it at let-off unless you use just the tip of your finger to press it. Thumb-cocking the pistol would require squeezing the trigger slightly to lift the hammer to the point where your thumb can get in front of it to pull it all the way back. This is definitely not recommended due the danger of a negligent discharge if you pull the trigger too far. The H&K will allow this procedure, but it has a safety that stops the trigger from pulling all the way through when applied. The S&W is completely reliable, with no malfunctions occurring in extended firing. The matte blue finish on the slide and the black anodizing on the frame are not especially durable as finishes go, and holster wear will take its toll rather quickly. The rock-hard durable finishes on the H&K and Glock pistols, or the stainless-bare aluminum finish of the Springfield are superior. The tritium sights on this pistol, provided by Trijicon™, give a good sight picture, day or night, and the pistol shot close to the point of aim. The dovetailed factory plastic sights are cheesy in my view, and almost demand replacement.

Previous: Frames | Next: Disassembly and Maintenance

Up Close and Personal – Barrels

Barrels
Barrels

Part 4: Barrels
© 2000 by John L. Marshall

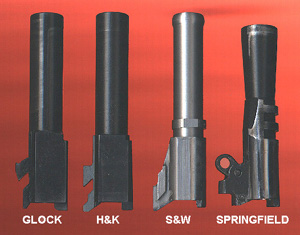
Barrels. The Glock and H&K barrels are the most similar. Each is the same length, about 3 ¾ inches, and each uses its chamber area to lock up into the ejection port. Each uses polygonal rifling, and this gives slightly increased velocity over conventional cut or impressed lands and grooves. The only downside to this type of rifling is that cast bullets will quickly lead the bore. Both Glock and H&K recommend the use of jacketed bullets only. Both barrels feature an integral ramp, which enhances reliability. However, the Glock’s ramp is cut more deeply into the chamber area, so hot reloads with weakened brass could conceivably cause a case blowout. Glock recommends that only factory ammunition be used, as do most firearms manufacturers. Using reloads voids the warranty; ditto with the other makers.

The H&K barrel, while not featuring a fully supported chamber, is pretty close to it. The barrel ramp is not cut very deeply into the chamber area. Here, you should be able to handle hot loads with less worry than with the Glock. Both H&K and Glock use a metal treatment which leaves the surface very hard. Both are quite weather-resistant, fully as much, if not more so, than stainless steel.

The Smith & Wesson barrel is the only one of the four which is made of stainless steel. Equal in length to the Glock and HK barrels, it measures out at about 3 ¾ inches. It also has an integral feed ramp, and this one has a fully supported chamber. There would be very little chance of a case blowout with heavy loads. The muzzle has a raised, rounded section at the muzzle. This fits closely into the bushingless slide, while allowing easy tilting for unlocking. All of these designs, by the way, allow the barrel muzzle to fit directly into the slide, dispensing with the barrel bushing as typified by the original 1911 configuration. The Smith barrel has one locking lug which mates into a corresponding groove in the slide. This is in addition to the chamber area, which also locks into the ejection port. This is a very strong lockup design. It features cut rifling, and so should be able to handle cast or jacketed bullets equally well. In the example I examined, however, the rifling was crudely executed with uneven diameter throughout. The rifling would probably even up as the barrel is “polished out” through firing, but it shows that the barrel was made in haste with no attempt to provide premium rifling. Likewise, the crown of the barrel was ragged. This required some simple polishing to correct. Maybe my sample was a “Monday barrel,” who knows? Smith & Wesson’s quality control department missed this one.

The Springfield barrel was the shortest of the four, at 3 ½ inches. As it also features compensation ports which vent propellant gases through the slotted slide, it should come as no surprise that you will not get as much velocity from this pistol as you will with the others. The barrel has a reverse taper, with the muzzle mating directly into the slide. All Springfield lightweight .45 pistols (which use aluminum frames) have a ramped barrel, and this one is fully supported. The ramp does not cut into the chamber area at all, lessening any worry about blown cases. The ramped barrel also eliminates any concern about rounds beating the aluminum frame during the chambering cycle. The traditional 1911’s two locking lugs which mate into matching recesses in the slide are present. The cut rifling is clean, sharp and uniform. Springfield uses a two-piece barrel, in which the forward part of the barrel is sleeved into the locking area. Some condemn such barrels as being weaker, but if properly done, there is no disadvantage. The barrel is made of tool steel, and is blued except for the chamber area, which is polished bright. I would not recommend using cast bullets in this barrel due to the extra cleaning chore that the vents would demand. Cleaning lead deposits out of 10 little holes is not something I would choose to do willingly. Of course there is no problem using lead bullets except for the cleaning nuisance.

Previous: Magazines | Next: Slides and Sights

Steyr M40, M357, & M9: New Super M Series Pistols

The new Steyr M series pistols have excellent state of the art features, some of which cannot be appreciated until you actually test fire one. Read on if you want to find out more about this new millennium pistol series.

A Short Steyr History

Wilhelm Bubits is the mastermind of the Steyr pistol. He’s a hobby shooter who at one time worked for Glock, and was also a uniformed officer and later a plainclothes officer.

Basically, Bubits was always critiquing pistols and finally decided to become a designer, so he could build what he envisioned. He actually offered his patents to Glock and was told that his designs did not follow their “philosophy” of design.

So, Bubits ended up with Steyr Mannlicher, another Austrian arms maker, in 1997. A key player to bring Bubits’ dream into reality was Steyr’s engineer, Fridrich Aigner. After two years of research and development, the pistol has been christened.

Steyr Mannlicher has been making quality firearms since 1864. Ayoob sums up Steyr’s history well when he said that Steyr is a daring company that boldly goes where no gun manufacturer has gone before, and has been successful doing it.

For example: The Steyr Professional with it Cycolac stock was introduced 25 years ago and has changed the face of riflery, proving the superiority of the synthetic stock. And the Steyr AUG was the first extremely successful tactical rifle. Instead of just a custom-make of Jeff Cooper’s Scout Rifle, Steyr dared to actually manufacture it. And everyone who shot it, has marveled at its execution.

So, with Steyr’s two years of expensive development of the M series pistol line, I’m expecting to see an excellent new product that will not have to bow down to the competition.

The Steyr M (Medium) Series

My Steyr Owner’s Manual lists three M models: the M40, M9, and the M357. I was told by Steyr’s exclusive US importer, GSI, that the M357 will be out in 2000. The M40 has been out since Nov ’99 and the M9 came out a month later. The M357 is scheduled to hit the market in June ’00. You can contact GSI at www.GSIfirearms.com or call 205 655-8299. The Steyr M series pistol has been Americanized with a stamping on the side of the frame, “GSI, T’VILLE, AL” (that’s Trussville, Alabama).

There are plans to also expand the line into the “S” Small series, and this series might possibly see daylight in 2000.

Rumors from the Jan. 2000 Shot Show: I was told some interesting information from someone who attended the show and had spoken with Bubits. Besides the “S” series, Bubits talked about a Steyr .45. He mentioned that the .45 would use regular 1911 style 8-round magazines. This model may be shown in the 2001 Shot Show.

Unsupported Versus Supported Chambers

The Glock was born as a 9mm and then modified into the now famous Glock 22 and 23 .40 S&W models. The Steyr M40 was born as a .40 S&W pistol and then the 9mm version was developed. That’s why the Steyr M40 is exceptionally beefed up with a very strong lock-up system, and why it has a “well supported chamber”.

Some manufacturers of 9mm pistols simply rebarrelled, modified the breechface and put in a stiffer recoil spring to develop their initial .40 S&W pistols. Since the .40/10mm bullet is bigger than a 9mm, the only way to get the .40 to feed reliably was to create an intrusive feed ramp, and possibly an oversized chamber to match. Thus the .40 S&W “Unsupported Chamber” was born. This was a quick and dirty fix by some manufacturers to get to market fast.

Other manufacturers either started from scratch or went through the added expense to redesign their 9’s to safely handle the .40 with a well-supported chamber that still feeds reliably. These types of .40 pistols are therefore safer to use, whether you shoot factory ammo or reloaded ammo.

If you want to find out if your .40 has a well supported chamber, then do this: Measure the diameter of the lower, most expanded part of some fired brass. After the first measurement, rotate the brass slightly and measure it again because the brass sometimes measures greater from a certain angle because of the 6-o’clock chamber opening affect. If your brass measures .431 or greater, then your chamber is entering into unsupported territory. Also, put a round into the barrel and look at the 6-o’clock position of the chamber opening. If the thin part of the brass wall is exposed, or too much brass is exposed, you have an unsupported chamber. “Both” of these measurements are important to determine if your chamber is well supported or not. The greatest

brass expansion occurs when shooting full power loads.

In the six-o’clock chamber opening of the Steyr M40, you see virtually “no” exposed brass and the chamber is not oversized either. I kid you not! This is truly amazing, especially since the rounds feed perfectly. A Steyr barrel does not over expand and bulge the brass like an unsupported chamber would.

The diameter of the Steyr fired brass measures around .428 -.430 for full power loads. The Glock .40 and even a SW99 I tested can expand brass as much as .431 .433, which is a huge difference. In other words, the Steyr M40 is friendly for using in sports, reloading, and in agencies. It should give a little extra confidence to anyone who carries a .40 caliber pistol.

Generally speaking, ammo and gun companies don’t care about reloading safety and case life. Some of the newer reloading manuals have strong warnings about reloading for pistols with unsupported chambers, especially concerning high-pressure cartridges.

One positive side effect of Glock’s famous unsupported chamber and their marketing omnipresence, is that some ammo companies have beefed up their .40 S&W brass so it has a better chance of surviving when fired in a Glock chamber.

The Barrel

Conventional rifling is used in the barrel, for those that choose to use lead. Bubits has stated that for the cost of being able to use lead and be “handload compatible”, there is no more than a 3 percent to 4 percent loss in velocity.

The Steyr M series employs the Browning cam-operated tilting barrel system to lock the action during firing.

For Lead Bullet Fans

I performed a little test just for you. I don’t normally shoot lead because I find it a little too messy. I bought 100 Oregon Trail Laser-Cast 170 grain Semi Wad Cutters (SWC).

Now, I’ve never been able to get SWC rounds to feed consistently in any of my Glock .45’s. I’ve had some luck shooting SWC’s in Glock .40’s as long as the right combination of magazine spring tension, magazine follower type, etc are stumbled upon.

I’m glad to report that my Steyr M40 fed all 100 SWC rounds “perfectly”. This is great news for sports shooters since a semi wad cutter cuts a larger, cleaner hole in the paper. That’s because a SWC is not only a flat point, but it has a 360 degree cutting shoulder that maximizes the size of the hole. Now I just have to find some good bulk plated/jacketed SWC bullets.

The Trigger

The Steyr, like the Glock, has a safety on the trigger. If the trigger gets bumped from various angles, the trigger will not release. You need to put a positive finger pressure on the front of the trigger for the gun to fire. This is an important safety feature that some people just don’t get.

After shooting a few hundred rounds, I took the slide off to clean the M40. I put a little high tech Tetra lube on the inner trigger workings with a q-tip and then lightly removed any excess lube with the dry end of the q-tip. Oh, and I applied a little tetra to the long trigger bar as well. After reassembling the Steyr, the trigger action is silky smooth. Early triggers had about an 8 lb. pull. After August, 2000, the standard trigger pull became 5 lbs.

The trigger guard is angled 10 degrees downward, leaving room for a manual safety. This trigger angle allows for a very natural, higher finger placement.

The Steyr trigger is true double-action since the trigger continues to cock the striker throughout the stroke until it is released. The Steyr trigger does not feel like a typical double-action trigger at all. It has a short stroke action (aprox. 1/8″) with a very short reset, for very accurate rapid fire.

Like the Glock, the Steyr striker mechanism is under partial tension (partially cocked) when the trigger is fully forward. After the trigger is pulled, the striker is fully at rest until the trigger is reset. The three passive safeties keep the Steyr pistol safe to operate. You just have to remember to engage your primary manual safety, the one between your ears, and NOT put your finger on the trigger until you are ready to fire; this rule is actually true for ALL guns.

In my opinion, the short, clean, stroke of the Steyr trigger feels better than the longer, mushier Glock trigger. I even grabbed a Glock armorer at my shooting range so he could test fire the Steyr. He agreed that the Steyr trigger felt better and the perceived recoil was less. But he told me not to tell anyone

The new SW99 pistol has some different trigger modes as well. But I find its trigger pull way too long for my preference, although some people seem to like it. Maybe, if a pistol does not have a manual safety, the longer pull is considered safer, although proper training is the real answer. For example, the classic 1911 style single action pistol is perfectly safe as long as one is properly trained and practiced at thumbing the safety off and on during the firing and holstering sequence. Each trigger style apparently has its aficionados

Since the M40 has a short trigger pull, it might be more appropriate to compare it to a single action trigger. Of course the M40 trigger cannot match a finely tuned single action trigger. But, for a short stroke DA trigger with 3 passive safeties, “requiring” no manual safety, unlike a single action pistol, it comes darn close. I’d say that single action fans could adjust to the new Steyr M series pistol pretty easily. Don’t forget! You can use the Steyr manual safety if you want to. The safety features are covered in depth a little farther down in this review.

Trigger Guard

The front of the large trigger guard is textured so those that like to grip the front of the trigger guard will have a non-slip surface.

Take-Down Lever

Step 1: To disassemble the Steyr, you must first check to make sure the pistol is empty with no cartridge in the chamber and no magazine inserted. Then you have to pull the trigger, like the Glock, in order to release tension to the striker mechanism, pointing in a safe direction of course.

Step 2: The take-down lever is quite easy to use — somewhat similar to a classic SIG. You simply press in the integrated lock button slightly, which is next to the take-down lever, and then the take down lever can be swung down easily so the slide can be removed. When the slide is reinserted onto the frame, the take-down lever automatically pops into place. Very clean.

A person unaccustomed to a Steyr may very well think the take-down lever is the manual safety, especially with the bold “S” and “F” markings adjacent to it. This could give the owner just enough time to take control of the situation during an emergency. With the manual safety on, this situation could get downright confusing for a perpetrator.

While a detailed disassembly is the job of a Steyr trained armorer, I can give you a rough idea of how to do it. Behind the take-down lever is a diagonal disassembly mark. You line up the take-down lever with this mark. After removing the manual safety, and depressing the integrated lock button, the entire modular steel housing can be lifted out of the frame. This entire process can be accomplished within seconds.

Grip

The grip has one finger groove that should fit almost all hand sizes, large and small. The upper rear of the grip frame is dished out, somewhat similar to the Beretta guns. This allows the web of the hand to get in a little tighter and also makes reaching the trigger easier.

Actually, some people who are used to oversized, large grips may at first complain that the Steyr grip is too small. I’m sure that grip socks will be made available for the Steyr to satisfy the needs of some owners. I’m 6′ 1″ and have long fingers, And I find the Steyr quite pleasant to shoot.

The grip angle is 111 degrees. Basically, this means when you aim the Steyr, you don’t have to cock your wrist up or down since it is a natural point shooting pistol. The bore axis is so low (lower than a Glock) that it’s almost like pointing your finger. A nice side effect is less felt recoil as well.

The textured pattern on the grip is adequate to obtain a nonslip grip. I personally like the more radical HK USP grip texture that almost feels like sandpaper — but some people think that’s a little too much. At any rate, the grip shape, along with the textured pattern, fits my hand perfectly.

Magazine Release

The magazine release is well placed on the left side of the frame so it’s easy to reach for a right or left handed person. When the pistol is laying on it’s side, the magazine release button is out of the way so it won’t release accidentally. The magazine release does not have sharp edges like the Glock does.

Magazines

Steyr magazines are steel and drop-free. Since the double-column magazine is tapered, it fits easily into the beveled magazine well. The bottom of the magazine well has room to pull out a magazine should that ever be necessary.

Out of curiosity, I loaded a .40S&W magazine with 10 357 SIG rounds. They seemed to fit very well. I’m hoping that the magazines will be interchangeable like the excellent Sigarms magazines are with either caliber.

New Steyr magazines are a heck of a lot easier to work with than a new Glock magazine. I typically can only get 8 cartridges in a Glock magazine for the first week or so until the magazine spring starts slowly breaking in.

Magazine Catch

The magazine catch is made out of metal, not polymer. So the high-quality steel Mec-Gar magazine directly contacts a metal magazine catch. You will therefore not have a problem of the magazine catch wearing out.

I’m only aware of two torture tests so far. One is discussed in detail later in this review, in which Bubits pumped 10,000 rounds through one M40 within a two-day period. GSI also shot over 13,000 rounds through several M40’s. The pistol parts are holding up very well as of this writing.

Accessory Mount

The Steyr accessory mount on the frame, for light mounts, etc, has two rectangular cut outs on each side of the frame, instead of the typical rail. These recessed slots allow the mount to have a positive attachment, with no movement whatsoever, and it gives a very distinctive look to the Steyr pistol.

Slide

The slide is super hardened with a tennifer finish, similar to the Glocks, and then a dull blackened finish is applied. The grasping grooves are well spaced, giving the shooter a comfortable contact when operating the slide. When you rack the slide, it is quite smooth.

The Steyr slide is only 18 ml high compared to the Glock’s 22 ml.

Slide Stop

The slide stop has a generous 30 degree angle making it very easy to manipulate. The owner’s manual states that the strong slide stop can be used to release the slide, if you prefer not to rack the slide.

Slide Rails

The slide rails are not molded into the polymer frame like a Glock and other polymer brands. The Steyr is essentially a steel pistol, wrapped in polymer. The mechanical parts function on a steel sub-assembly, and the lock bridge is very “strong”.

It’s interesting to note that the rails are cut at a 45 degree angle. This allows the slide and barrel to ride about 1/8″ lower than existing pistols with rails cut at 90 degrees. The Steyr bore axis is about 5mm lower than a Glock. As a result, there is less muzzle flip, less felt recoil, and the low bore axis helps to center the round coming out of the magazine into the barrel chamber.

I shot the Steyr M40 side-by-side with a Glock 23 and the M40 did have less felt recoil.

Sights

The standard Steyr comes with fast acquisition, triangular-trapezoid sights. They can easily be swapped for traditional sights or night sights. Trijicon has mentioned they will support the new Steyr pistols by late 2000.

I personally believe these standard stock sights are the best I’ve had on a pistol. It’s so easy and fast to find the large, triangular front sight during speed shooting — wonderful. For accuracy shooting, use the tip of the front triangle for superb accuracy.

These standard front and rear sights are steel, unlike the Glock, which uses plastic sights (the front Glock sight is especially fragile).

The Steyr has a sight radius of 6.22″, compared to a comparable sized Glock 23/19/32 with 6.02″.

Loaded chamber Indicator

There is a loaded chamber indicator in the back of the slide that can be seen or felt.

Inside the M40

When I looked inside of the Steyr, I was pleased to see how strong and beefed up all the parts are. This is one tough gun that is excellently engineered to last a long time.

5-Point Safety System

The Steyr pistol has a manual safety for those that are concerned about retention issues. You can use it or not. The Steyr manual safety is very similar to several popular rifles that use a similar safety. More on that below.

The Steyr has three passive reset action safeties so it can be carried safely without using the manual safety, if desired. Along with the 3 reset action safeties and the manual safety, there is an integrated lock (for storage purposes), giving the Steyr an impressive total of 5 safeties!

The integrated lock is next to the take-down lever, located on the side of the frame, and comes with two keys. The police version uses a handcuff key. The civilian version uses a two pronged key. When it’s locked, you cannot pull the trigger or take the pistol apart, but you can load and unload the pistol.

The integrated lock is not meant to be used in speed drills. You carefully insert the key and push the lock in then then rotate counter-clockwise to lock the pistol. You then push the lock in and turn the key clockwise to unlock the pistol. During the unlock phase, it’s best to keep turning the key clockwise until you feel pressure as you pull the key out so the lock pops out into position easily. It’s a snug fit. You can also pull the slide back a little or lightly press the trigger to help pop the lock out into position, although these two latter methods are non-standard and should not be necessary. The manual safety can be on/active during the use of the integrated lock for extra safety.

I have actually started using the integrated lock when I do not have direct control of the pistol since it is so convenient. Obviously, during concealed carry, you do not want to use the integrated lock! As a side note, the integrated lock is a very inexpensive part and very easy to replace.

Of course all locks can be picked with the right tool, even the generic handcuff lock. Overall, the integrated lock is an excellent feature, and it sure beats misplacing an external lock or forgetting one during transit.

I really like the Steyr manual safety because you don’t have to worry about toggling it on and off accidentally. And it’s basically invisible if you choose not to use it.

During a scuffle, or an operator slide rack error, or if the pistol skids across the floor, a typical manual safety on the side of a slide or frame can sometimes be toggled unknowingly. A Steyr manual safety system is less likely to be affected by these same scenarios.

For pistol owners in general, the Steyr manual safety is a bit different from what they are used to. On the other hand, there are a number of rifles with the safety in the same general location as the Steyr pistols: M-1 Garand, the M-14 or Springfield Armory M-1A rifle, or the Ruger Mini-14 or Mini-30. And the new Vector pistol from South Africa employs a similarly placed manual safety.

To activate the manual safety, you pull down on a small lever on each side of the frame. Interestingly, these two levers are in the same basic position as the Glock take-down levers and they are protected by a slightly recessed polymer molding. This action lowers a small safety bar from the “top” of the trigger guard. Note: If the trigger is in the fully back position, you cannot activate the manual safety since the trigger is already deactivated.

You would normally activate the safety with your supporting hand. If you cannot or choose not to use your supporting hand, you can simply move your thumb to the other side of the frame, and slightly shift your grip with the lower three fingers and the thumb to maintain control of the pistol. Then, you can pull the levers down “easily” with your trigger finger and your thumb. It’s a lot easier to do than to explain. At any rate, most combat/defensive type shooting has both hands on the gun most of the time anyway, so this is not a big deal. And remember, the Steyr is safe even without having the manual safety activated, as long as the trigger is not pulled.

When the manual safety is on, you can still rack the slide to load and unload the pistol. In fact the Owner’s Manual recommends having the safety on during the loading & unloading stage.

To release the safety, you simply press “up” against the safety bar with your trigger finger, which is a distinctively different action than pulling the trigger finger backward to fire the pistol. Once you are trained with releasing the Steyr manual safety to fire mode, it’s just as “easy and fast” as toggling the more traditional manual safety with your thumb.

Out Of Battery

Firing out of battery should not be an issue with the Steyr series. It has a very strong positive lockup. As soon as the slide begins to go back, the firing pin tension is also reduced so the firing pin should not have the momentum to set off a primer.

I always check all of my spent brass before reloading. I have yet to find a primer strike that is not in the center.

My Steyr pistol passes the 12 o’clock recoil spring test with flying colors. This is a good test to check the recoil spring strength. Make sure the gun chamber is empty. Point the muzzle straight up. Pull the trigger. Keep the muzzle pointing straight up while you rack the slide and then very gently let it forward until it stops on its own accord. My Steyr pistol completely resets in the 12 o’clock position. On the other hand, my new Glocks, 22 & 23 had to be lowered to the 9 – 10 o’clock position to completely reset. Having a strong reset and lessoning slide battering is a high priority of mine.

Lubrication

Besides the directions in the owner’s manual, I’d recommend using a high Tech lubrication like Tetra or some equivalent. While regular gun oil works fine, Tetra actually penetrates the metal surface. Even if you wipe the metal dry afterwards, it’s still lubricated. Tetra is especially good to use in areas like the firing pin recess, where you want to very lightly dab a touch of Tetra, but not to the point of having oil oozing in the area; it should almost appear dry after lubing. I’ve found Tetra works well on any moving part, even plastic, such as the inside trigger mechanism.

Petroleum based lubes have a tendency to collect dirt and grime.

Lubing is one area where the Glock shines. It can work almost dry, with low-tech lube, and with high tech lube.

Accuracy

There is no other out-of-the-box, service-grade, compact pistol that will out shoot the Steyr M40. The slide to frame fit is tight, and built specifically to increase accuracy. After all, who cares what caliber you’re using if you can’t hit what you’re aiming at.

Torture testing

In June ’99, Bubits tested an early M40 “prototype” by firing 10,000 rounds through it within two days. He lubricated it once at the beginning of the session. Then he sprayed the pistol with an air hose after every 500 rounds but otherwise did not clean it thereafter. He had 5 malfunctions, one of which was a dead primer. He tweaked the extractor to fine-tune the gun for reliability.

Will the Steyr pass the torture tests of being frozen, burned, buried, dropped from helicopters, run over, etc? I don’t know. It’s a nice marketing ploy, but as long as my Steyr can handle “reasonable” torture testing, such as the flying frisbee test, etc, that’s good enough for me and any kind of shooting I’ll be doing.

I’ll be using my M40 in IPSC & IDPA shooting as well as for a defensive weapon. That means I’ll be firing it in cold, hot, dusty, & wet conditions. And I need to be able to reliably pump at least 200 – 300 rounds through it at any given match. Right now I’m feeling good that the Steyr M40 will do just fine. Once again, I really like the well supported chamber for this kind of shooting; And as a result, I feel more confident when carrying the M40 for defensive purposes as well.

I examined my M40 after shooting 1000 rounds through it during the first two weeks of ownership. There were no wear marks anywhere. The slide-to-frame fit is superbly engineered. I did find a little black paint that had rubbed off on top of the slide stop lever. This examination increases my confidence in the M40 substantially.

Steyr Service

Since the M series is new, Steyr obviously does not have an extensive armorer/repair program throughout the U.S. yet. That is changing now that Steyr has someone actively in charge of this arena. For now, you must send your pistol to GSI for repair, although their turnaround time is just a week or two.

Holsters

Steyr has selected Galco and Safariland to make holsters. Blade-Tech has ramped up to support Steyr as well. There are probably others that I’m not aware of.

Owner’s Manual

Steyr did a great job on the M Series Owner’s Manual. The manual provides all the necessary safety and pistol information, as well as some excellent pictures. There is an attachment which quotes some important Federal Laws.

Any Steyr M Series Issues?

Some of the early Steyr pistols dinged up the top of the slide a lot from ejected brass. Steyr did come out with an ecjector port tapering fix. The top, front of the ejector port edge is now tapered at about 45 degrees instead of 90 degrees. And at the top, back, right of the ejector port, it is now angled at approximately 45 degrees instead of a 90 degree corner.

I picked up a second Steyr M40 to test. There was some scoring on top of the slide, right at the rear edge by the ejection port. I doubt if most people would notice or be concerned about it.

Another Steyr customer degreased his Steyr M40 and then began having severe trigger problems. GSI told him that they would either fix it or replace it. Some people have had problems because of not cleaning and lubricating their pistols properly. A few of my Glock buddies were appalled that a pistol can actually require more than 3 1/2 drops of lubrication

I heard about one M40 that shot fantastic for about 50 rounds. Then the firing pin stopped denting the primer. The owner sent it in to GSI for repair.

One of my two M40’s did have trouble resetting at times, for no obvious reason. This problem was later fixed by using precision drilled holes in the metal sub-assembly.

In late May, 2000, I bought a 3rd M40 with a serial number in the 10,000 series. And all the above bugs have been worked out. Steyr made a few internal changes and manufacturing improvements to fine-tune the Steyr M pistols. The recoil spring seems to be slightly stronger, so the slide reset is very solid.

In late August, 2000, I sent my 10,000 series pistol to GSI for the new generation trigger upgrade. My pistol was back in three days. GSI paid the return shipping cost and gave me a $35 gift certificate. Folks, that’s excellent service.

Before the upgrade, my trigger was around 7.5 lbs or so. After the upgrade, it is 5 lbs. The really big improvement is that no matter where you place the trigger finger — high, medium, or low on the trigger — the trigger is “smooth, crisp, & consistent”!

So, the bottom line for the new Aug, 2000 trigger upgrade is, “Wow”!

I now consider the new Steyr pistols production ready and some agencies are interested in taking a look at them seriously. Steyr and GSI are ramping up training classes and law enforcement engagements, etc. Note: A lot of the early models continue to work fine, although, if you have any issues, be sure to contact GSI so they can upgrade your pistol.

Since the Steyr M (Medium) & S (Small) series pistols are new, the manufacturer could take advantage of the latest advances in ergonomics and safety. Therefore, the Steyr pistols can easily meet the most strict “common sense” State firearms safety laws.

Specifications:

Length/slide 7.05″
Height: 5.03″
Width: 1.18″
Sight radius: 6.22″
Weight: 28 oz.
Finish: Black Oxide Tenifer
Barrel length: 4.00″
Barrel rifling: RH, 6 groove
Length of twist: M40 M9 M357
15.98″ 9.85″ 16″
Trigger system: Reset Action System
Trigger pull: 5 LB’s (as of new trigger upgrade 08/00; adjustable at the factory)
Trigger travel: 1/8″
5 safeties:
3 reset action safeties: Trigger, Drop, and Firing Pin Safeties
1 Manual Safety
1 Integrated lock with two keys
1 Loaded chamber indicator
caliber M40 M9 M357
magazine capacity 10 10 10
Law Enforcement 12 14 12
Weight (without mag.) 23.87 23.17 24.45
Weight of empty mag. 2.97 2.97 2.97
Steyr M40 retail price: $669
Commercial pricing: $500 aprox. As of 10/01/00

Steyr S (Small) Series Specs:

Length/slide 6.53″
Height: 4.6″
Width: 1.18″
Weight: 22.5oz.
Barrel length: 3.58″
Magazines: 10 rounds in 9mm, .40, and 357 Sig

Chronograph Data for the Steyr M9 (from Handguns, Oct ’99)

Group  

Size


Velocity

Cor-Bon 90 gr jhp +P 2.0 1515
Black Hills 115 gr jhp 2.4 1201
Federal 115 gr jhp 2.3 1147
Hornady 115 gr jhp 1.6 1122
Remington 115 gr jhp +P 1.8 1222
Federal 124 gr nyclad ball 2.3 1116
Federal 124 gr jhp hydra-shok 1.8 1103
Hornady 124 gr jhp xtp 1.6 1058
Norma 124 gr jhp moly-coated +P 1.2 1185
Cor-Bon 125 gr jhp +P 1.4 1226

*Average is the average of five five-shot groups rounded to the nearest 1/10″.

Chronograph & Accuracy Data for the Steyr M40 (from Handguns, Aug 00)

Cartridge  

Group Size Smallest


Group Size Largest


*Average


Average Velocity


Standard Deviation

Cor-Bon 135 grain JHP 2 1/4 4 5/8 3 3/8 1278 46
Norma Black Diamond 155 gr JHP 2.0 3.0 2 3/8 1271 08
Hornady 155 grain XTP 1 1/2 3 1/2 2 5/16    
Winchester 155 gr Silvertip HP 2.0 4 3/8 2 3/8    

Note: 5-shot groups fired in the Petersen Ranch Ballistic Tunnel from a Ransom Rest.
*”Average” is the average of five five-shot groups.

In Summary

The Steyr M40 is an ergonomic, well thought out pistol that’s about the same size as a Glock 19, 23, 32. All the edges of the Steyr have been rounded. It’s very comfortable to hold and shoot. Just looking at and handling a Steyr pistol in a store is not good enough. Shoot it several times and that’s what will really sell you on this pistol, along with its excellent features. I believe the Steyr has the best all-around features in a pistol today.

Regarding felt recoil, some people have claimed that the Steyr M9 (9mm version) feels more like a pellet gun than a 9mm pistol. I’m really looking forward to the M357 model as well.

Obviously, the Steyr M series is a new kid on the block and has to continue proving itself to agencies. From what I’ve seen with my own Steyr M40, this will be a moot point.

One amazing thing about the Glock design, besides its market share, is that it only has 35 listed parts, compared to 53 Steyr pistol listed parts. Although, Glock uses a few little tricks by combining some parts. I would say the Glocks really have at least 42 parts or so. Of course, the Steyr has more functionality built into it, and Steyr even lists the Pistol Box and lock keys as parts; Obviously, Steyr is not trying for a ‘Least Parts’ record :) From what I’ve seen, the Steyr M Series is made to last.

The Steyr pistols have a well supported chamber. On the other hand, as long as you use known, tested “factory” ammo in a well-maintained “Glock”, their unsupported .40S&W chamber will serve you well. But a lot of people shoot remanufactured ammo and reloads and even lead through their Glocks all the time, exacerbating this problem, not to mention bad lots of factory ammo occasionally.

Some kB (kaBoom!) information can be found at the Calibers Web site, www.greent.com/40Page. I also wrote a related article called, “You Say kB! and I say Case Failure”, located at www.glockmeister.com and www.recguns/XN.html. Another good site is John Leveron’s Glock Page at http://glock.missouri.edu/glock.shtml. And lastly, Dean Speir’s kB! Faq has some excellent pictures and is located at: http://communities.prodigy.net/sportsrec/glock-kb.html.

I personally believe that any .40 pistol with an unsupported chamber and possibly a thinner chamber wall, would most likely kB before other major pistol brands if using the same “bad factory” or “bad reloaded” ammo. And I also have a theory that the combination of polygonal rifling which seals the bullet tighter in the barrel, combined with an unsupported Glock chamber is a bad combination. But, bad ammo and bad gun maintenance aside, a Glock can hold its own very well. However, I personally prefer to use a good Bar-Sto or KKM .40 barrel in a Glock because these barrels are far kinder to the brass than a Glock barrel, and they appear to feed reliably as well — apparently Glock Inc. disagrees with me J

Since the Steyr M40 has a well supported chamber, it is safer to shoot in a wider range of shooting disciplines than a standard barreled Glock .40 S&W pistol. And the Steyr M feeds at least as reliably as a Glock, due to some great engineering.

In the Steyr Safety condition 1, with its trigger safety, drop safety, and firing pin safety, it is just as safe to carry as a Glock. The Steyr is also “easy to use” just like a Glock.

The Steyr Safety condition 2 is activated when using the manual safety. For those that want a retention safeguard of some kind, this is an important consideration. The manual safety is completely invisible if you choose not to use it, and it cannot accidentally be toggled on. The safety location is a proven design on several popular rifles and the Vector pistol, although it may at first appear strange to some traditional pistoleros.

The Steyr Safety condition 3 (integrated, limited access lock) is an excellent feature. For those with families and/or storage needs, this is an important consideration. The gun cannot be taken apart or fired when this mode is activated. The integrated lock is basically unnoticeable since it blends into the pistol so nicely.

The Steyr has a loaded chamber indicator in the back of the slide that can be seen or felt, which is really a 6th visual/tactile safety feature.

The Steyr can easily and safely shoot SWC (semi wad cutter) bullets and lead bullets — not recommended if using the polygonal rifling of a standard Glock barrel.

There are dovetails at the front and rear of the Steyr slide for the standard all-steel sights.

The large triangular front sight is excellent for fast aiming during speed shooting. And the tip of the front triangular sight helps zero you in for excellent accuracy.

The Steyr pistol has an even lower bore axis than the Glock.

The Steyr pistol has less felt recoil than a similar sized Glock 23.

The Steyr M40 has a shorter, crisper trigger pull than the standard Glock.

People with small or large hands can easily adjust to the Steyr grip.

The side of the Steyr pistol only has a simple slide lock lever and that’s it — very simple to operate.

As of June, 2000, the street price of the Steyr pistols is around $500.

When the subcompact Steyr S (small) series pistols come out in the latter half of 2000, it will be a perfect complement to the compact Steyr M series that is now available.

The slide rails are integrated into the main steel housing of the Steyr, which is a “steel pistol” that happens to be wrapped in a very strong “polymer”. This makes it a beefy design. A Glock, H&K, and Walther P99 are conversely “polymer pistols” that mold the metal slide rails directly into the “polymer”.

If I could take the liberty to compare pistols to cars, I would say that the new Steyr pistol is the “manual shift” smart gun of the 21 century, while the “automatic” electronic smart guns may or may not ever be street worthy, based on current reports.

Note: As of Oct, 2000, all Steyr pistol articles have been written based on early prototype or very early production pistols. The up-to-date pistols are taking full advantage of the fine tuned Steyr manufacturing plant and new trigger update.

I just can’t help but end my Steyr M info review with a quote from Massad Ayoob, regarding the new Steyr M Series pistols, who quoted William Shakespeare, “Something wicked cool this way comes”.

References

Guns & Weapons For Law Enforcement; “New Steyr M-Series M9mm/.40” by Wiley Clapp

Handguns; Aug 2000; “Steyr M-40 Packs A Punch” by David W Arnold

Combat Handguns; Dec ’99; “New Steyr M9/M40” by Paul Johnson.

Combat 2000 Annual; Display until April 30, 2000; “The Steyr M: Wicked Cool” by Massad Ayoob.

Guns; Oct ’99; “Steyr M9” by Massad Ayoob.

Handguns; Oct ’99; “Road Testing the new Steyr M9” by Kerby C. Smith & David W. Arnold.

Gun World; Jan 2000; “M is for Modern: Steyr’s New M-Series Pistols” by Gary Paul Johnston.

GSI INC; www.GSIfirearms.com ; Home web page of the exclusive U.S. importer of Steyr Mannlicher; 205-655-8299;

Steyr Mannlicher; www.smg.steyr.com; (+43 7252) 896 – 0

Steyr Pistol Owner’s Manual; buy a Steyr pistol to get one :)

Laser-Cast Reloading Manual, by Oregon Trail Bullet Company; 800-811-0548; www.laser-cast.com

Version 10/08/00 from Pete’s Pistol Page: http://home.earthlink.net/~petej55